


Each corner of the Ashes of the Damned map holds several Easter Eggs, and once you locate them all, you unlock free Perks, weapons, and even armor. There are a few relics to find, and once you find them, you unlock the new Golden Armor vest. This guide will detail where to locate all relics in BO7 Zombies Cursed Mode.
All Relic Locations in BO7 Zombies
Complete the main Easter Egg in Ashes of the Damned standard mode and defeat all the story bosses to find a unique totem at the end of the docks. Interact with the totem to get the Relics Unlocked notification, which also unlocks Cursed Mode. Load into Cursed mode and keep playing till you reach Round 20, after which the Relics will spawn around the map. There are three Relics to find:
- Dragon Wings
- Lawyers Pen
- Teddy Bear
Let’s look at each of these one by one.
Dragon Wings Relic Location

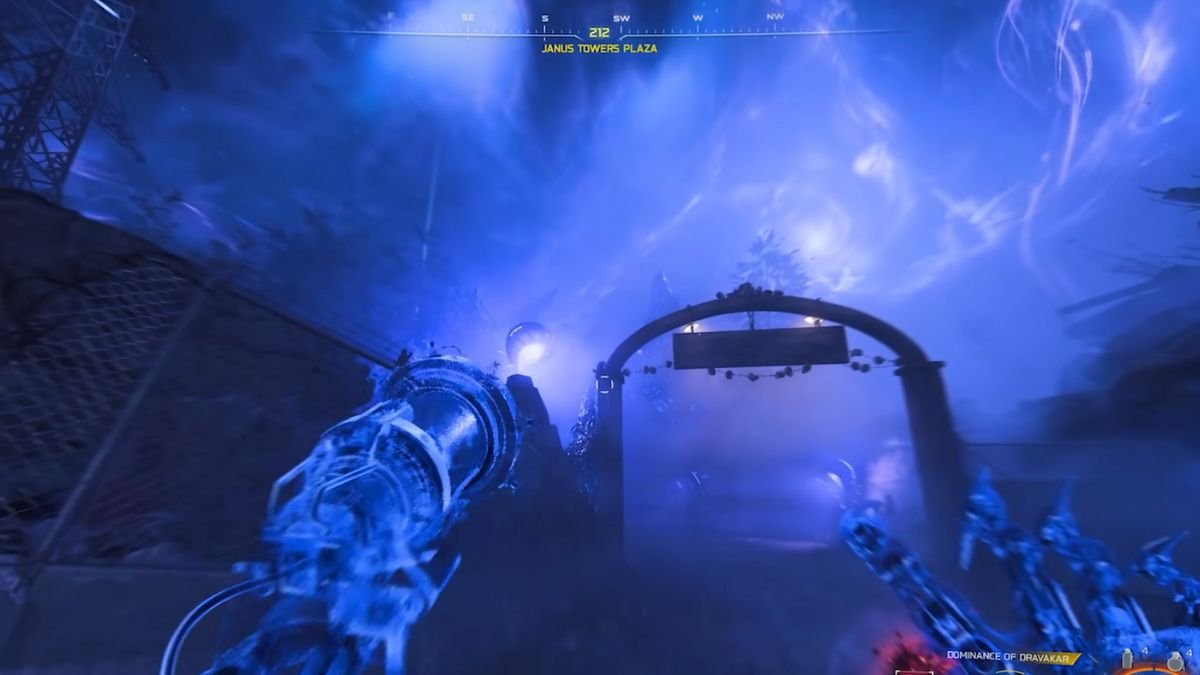
Before you begin, make sure that you own any long-ranged weapons like any Assault Rifle or LMG that has been Pack-A-Punched. Take the jump pad from Vandorn Farms and head over to Janus Towers Plaza. While flying, keep an eye out ahead to find three purple circular areas.
- On the broken roof to your right
- On the power grid to your left
- Above the entrance to the main tower.
Shoot them down before you land. Successfully obtaining each one will cause them to disappear, and you will hear eerie laughter in the background. If you fail, head back to Vandorn Farms and use the jump pad again. Once you are done with that objective, visit Vandorn Farms and check out the outer side wall of the Farnhouse. Enter the Relic Portal to start a new mini-game.
There are four rounds to clear. Check out the objectives in the top left corner to know what to do during each round. Each time you get the required number of kills, the meter on the top left will be filled up, which will start the next round. Completing all four rounds will teleport you back to the main map and unlock the Dragon Wings relic. This relic will disable all normal Power-Up spawns that drop from zombies or Ravager Rounds.
Lawyers Pen Relic Location

Use the Arsenal Machine and add the Napalm Burst upgrade to any weapon of your choice. Next, visit three locations to find candles and light them up using your Napalm Burst weapon.
- The second floor of the Farmhouse has one candle on the bedside table, opposite the Stamin-Up.
- The far right cabin closest to the Ashwood entrance in the Lost Cabin area has a candle beside the wardrobe.
- The Ruby Rabbit in Ashwood has a candle in the lower level, where the Juggernog is. Check the shelf on the right to find it.
Head back to the Farmhouse in Vandorn Farm to find another Relic Portal. Head inside and again check the objectives in the top left corner. There are four rounds for this one, too, and filling up the zombie kill meter will advance to the next round. Completing all four rounds will unlock the Lawyer’s Pen relic. This relic will turn items found randomly into Shock Mimic Zombies.
Teddy Bear Relic Location
You need to have the Necrofluid Gauntlet and the Aether Shroud Field Upgrade active. Reach above Round 20 and visit the below 10 locations to retrieve all of Mr. Peek’s body parts. You need to shoot the body part using the Gauntlet to get them.
Head over to the entrance for Monolith Forest from Janus Towers Plaza, check the top left of the entrance board to find one part of Mr.Peeks.
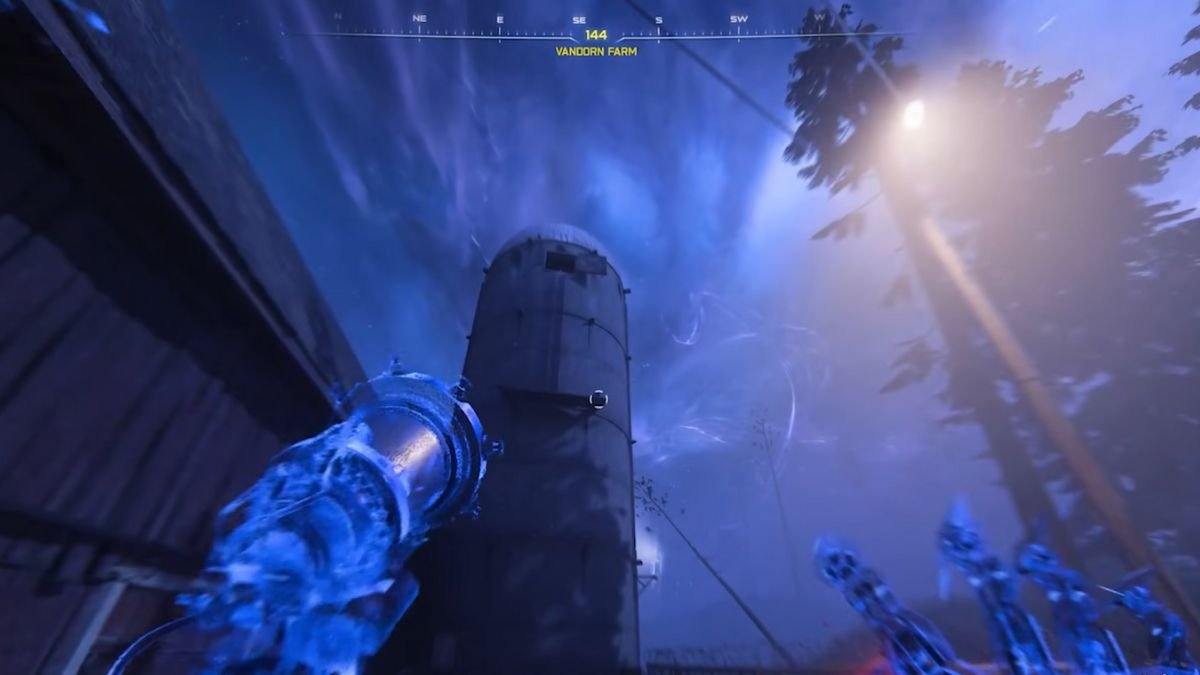
Make your way to Vandorn Farm and check the top of the silo in the southern section of the map. The body part is on the ledge near the top of the silo.
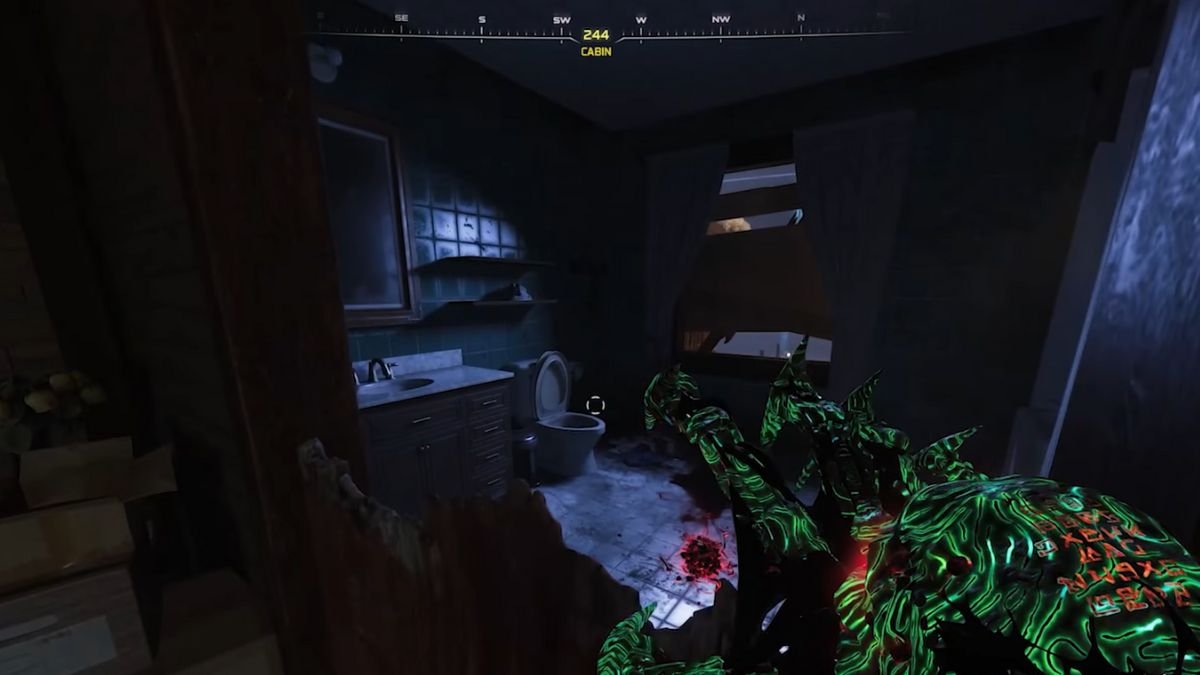
Your next location is Blackwater Lake, inside the cabin with the Speed Cola. Besides the Speed Cola, check the bathroom to find the missing body part in the toilet.
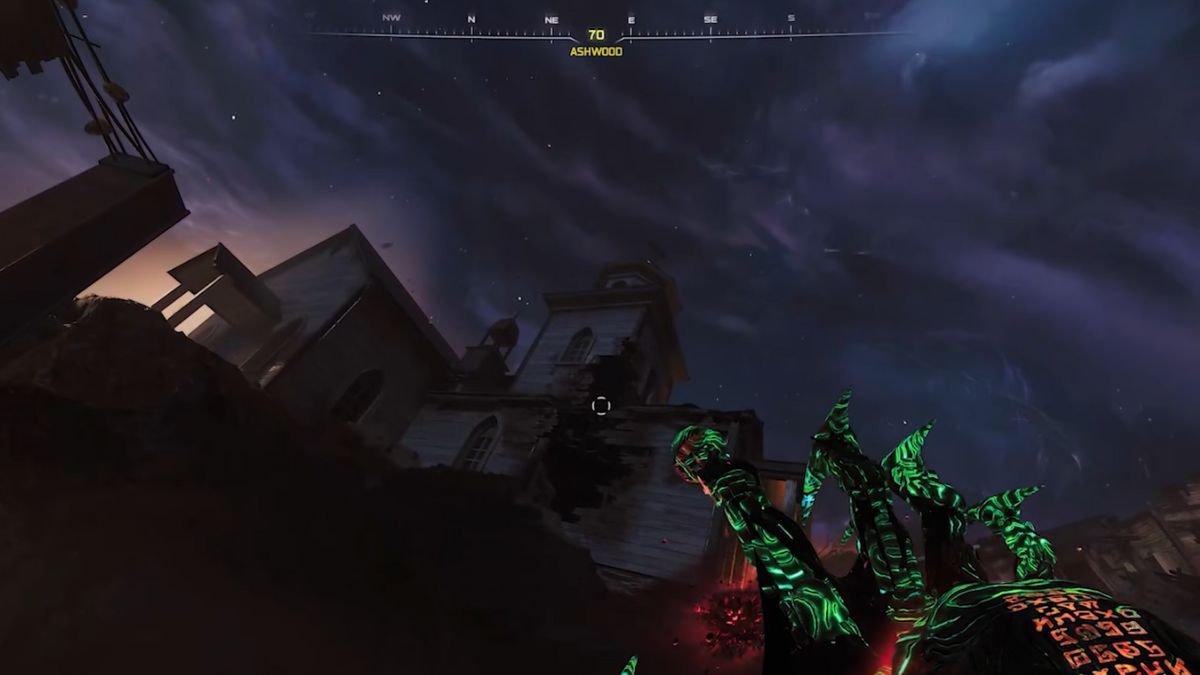
In Ashwood, follow the path that leads towards Blackwater Lake’s entrance. Look above to find a church and shoot the broken section at the corner of the tower to get the body part.
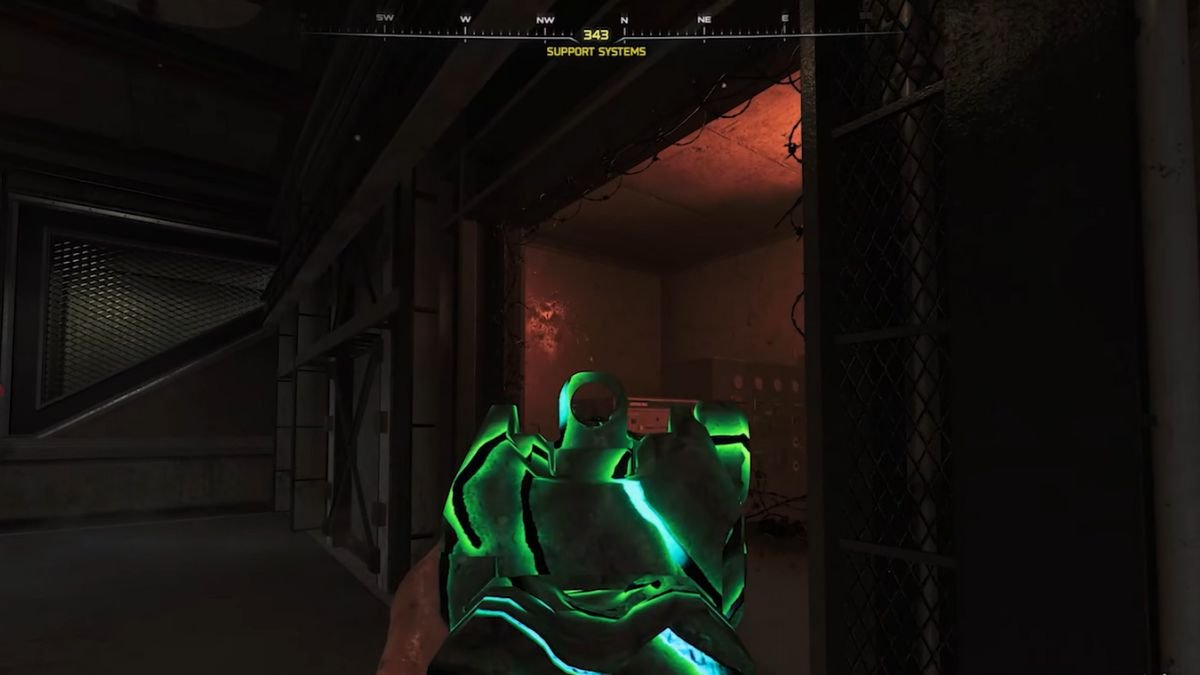
Visit the Support Systems under Zarya Cosmodrome and check for an open window with a red light and some machinery inside. On the left side wall, you will spot a strange portal; shoot it to get the body part.

Exit the Cosmodrome and look above at all the electrical poles leading towards the crashed rocket. You will find Mr. Peek’s body part at the top of one of these poles.
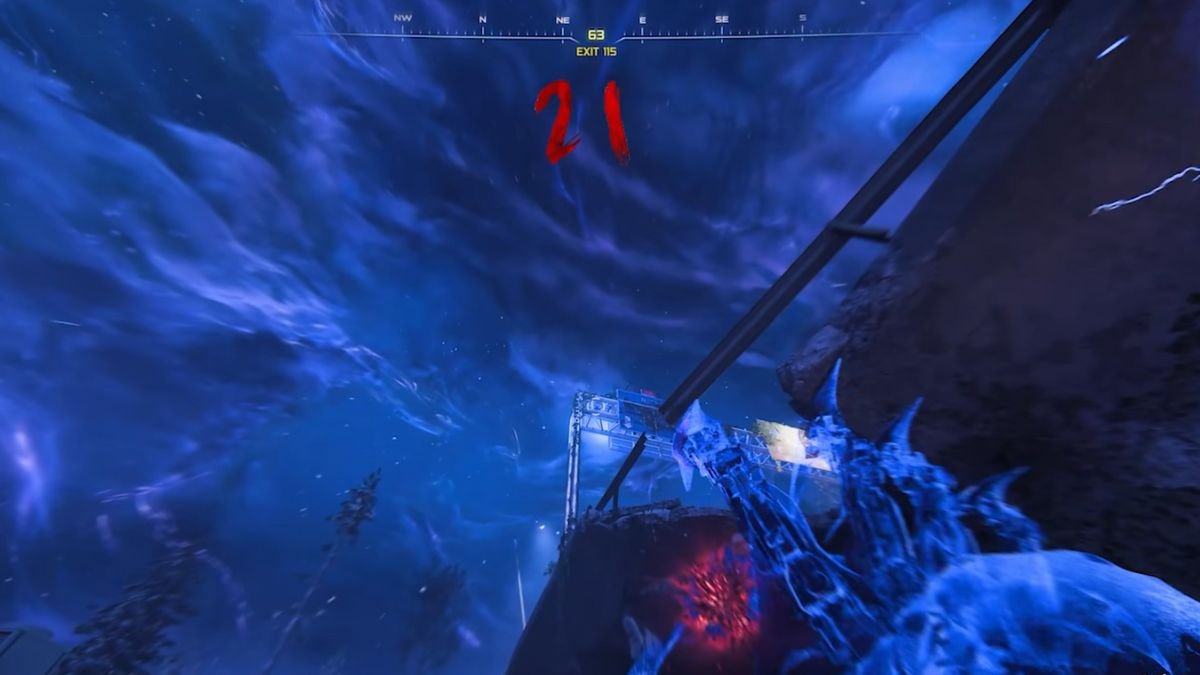
In Exit 115, head behind the diner and get up on the truck. Look up towards the gantry sign and shoot at the left part of it to get the part.
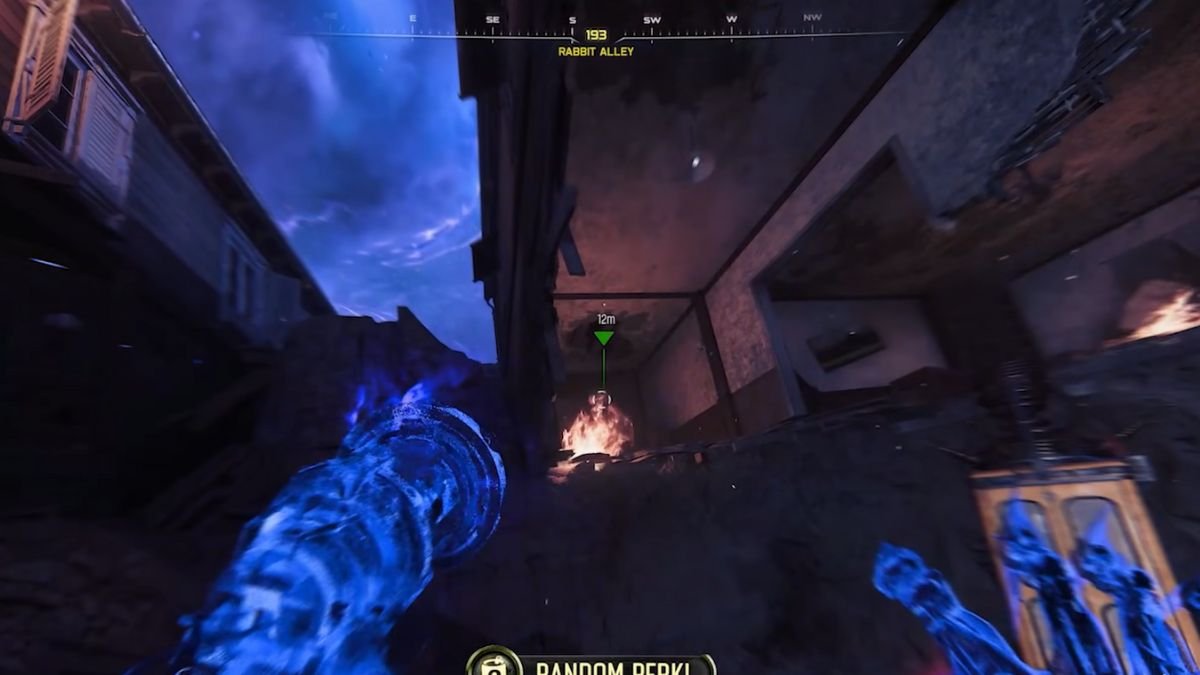
Visit Ashwood’s Rabbit Alley jump pad and check the area above the firepit to get the body part.
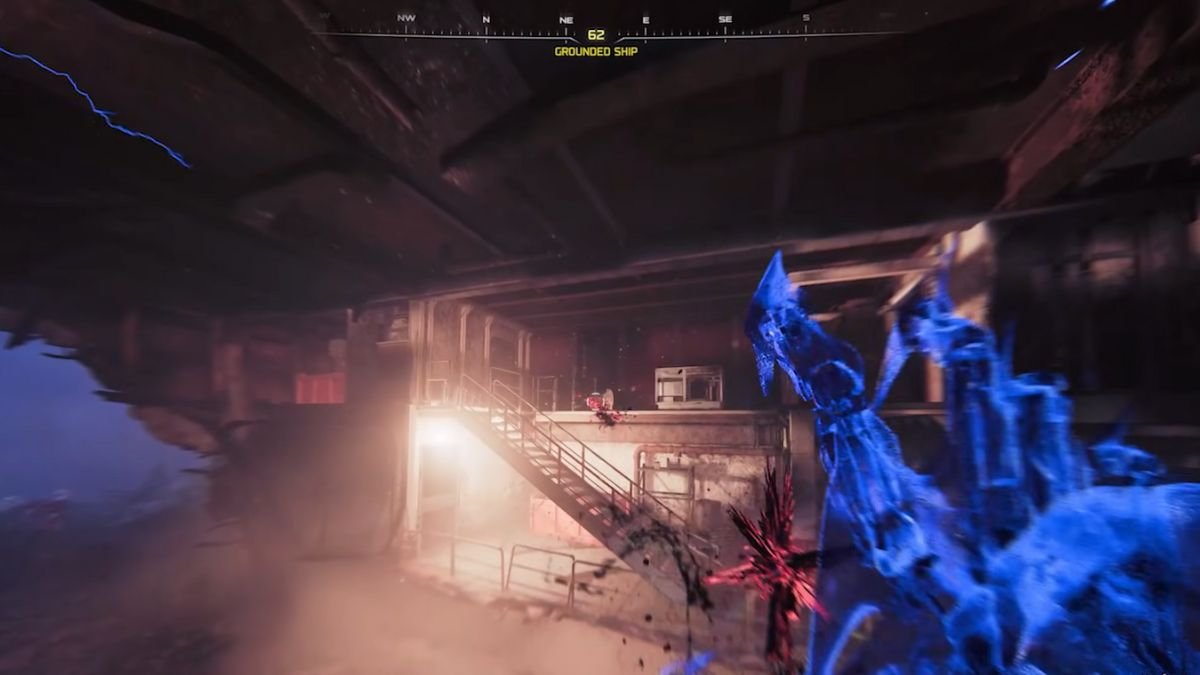
Head over to the underground section of the Grounded Ship. Stand a bit away from the staircase and shoot slightly to the right of the top of the stairs to retrieve the body part.
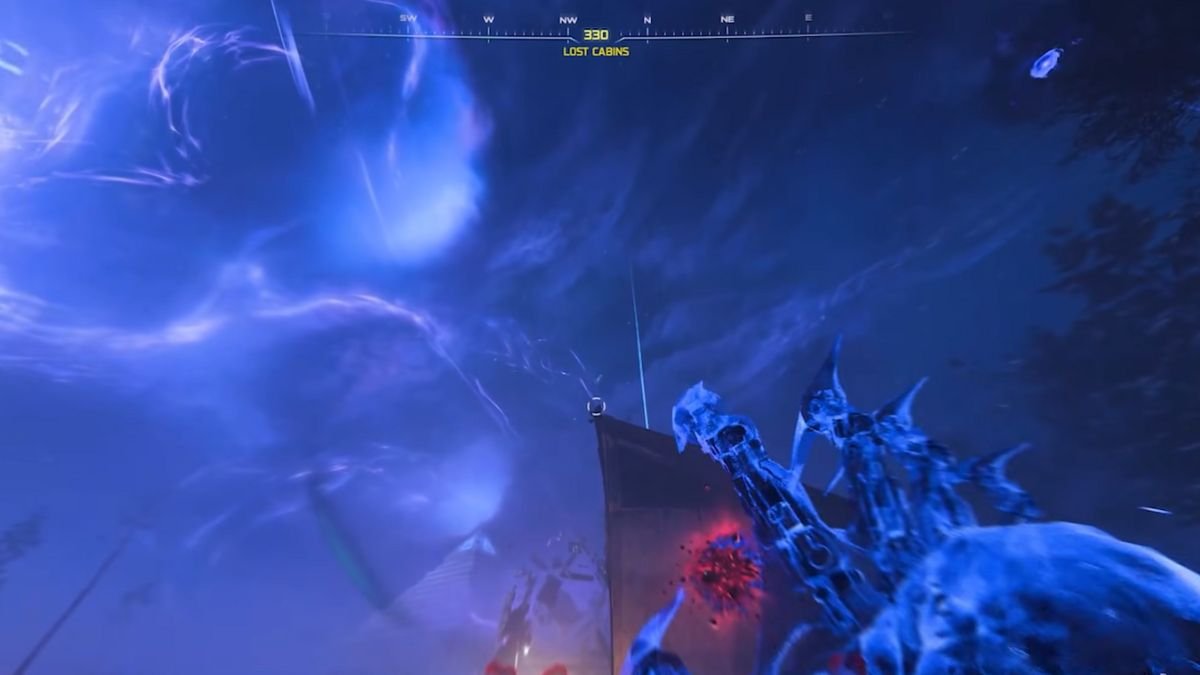
In the Lost Cabins, while facing the giant pyramid, aim and shoot at the corner of the roof of the cabin to get the last part.
After you collect all 10 parts and hear Mr.Peek’s laughter, head back to Vandorn Farms and visit the Relic Portal one last time. This challenge can be a bit tricky, as you will lose Essence if you fire your weapon. To bypass that, enable the Saw Blade Trap when you first load into the mini-game, and also use Monkey Bombs and the Necrofluid Gauntlet with the Recall effect to lower the Essence lost. Completing the challenge will reward you with the Teddy Bear relic, which will cut down the round start by 75%.
Getting the Golden Armor
Activate all three relics in the Cursed Mode menu and start the round, then visit the Armor Vest wall buy and upgrade it to level 3. At level 4, you will get the Golden Armor, which auto-regenerates armor over time. It will cost 45,000 Essence to purchase this, but it is well worth it to get additional defense against the zombie horde.
For more BO7 Zombies guides, check our guides on T.E.D.D. Tasks Explained, All Weapon Upgrade Locations, and All Wall Buy Weapon Locations.