


The Alchemist’s Assistant Wish is one of the many quests you’ll encounter in your journey through the Kingdom of Pharloom in Hollow Knight: Silksong. The Wormways is home to countless secrets, one of which is the Alchemist’s Assistant Wish, which you can accept from Alchemist Zylotol at the top of the location, beside a Bench. In this guide, we’ll help you find all the required materials to complete this Wish, as well as the rewards you obtain for doing so.
How to Find All 3 Plasmium Samples In Silksong

You need to collect 3 Plasmium samples inside the Wormways to complete the Alchemist’s Assistant Wish in Hollow Knight: Silksong. Locate Alchemist Zylotol at the Wormways, as shown on the map above, then interact with him to start the Wish. He’ll give you a temporary tool, the Needle Phial, which you’ll use to extract the Plasmium samples from the Plasmium Plants located all over the Wormways.
To collect the samples, you need to equip the Needle Phial, then charge it by holding down your attack button and hitting the Plasmium Plants to extract the flowers. With that being said, let’s move on to the locations you need to visit to find these Plasmium samples for completing the Alchemist’s Assistant Wish.
Plasmium Sample #1
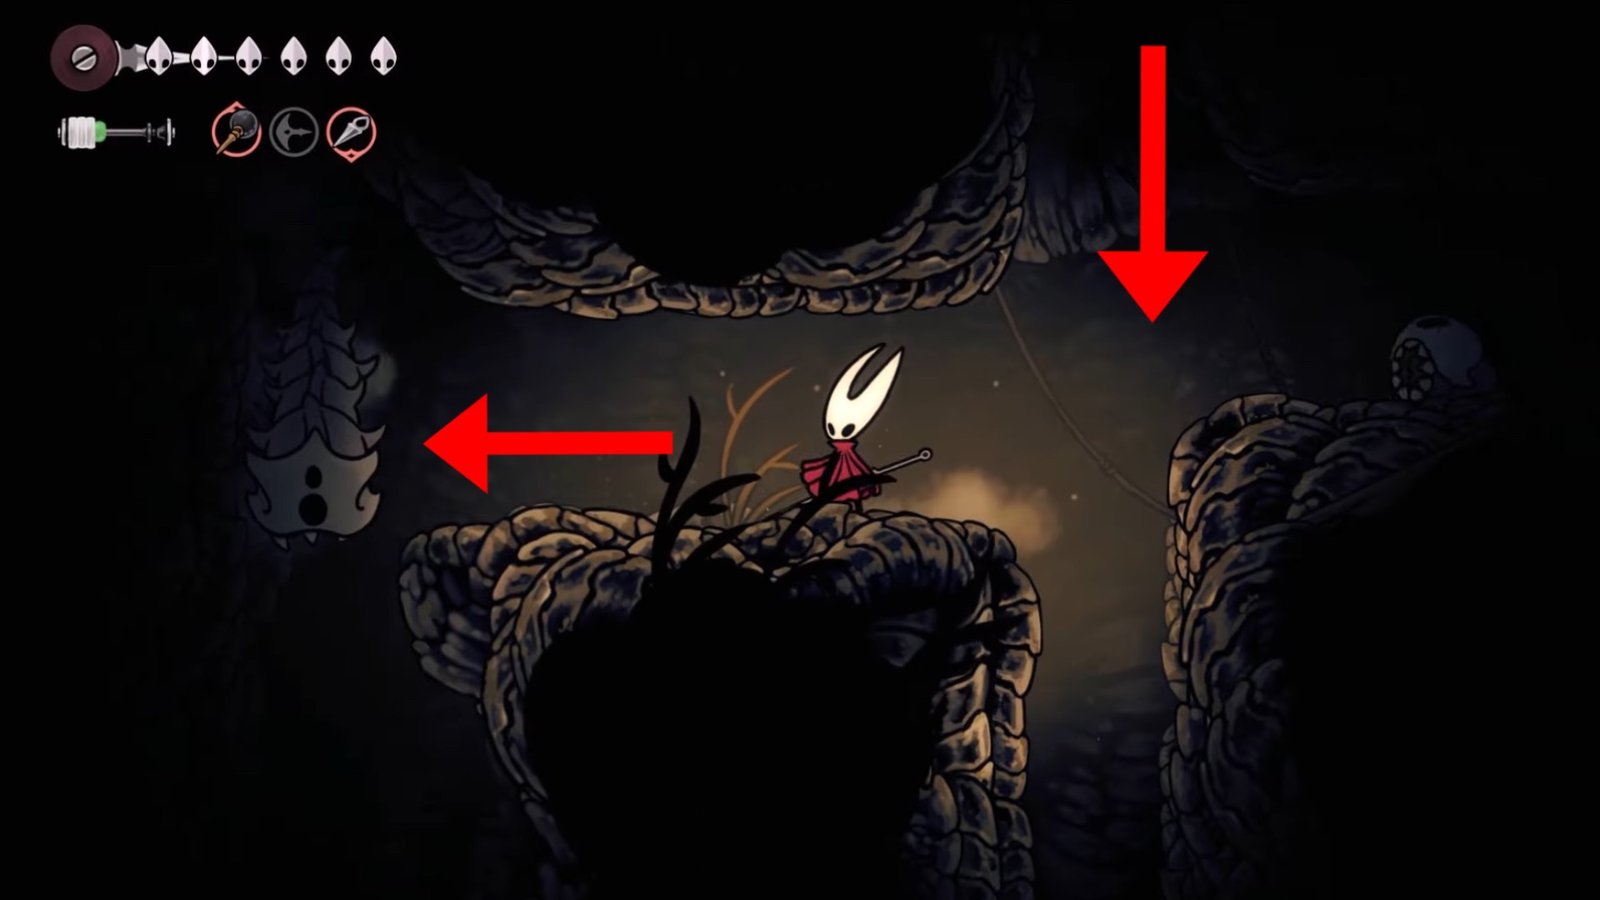
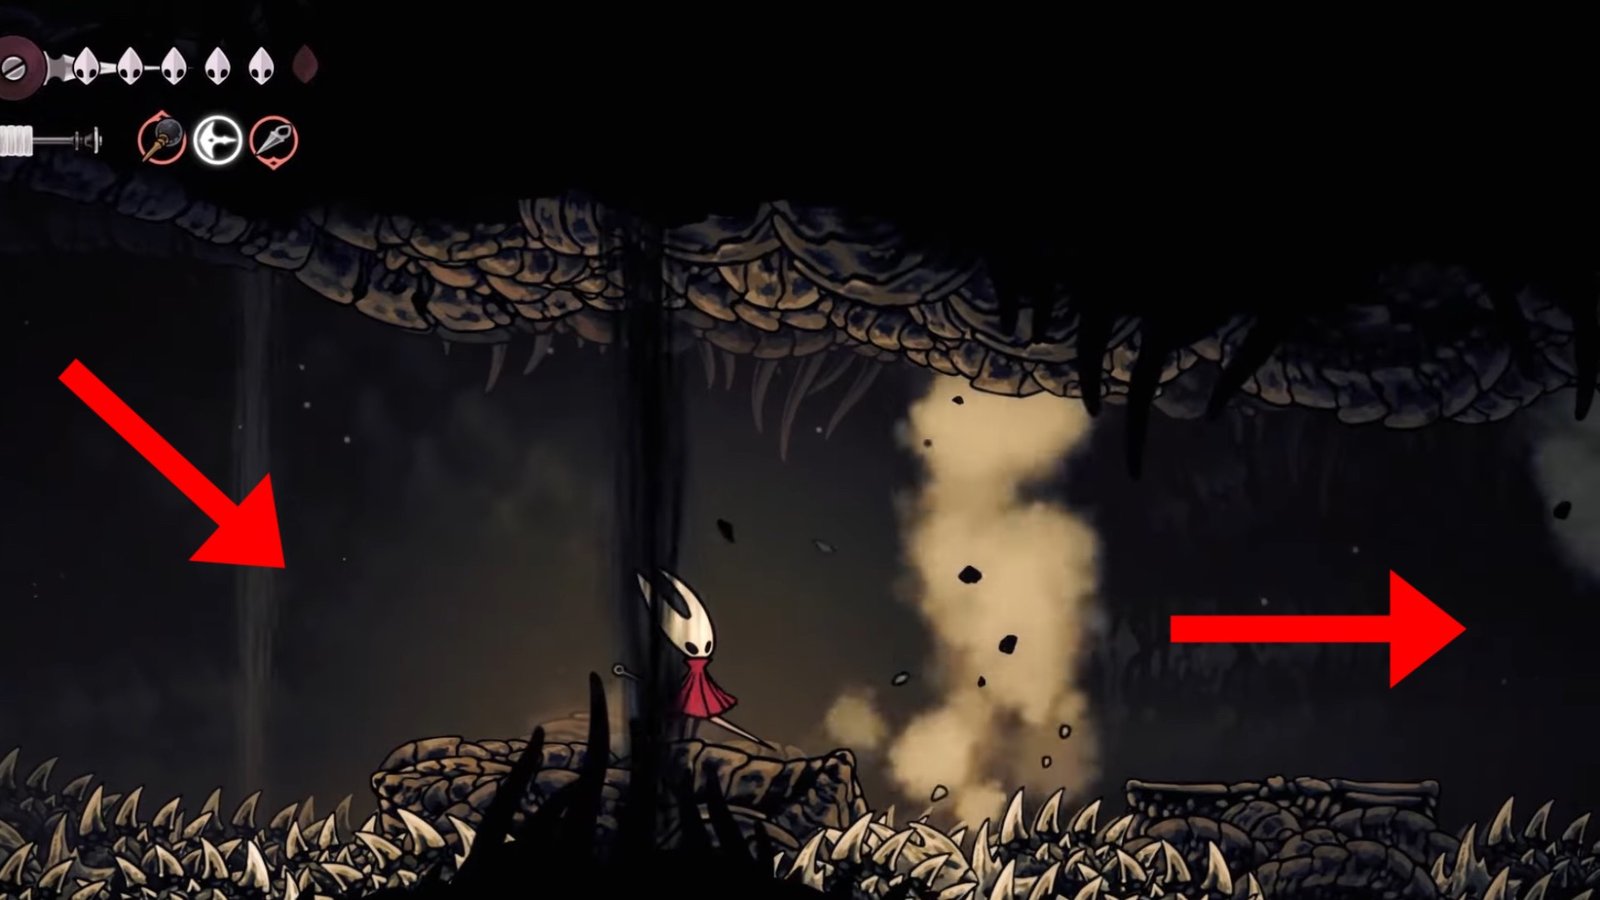
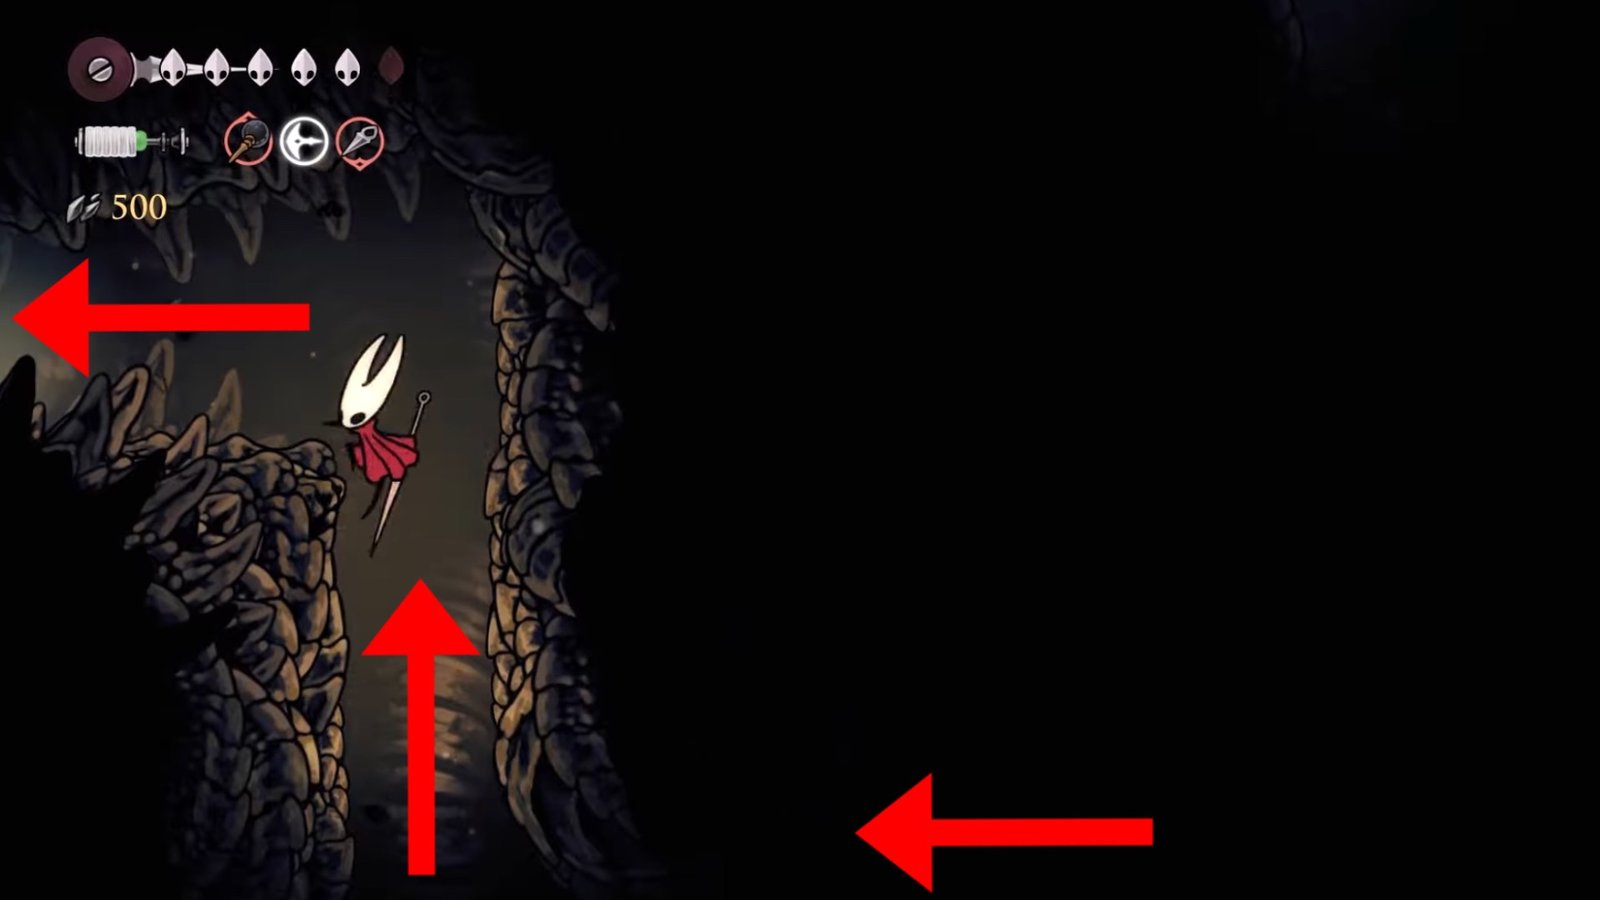
From Alchemist Zylotol’s location, head right and drop down to the area below. When you drop down, head down to the platform at the bottom left. From there, you must continue left and drop down again. An enemy will block your way, so you need to time your jump right to drop down below without taking any damage.
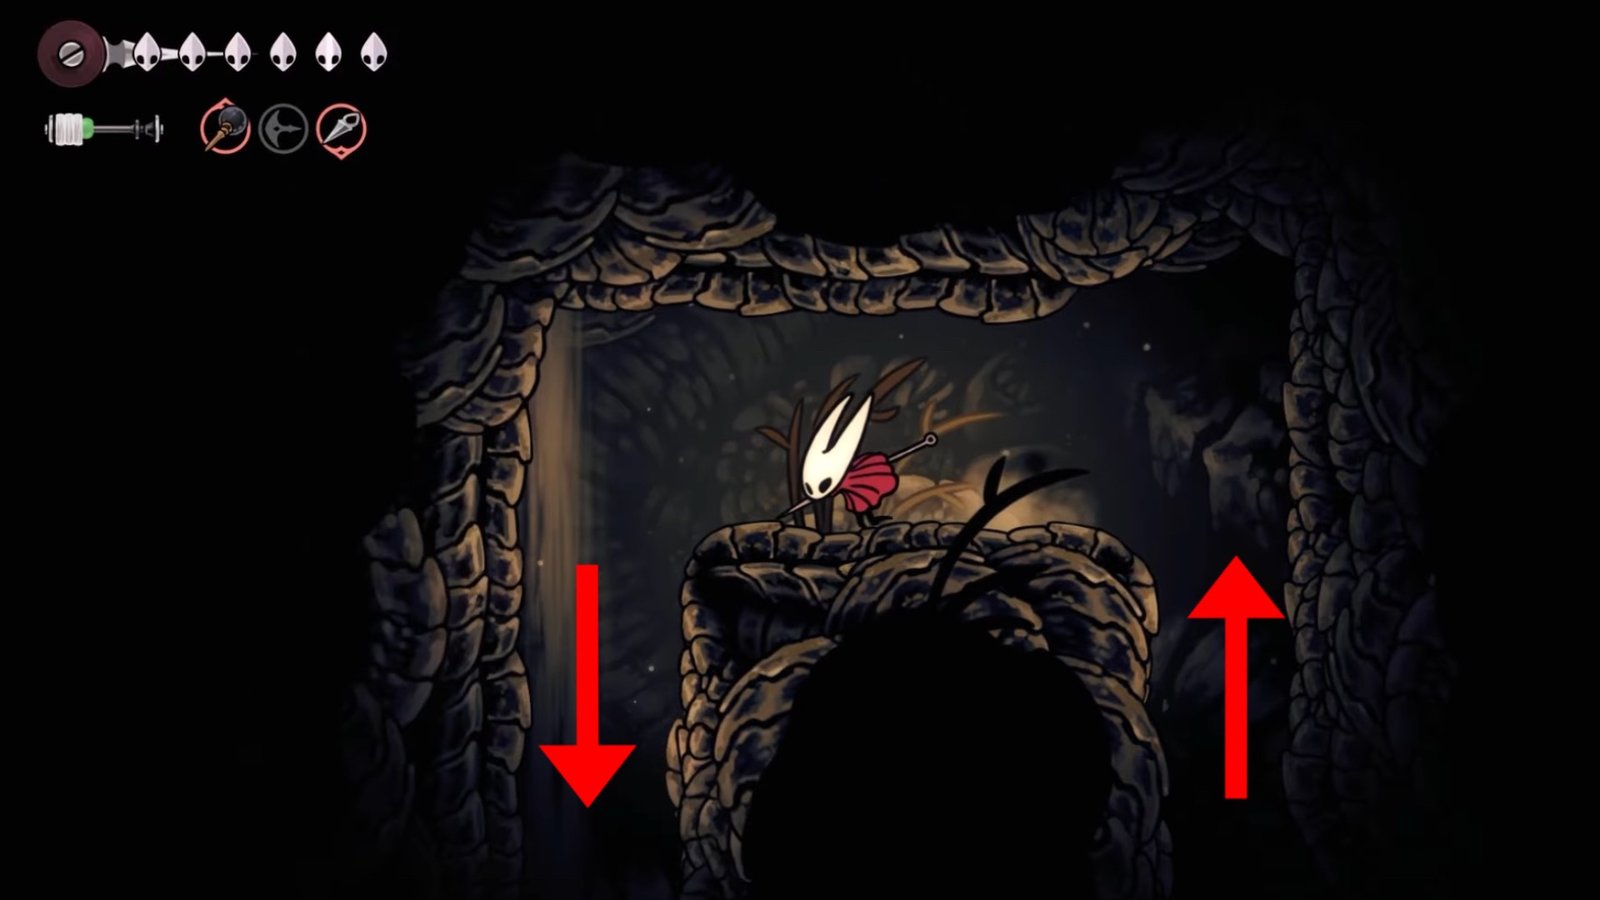
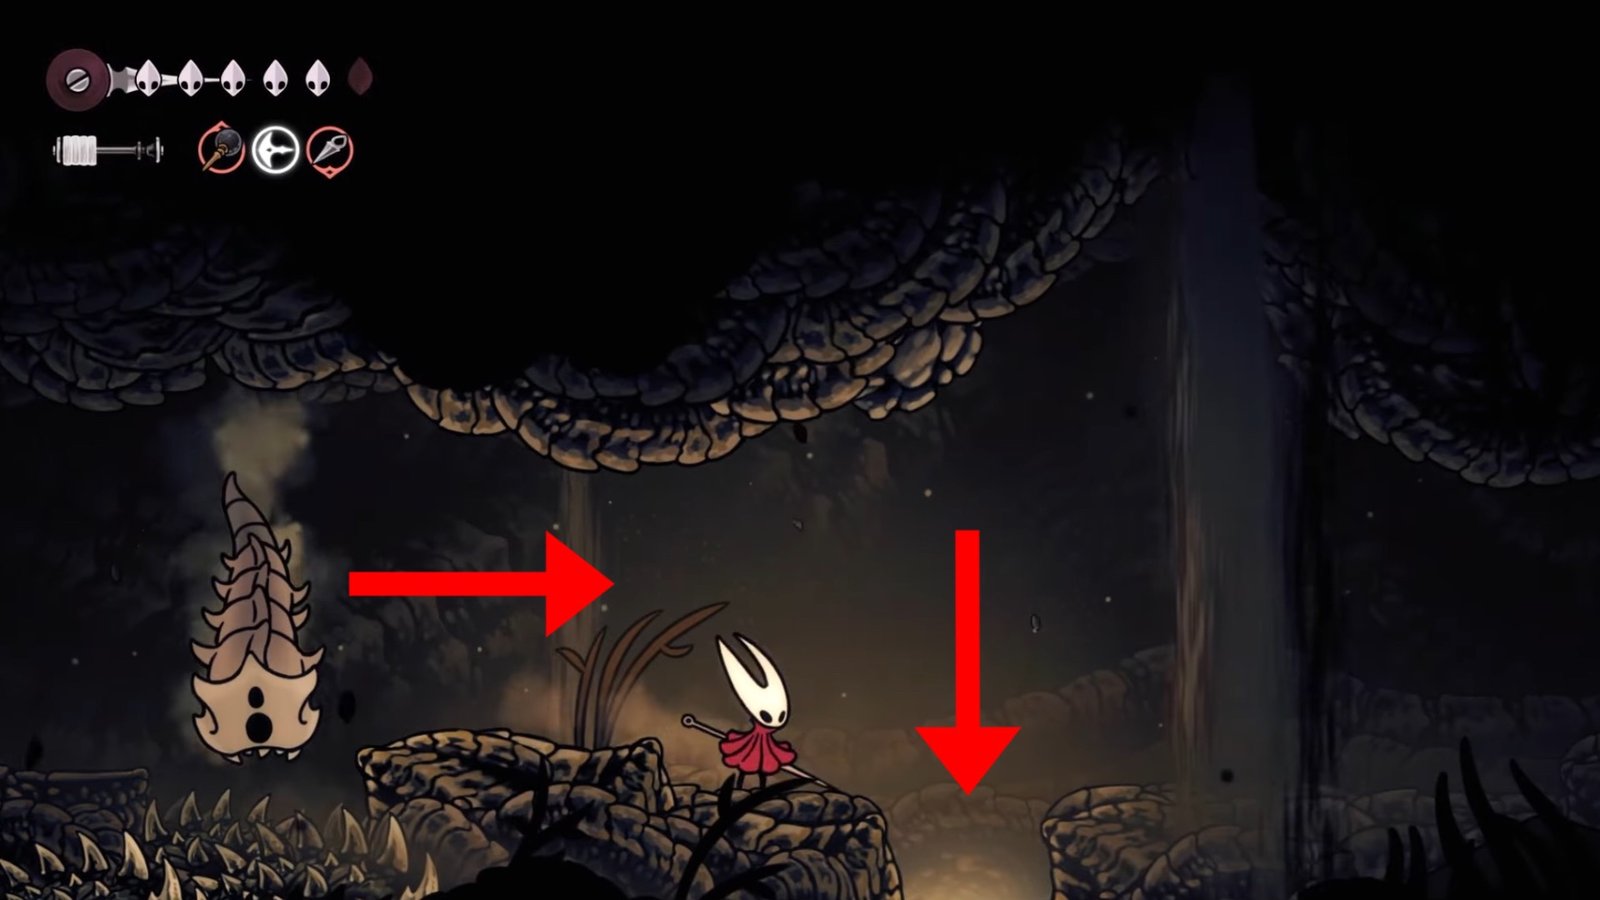
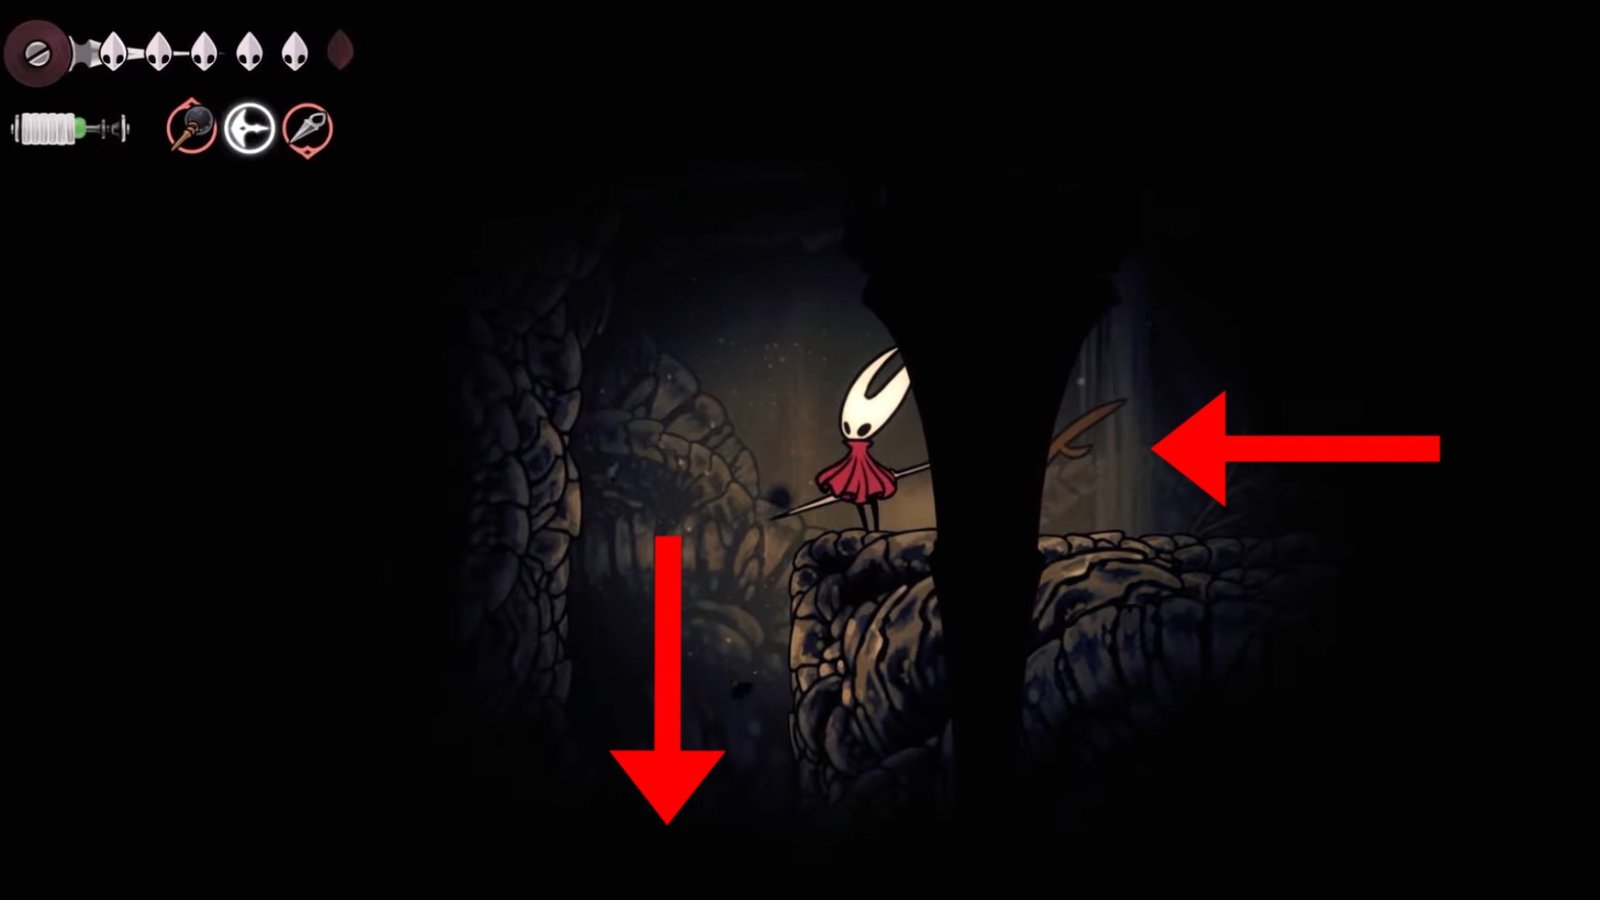
After dropping down, head left and use your Cling Grip ability to climb up the wall, then continue left. Here, you’ll find a dust trail that’s heading downwards.
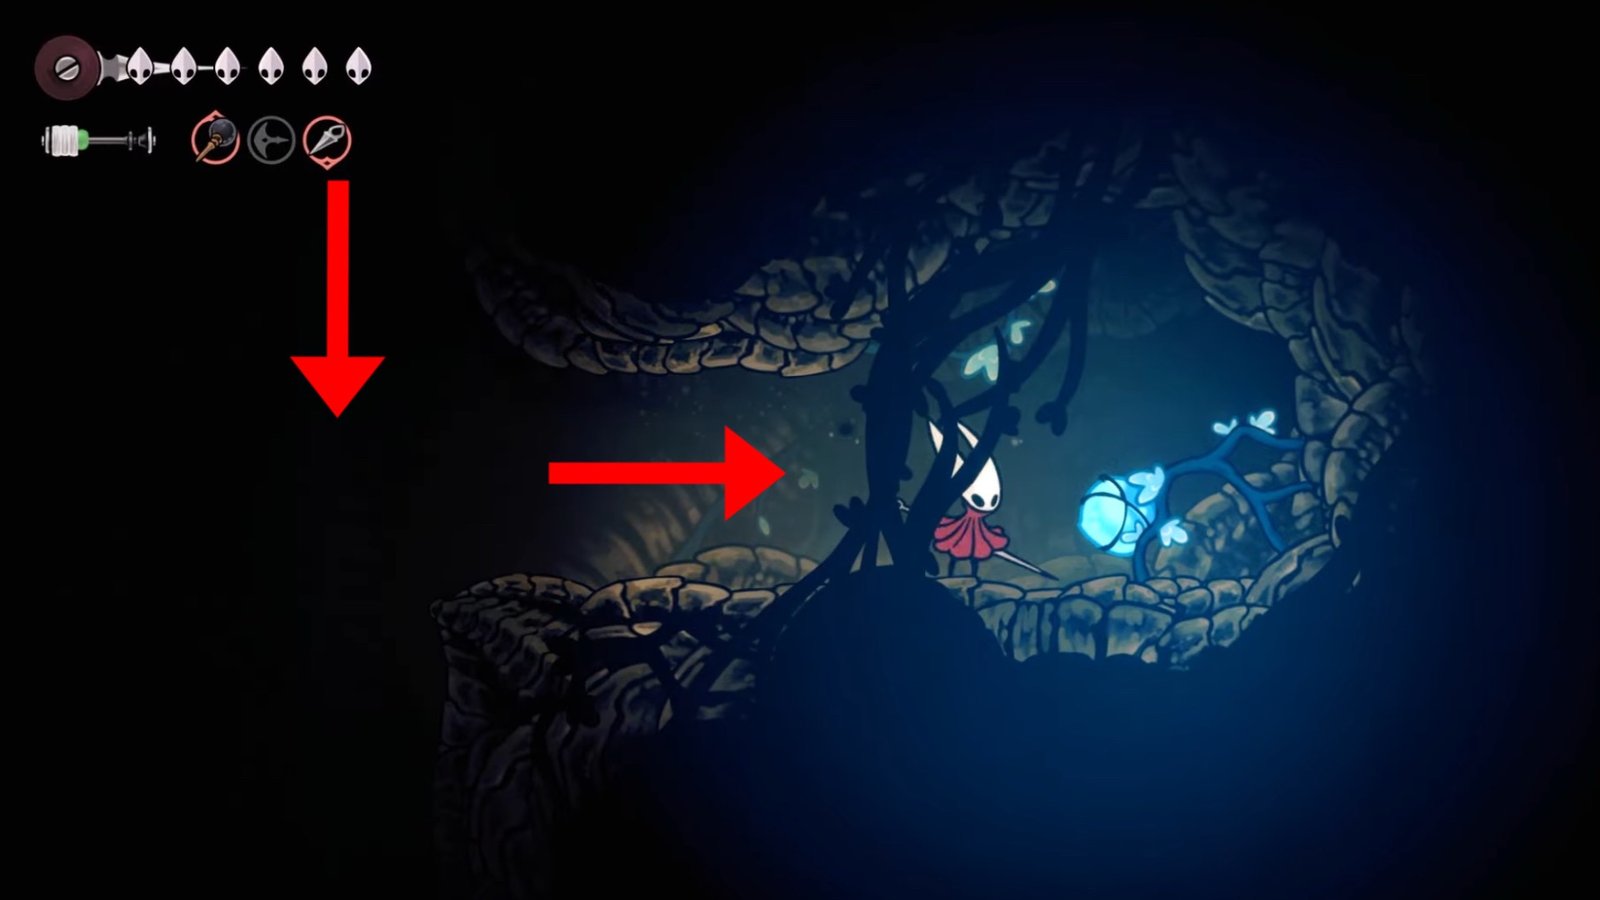
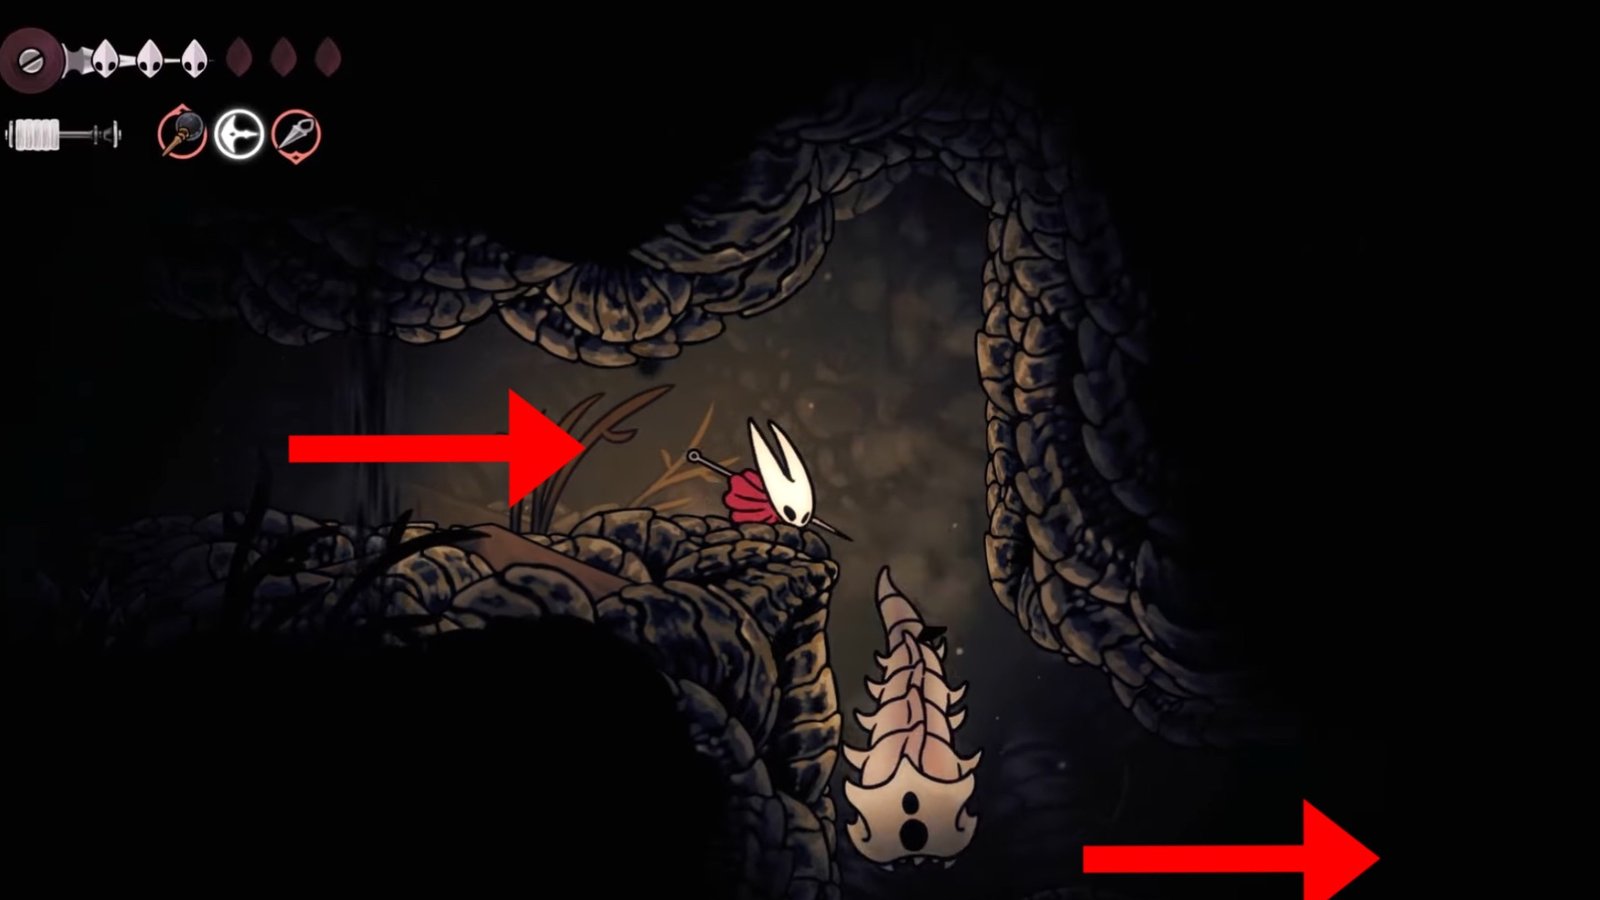
When you encounter the dust trail, drop down to the platform at the bottom right, and you’ll notice a glowing blue orb at the far right. This is the Plasmium Plant from which you need to collect the Plasmium sample. Charge up your Needle Phial and hit the Plant to extract the sample.
Plasmium Sample #2
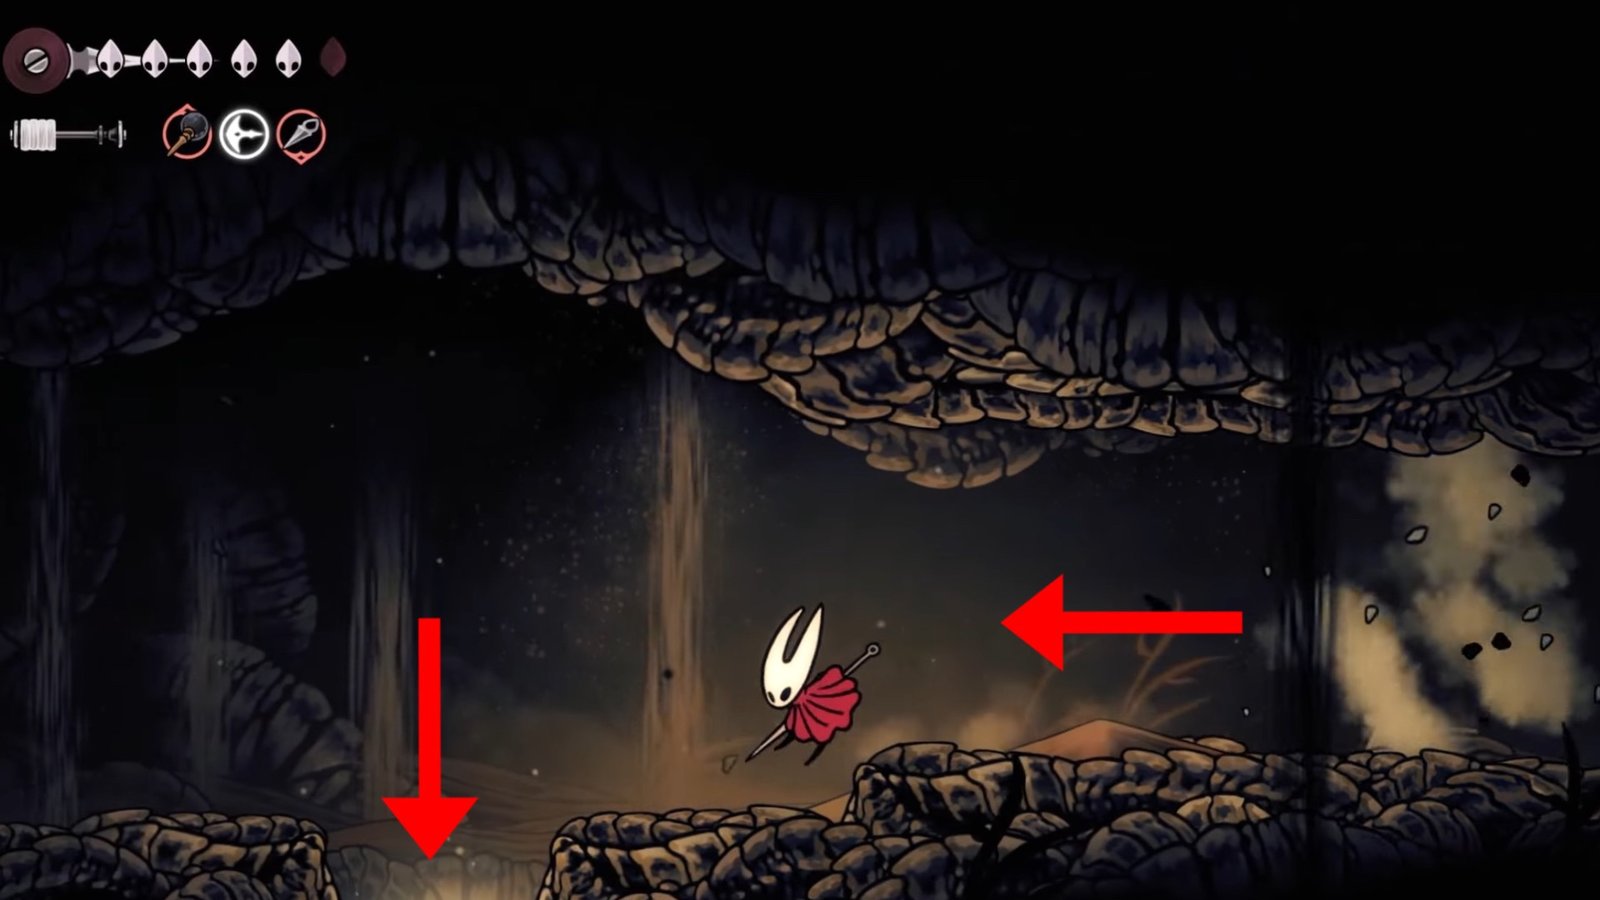
From the first Plasmium sample location, turn right and drop down below where the dust trail leads. Then, head left and dodge the spikes that lie below. Here, you’ll face enemies blocking your path again, so you need to time your moves right to get past them and avoid taking any damage. Continue left, and drop down to the opening below to the next area.
At the next area, drop down even further and keep heading right. Avoid the spikes that lie below and the enemies that are trying to hit you on your way forward.
After you dodge the third enemy, you’ll notice another opening that takes you to the bottom. Jump into the opening to access the next area below.
In the next area, keep going downwards until you come across a small spike patch on the ground with another enemy trying to hit you on your right. From the enemy, jump onto the next platform located a bit to the bottom right.
On this platform itself, you’ll find the second Plasmium sample on the far right wall. Charge up your Needle Phial once again, then hit the Plasmium Plant to extract the sample.
Plasmium Sample #3
From the second Plasmium sample location, backtrack your way to the left until you come across an enemy that launches from the wall on the left. Defeat the enemy, climb up the wall using Cling Grip, then continue inside the opening to the far left, which will take you to the next area.
Inside the next area, which is filled with rocks shaped like pointy teeth, continue on the left path until you come across an opening that leads to the bottom at the far left of the platform. You’ll encounter a couple of openings before this one, but do not jump into them. Travel to the far left, and then drop down the opening located there.
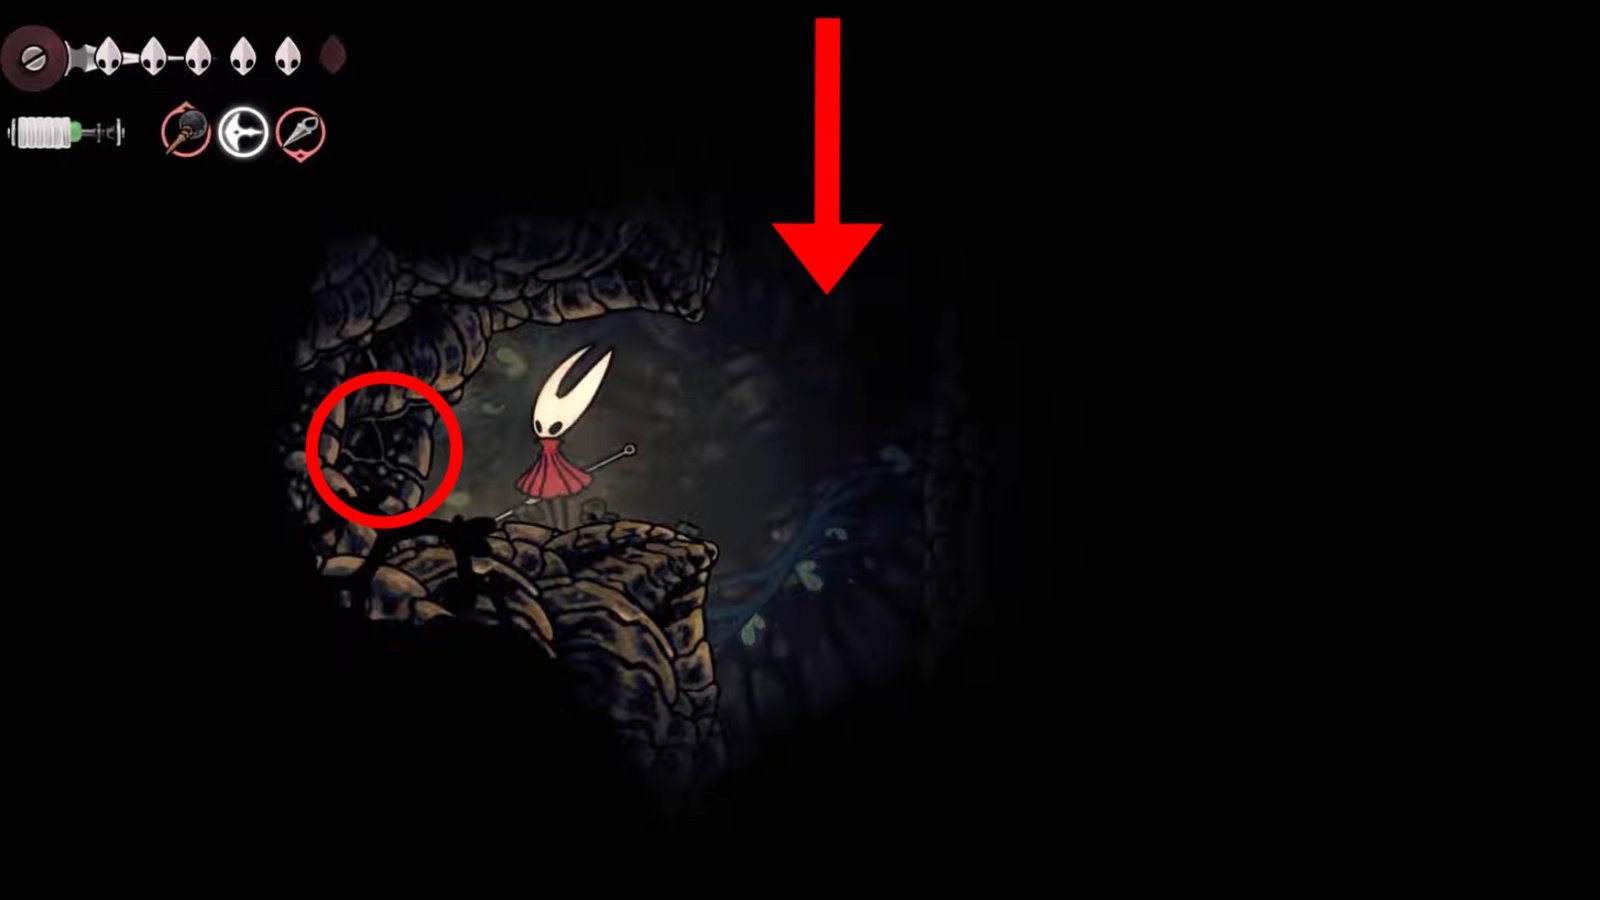
Just below the opening, you’ll notice a small pocket area with a blocked wall on the left. This wall can be broken with multiple hits. Break this wall to open the path forward, which will take you to the next area.

Once you’ve broken the wall, continue left and then climb up using your Cling Grip. Avoid the spikes that lie in the middle, then head to its left side using your traversal abilities, then drop down below.

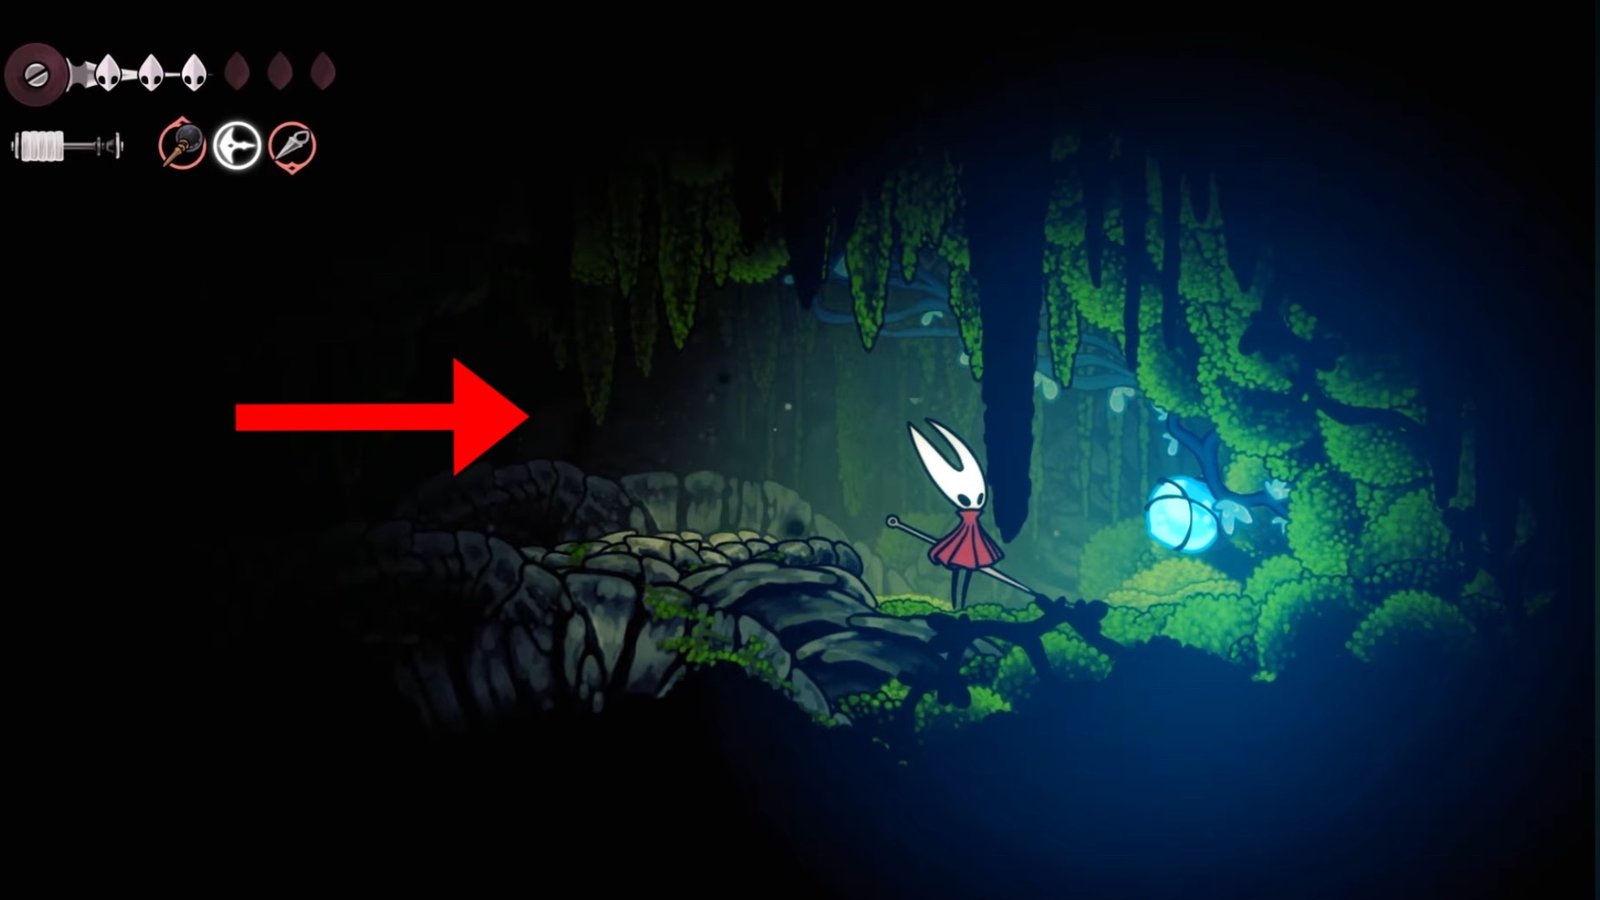
As you drop down below, you’ll notice the blue light being emitted from the Plasmium Plant. Avoid the spikes that lie below, and head right to find the Plasmium Plant on the right wall. Once again, charge up your Needle Phial and hit the Plant to extract the final Plasmium Sample.
Rewards for Completing the Alchemist’s Assistant Wish

After you’ve collected all three Plasmium samples, head back to Alchemist Zylotol at the top of the Wormways. Interact with him, then give him the Plasmium Samples to receive the Plasmium Phial for your troubles. With the Plasmium Phial, you’ll be able to regain your health beyond your natural limit, which is a terrific item to have during boss fights. You’ll have a total of 20 charges for the Plasmium Phial, which can be used three times per rest at a Bench. If you run out of them, return to Alchemist Zylotol and refill them in exchange for Rosary Beads.
This will mark the end of the Alchemist’s Assistant Wish in Hollow Knight: Silksong. Speaking of boss fights, there are a ton of legendary foes you’ll face on your adventure through the the Kingdom of Pharloom, which is why you should check out our boss fight guides on Trobbio and Skarrsinger Karmelita.