


In Roblox Arise Crossover, you are tasked with locating all the toughest bosses across the islands and turning them into Shadows. As you form your ideal team to deal with more enemies, you might have to partake in several battles just to collect more Shadows. Hence why you can claim the Auto Attack feature and enable it to quickly, and this guide will explain how to do that in Arise Crossover.
How to Get Auto Attack in Arise Crossover
The Auto Attack perk is part of the Arise Crossover Game Pass. The Game Pass offers tons of perks and bonuses for F2P and P2P players, and they can be purchased using Tickets or by spending Robux. Tickets can be obtained by clearing Dungeons, while Robux requires real money to purchase them. You can access the Game Pass from the in-game store and browse through the selection and pick the ones you want. Purchasing the Auto Attack feature requires 549 Tickets to get it.
How to Use Auto Attack in Arise Crossover
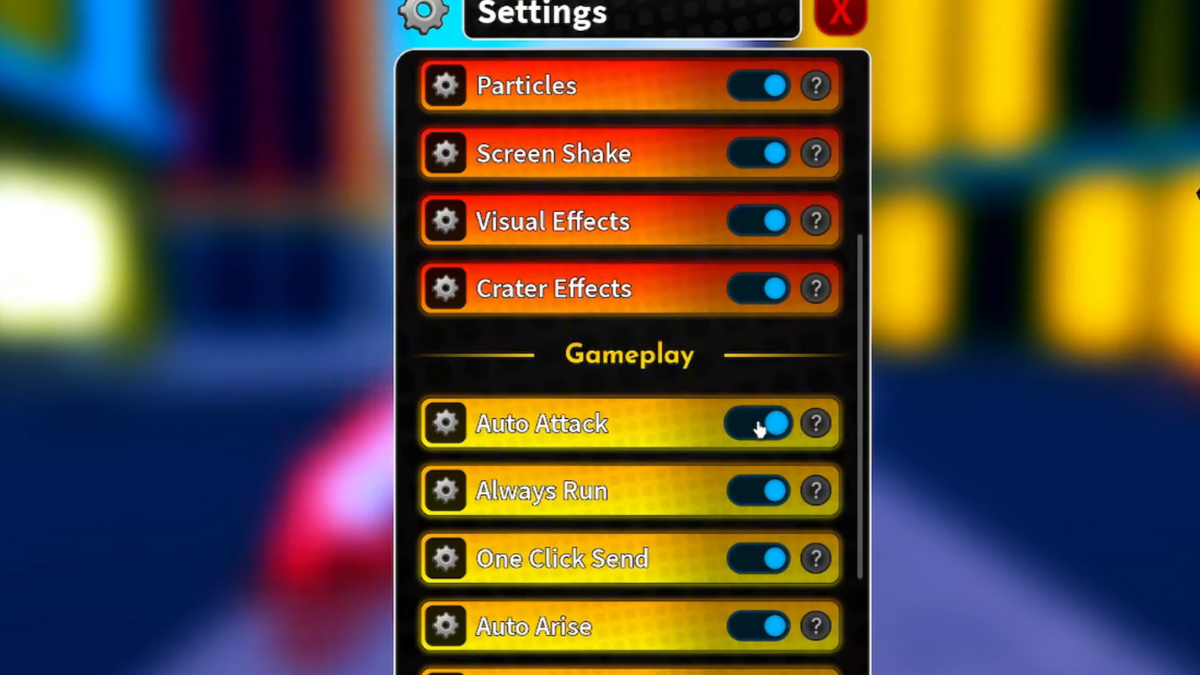
To enable Auto Attack, all you need to do is click on the Settings option in the main menu, then scroll down to find the Auto Attack feature under Gameplay. Enable it by sliding the circle beside the Auto Attack feature to the right. If you purchase more Game Pass perks, you can enable them all through this method.
With the Auto Attack feature activated in-game, you can easily farm dungeons while being AFK. Usually, you might have to select targets to fight them. But with the Auto Attack enabled, your character will automatically select their target and fight them. You can also select a specific area by clicking on a specific enemy unit, and this will signal your character to attack said unit. The area will also be highlighted by a circle, and any enemy that falls within this circle will be attacked by your units.
Is the Auto Attack Worth It?
If you are grinding through Dungeons frequently, then the short answer is yes. Having Auto Attack turned on will increase the XP you get while fighting, which grants you faster character leveling. Also, you don’t have to keep an eye out for targets, as your character will automatically locate them regardless of whether you are paying attention to the game or not. Also, pairing this up with Instant Arise helps you farm Shadows more efficiently. Not to mention, you can claim all your rewards automatically too, which includes Tickets and gems.
How to Macro in Arise Crossover
If you don’t want to purchase Auto Attack from the Game Pass, you can also use an external application to do the work for you. You can follow the steps below to learn how to do this.
- For starters, download and install the TinyTask application
- Then, load it up while having the Arise Crossover running simultaneously.
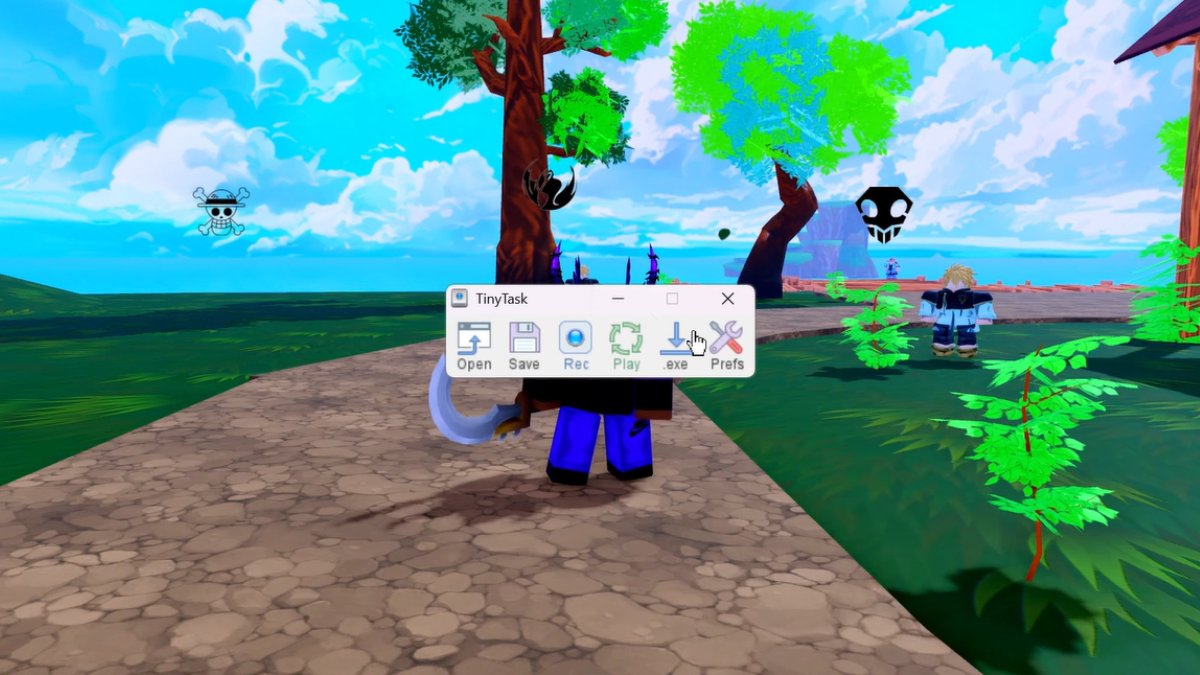
- With the TinyTask taskbar visible in the game, select the Prefs option then select the Continuous Playback option to enable it.
- Just below this option is the one for Recording Hotkey, select that and assign the F8 key.
- Next, configure the one for Playback Hotkey by assigning F12 for it.
- After that, go to your game settings, scroll down to Gameplay, and disable One Click Send.
- You can now hop into any area where there are tons of enemies, then press F8 to start recording.
- Select your targets and watch your Shadows attack them and farm money.
- Once all the enemies in the area are defeated, press F12 to replay this scene and respawn enemies, thus helping you attack them again and farm more XP and cash.
- You can also save this location by clicking on the Save option in the TinyTask hotbar, so you can always come back to it at a later time to farm.
If you are looking for more Arise Crossover gameplay tutorials, we have guides on Merging & Upgrading Shadows, How To Get Powder Dust Fast, and How To Find & Complete Dungeons to know more.