


If you are looking to assemble a defensive playstyle in Blue Protocol: Star Resonance, then the Heavy Guardian will fulfill the tank role in the game. A perfect tank does require working on skills, upgrades and talents best suited for defence and survivability. Here is a complete guide that covers the Heavy Guardian build guide in Blue Protocol Star Resonance.
Heavy Guardian Build Overview In Blue Protocol: Star Resonance

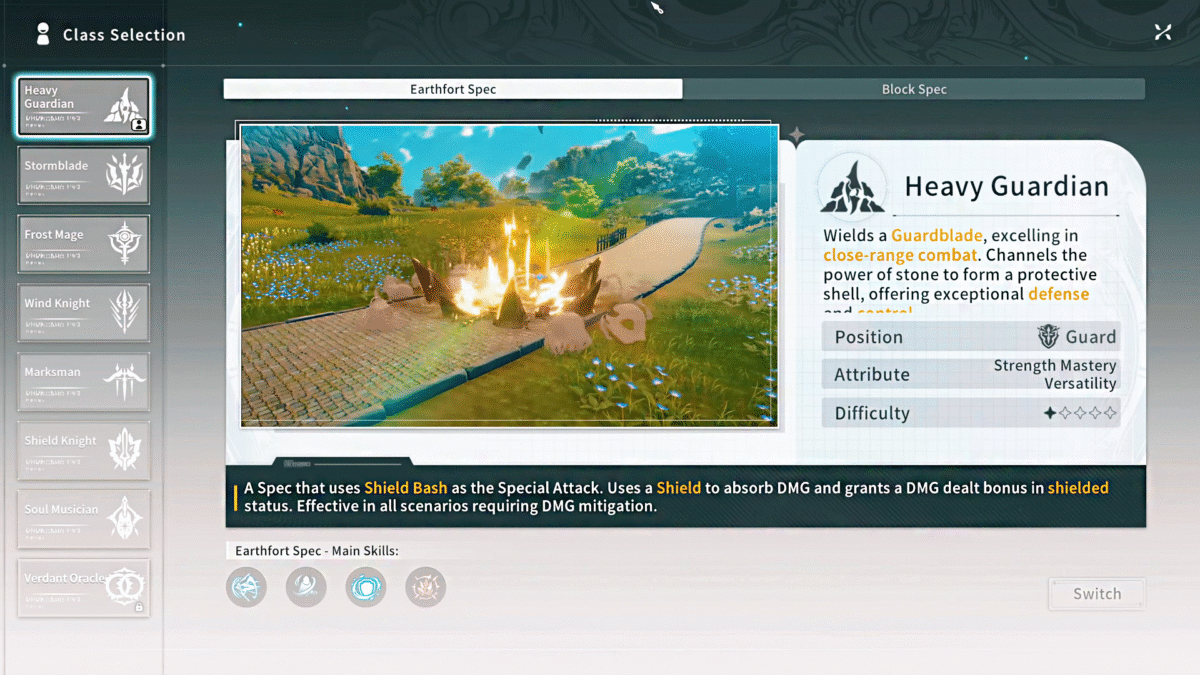
Heavy Guardian is divided into two specs: Heavy Guardian Block and Heavy Guardian Earthfort. Both are excellent defensive options for anyone who wants the role of tank.
Heavy Guardian Block Spec
If you want to focus on building nothing but a tank in the game, then choose to roll with Heavy Guardian Block. Here, our primary goal is to shift towards defense rather than pushing anything on the offensive line. The job is to take the heat from the boss without getting staggered. The talent tree and Mastery will help us reduce damage taken by our character.
Heavy Guardian Earthfort Spec
Here, it is more geared toward using abilities such as Rage Burst and Shield Bash to create an indestructible shield against enemy damage. We will use other skills, such as Shield Bash, to amplify our overall shield in the game.
Rage / Sand Crystal
Both Heavy Guardian Block and Earthfort are going to be reliant on their special attack, which requires generating Rage. Since we are taking the role of a tank, taking damage and doing basic attacks will help us gain Rage for both Block and Earthfort. Sand Crystals will help us to cast Expertise Skills. We will generate a Sand Crystal by using Star Shatter and Sandshroud skills.
Earthfort will be a great first experience with the tank build. It’s very easy to get started with Earthfort, as it will teach you the way of Heavy Guardian without a steep learning curve. Then you can move on to Block spec for an advanced experience in Blue Protocol: Star Resonance.
Best Skills To Level For Heavy Guardian Class

Heavy Guardian Block Spec
Here, we will rely on Halberd’s Edge and Countercrush as our fixed skills. Countercrush takes the center stage, as it grants 100% block chance, and 30% damage reduction when blocking. Halberd’s Edge helps us gain 5 Rage per hit.
- Granite Fury: This skill will take Sand Crystals to dish out damage and lowers the damage taken by 10% for 10 seconds. Suffice it to say, we need this skill to stay active all the time. By using talent, evolve the Granite Fury to Stone Fist.
- Brave Bastion: When you are at the max level and perform blocking, it grants you a 20% damage reduction.
- Star Shatter: This skill helps generate 25 Rage and one Sand Crystal. It will help us with the Countercrush’s block rate.
- Sandshroud: The crucial point about this skill is that it will grant us 33 Rage and 6 Sand Crystals for six seconds. The skill also deals a good amount of damage to nearby enemies.
- Sandgrip: Pulls enemies near you from a distance.
- Sandward: Become immune to damage for five seconds and taunt close enemies.
Focus on Brave Bastion and then Countercrush, Granite Fury, and then Halberd’s Edge. Then, focus on the rest of the skills mentioned above.
Heavy Guardian Earthfort Spec
Our fixed skills for Earthfort are going to be Halberd’s Edge and Shield Bash. Halberd’s Edge is perfect when the Sand Crystals are on cooldown. But generally, we are going to use the Shield Bash, where we use Rage to deal damage and, with the help of Sand Crystal, build a shield.
- Star Shatter: A charge attack that also stuns the enemy. The skill also grants 25 Rage and a single Sand Crystal. We are going to be using the Star Shatter as a skill to generate Rage and Sand Crystals. After you spend around 20 Sand Crystals, Star Shatter will evolve to Starfall.
- Sandshroud: After using this skill, we will generate 33 Rage and 6 Sand Crystals over 6 seconds. Suffice to say, we are going to be using this skill to buff our shields.
- Stoneform: We will use this skill to taunt enemies, increase armor, and also lower any incoming damage by 20%.
- Rage Burst: It offers a large shield and disrupts enemies, but at a cost of 50 Rage and 5 Sand Crystals. Whenever a target gets hit by this ability, we will receive 10% less damage from them.
- Sand Grip: Pulls enemies towards you and also adds a slow effect on them that reduces their movement by 70%.
If you are looking to prioritize certain skills here, we highly recommend that you go with Rage Burst and Shield Bash, then choose Stoneform, and the rest.
Ultimate Skill: Cracking Echo Best for Block and Earthfort
The only thing you should know about the Ultimate is that it generates 5 Sand Crystals, which you can use to taunt Nemeis and stun targets for 3 seconds. But the highlight here is the Earth Guard buff that gives us super armor, which raises armor by 100%, max health by 50% and generates 40 Rage.
Battle Imagine for Heavy Guardian Build

The Battle Imagine mentioned in this section can be applied to both Heavy Guardian Earthfort and Block specs. Almost all of them are geared towards defense, HP generation, and one is for revival.
Here, we will combine Golden Juggernaut with Tempest Ogre or Frost Ogre with Golden Juggernaut. Tempest Ogre allows us to take 5% less damage and pulls enemies from a large distance away, perfect for mob clearing. Frost Ogre allows us to break enemies. And lastly, Golden Juggernaut raises shield strength and adds 30% health to the shield for you and your allies. Any allies that get the effect of Golden Juggernaut will deal more damage on hits.
For against bosses, you can think about adding Airona, which helps with the revival of up to 4 downed allies. Any dangerous move that can wipe out the entire team can be dodged by using the Airona Battle Imagine. Another Battle Imagine worth mentioning is Tina. It adds 50% cooldown reduction for 20 seconds. But the Battle Imagine itself also has a cooldown of 60 seconds.
If you are looking for some friendly purple Battle Imagine, we recommend rolling with Brigand Guard Captain and Void Arachnocrab. Brigand Guard Captain will help you with your HP boost, it also has a good passive of 12% Endurance and 20% additional on use. Void Arachnocrab will allow us to gain armor by 1125 for 15 seconds after taking on 10 hits. Whenever you trigger the Void Arachnocrab, you will become invincible for 5 seconds.
For a Heavy Guardian Block, think about Goblin Guard, as it adds 500 passive block and 15 % block damage reduction whenever you trigger the Battle Imagine.
Best Talent Tree for Heavy Guardian Build
Heavy Guardian Block Spec

- Rage Enhancement: The cost of Granite Fury will be lowered to 2 Sand Crystals from 3.
- Heart of Rock: When you cast Granite Fury about 10 times, you will get Heart of Rock, which helps evolve Granite Fury into Stone Fist. That summons a giant boulder and leaves enemies with Enraged status.
- Sand Block: It helps us gain Sand Crystals for defensive buff maintenance.
- Block Recovery: Gives us Rage for resource keeping.
- Earth Shard: After Stone Fist, using Earth Shard allows you to fire away 5 rock projectiles for 10 seconds. It will help us trigger talent and deal damage to enemies.
- Granite Combo: It gives each Earth Shard projectile a chance to be duplicated based on our luck.
- Granite Fury 1 and II: Whenever 50 Rage is generated, you will gain 1 extra Rock projectile.
- Enraged Rock Heart: Gain 10% Luck chance while Enraged.
- Sand Block: Grants us Sand Crystals
- Block Recovery: Grants us Rage.
- Shattering Rageblow and Sandstone Rewind: We will need both Sandstone Rewind and Sandstone Rageblow to turn our basic attack into Rageblow, granting 10% block damage reduction for 10 seconds on hit. It also makes Rageblow powerful enough to deal damage and lower the cooldown of Brave Bastion.
- Intimidation: Whenever a Rock Projectile lands on a target, it lowers the damage by 10% for five seconds.
Heavy Guardian Earthfort Spec
- Starfall: Every Sand Crystal we spend adds a new counter. When the counter gets to the number 20, Star Shatter will evolve into Starfall, generating Rage and helping with other talents.
- Star Fury: adds Enraged status to Star Fall and Star Shatter whenever they get used.
- Lord of the Great Rock and Lord of Rocks: When you trigger Stoneform, it will upgrade our basic attacks into Rupture and Rage Burst into Terra Sunder. Each will have a single use. Rupture will help us generate Rage, and Terra Sunder is an upgrade of Rage Burst without any Sand Crystal requirement.
- Shield Echo: Whenever Sandshroud is active, applying the shield gains Shield Echo, which grants Rage and deals damage.
- Shield Combo: Our basic attacks have a chance to grant free Shield Bash use, and also raise Shield Generations.
- Stone Domain: Any enemy attacks during Sandshroud will get a 30% reduction in attack speed, and allies nearby will get 10% armor.
- Rage Burst Improvement: Rage Burst will get one additional charge, raising the speed of casting. The same rule also applies to Terra Sunder.
- Group Suppress: It helps the effect of Suppress by 3 for each enemy around us. The skill’s effect cap is at 15%.
- Bravery in Battle: Turns overhealing into shield to a rate of 50%. So the healer’s effect can help your shield. It has a limitation of 50% of the maximum life.
- Fang of the Alpha: Get 8% damage reduction from bosses. A talent is best reserved for boss fights rather than having it active all the time.
Rotation for Heavy Guardian Block Spec
For Block, start with Countercrush and then use Brave Bastion to taunt the enemies and boost your damage reduction, then Granite Fury to give another boost to the damage reduction. Now the talent Heart of Rock will come into play, evolving the Granite Fury to Stone Fist. You need to use Granite Fury over 10 times to achieve it. Here, also use Star Shatter, Sandshroud to gain Sand Crystals, and Sandgrip to pull enemies towards you.
Rotation for Heavy Guardian Earthfort Spec
First, use Sandshroud to take care of the Sand Crystals and Rage, then use Star Shatter to get into the Enraged state. After all of it, use Stoneform to taunt the enemies’ boost damage reduction. Now use basic attack to gain Sand Crystals and Rage Burst to generate a large shield. Here you can also take advantage of the ultimate Cracking Echo to gain 5 Sand Crystals and Shield Bash to spend the Sand Crystals and gain shield.
That completes all the details on setting up the perfect Heavy Guardian Build to take on bosses and mobs in Blue Protocol: Star Resonance. The game brings several build possibilities, check our guides here on the Stormbuild guide, and the Marksman build guide.