


With the new release of Elden Ring Nightreign’s first DLC, comes a slew of new and exciting content for you and your fellow nightfarers to get stuck into.
Front and centre is the old Albanuric himself, The Scholar. This is a brand-new character that leans towards the more complex side of things. But when he’s used correctly, this dual support-debuff stacking monster can really shake things up!
While this fellow might seem like more of a bookworm, he’s anything but! So let’s take a look at the Scholar and how to get the most out of his fascinating abilities.
Scholar Overview

First of all, let’s take a little look at his core stats. From this, we can see just how well this character shines:
- Vigor: B
- Mind: B
- Endurance: B
- Strength: D
- Dexterity: C
- Intelligence: C
- Faith: C
- Arcane: S
Now, at first glance, these stats don’t really seem to be anything to write home about. He’s a little bit squishy, doesn’t have great manoeuvrability, and doesn’t excel in any magical stats.
But that Arcane scaling is where the Scholar really shines. As a Scholar, you’re going to be taking advantage of the many debuffs and negative effects you can place on your enemies.
And the brilliant thing about these is that the damage of your main weapon doesn’t really matter; your main damage dealer is going to be those bleed/frostbite procs and various other nasty effects.
What’s more, you can deal even more damage from a distance due to your new passive ability, which finally gives Nightfarers a good reason to use those pesky items always lying around on the ground. Let’s go a little bit more into detail with these new abilities, shall we?
Passive – Bagcraft
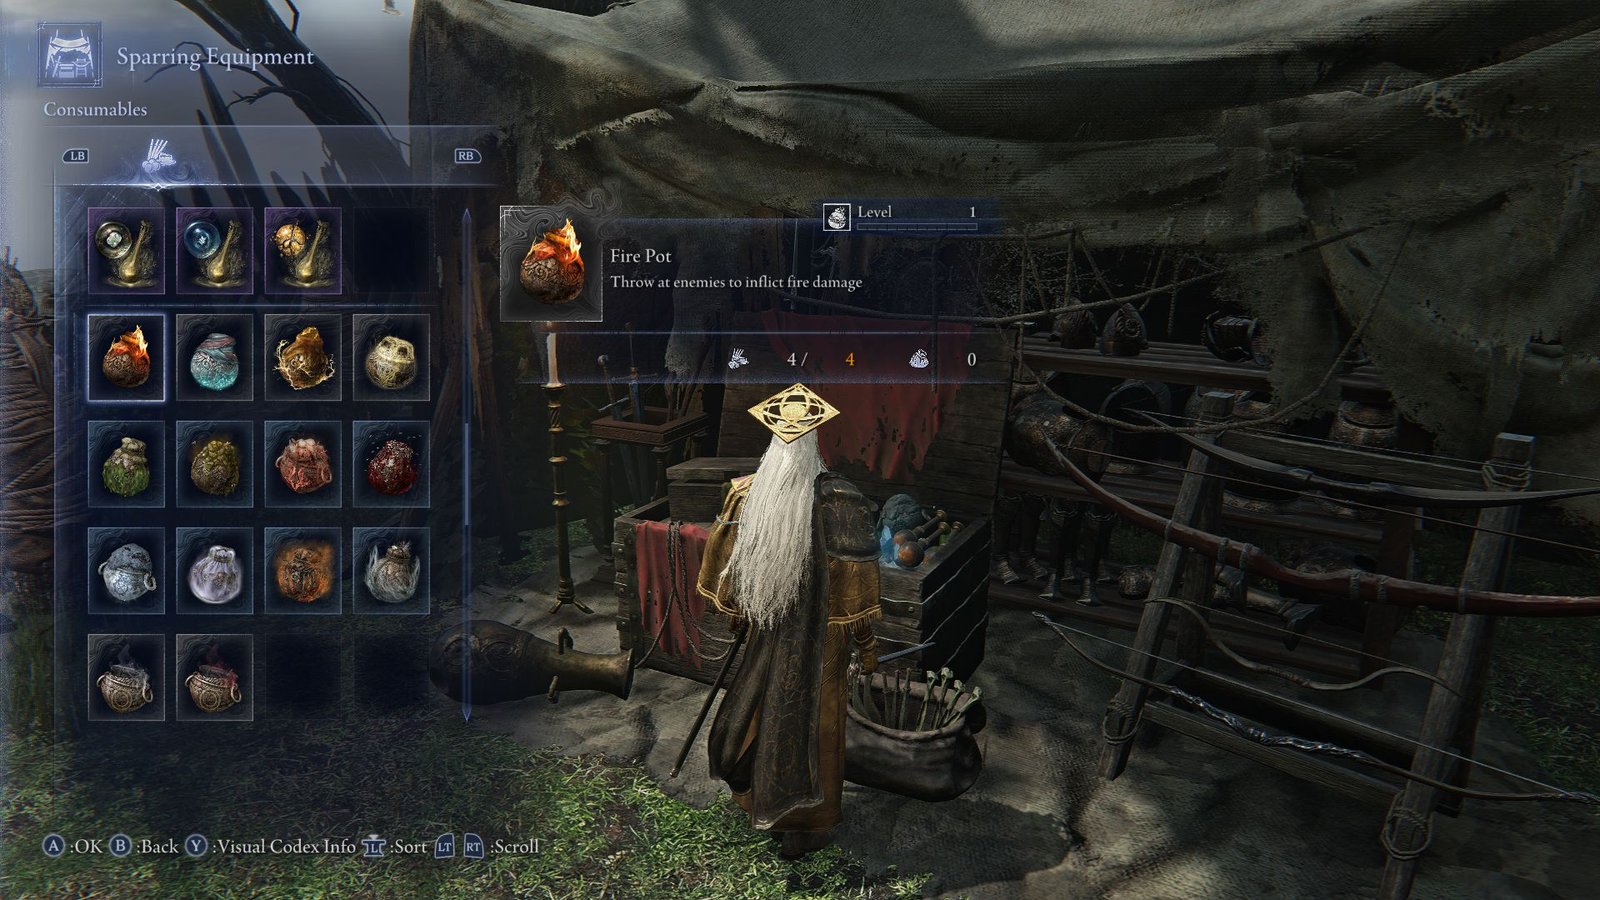
Quite honestly, Bagcraft is perhaps the most intriguing and complex of The Scholar’s abilities, despite it being a passive. Bagcraft allows you to do multiple things:
- You can carry more of every type of item
- Using items will level them up to a max of level 3, granting them new effects when used.
Of course, being able to carry more stuff is nice, but the real meat and potatoes lie in that second effect. Every time you use an item or deal damage with it, it will gain experience and level up.
When leveled for the first time, it will gain a small increase in its power, but when leveled up again, it gains a whole new effect.
Each item is separated into categories, for example, throwing pots, throwing knives, boluses or animal parts, etc. When you use one type of item, it will level up the whole category. So when you use a couple of Starlight Shards, you’re also going to be increasing the strength of your Warming Stones.
The real items you’re going to want to constantly look out for are Throwing Knives, which now reduce enemy defence, Warming Stones, which can halt the build-up of your death gauge, and all Pots.
In addition, relics that either give you free starting items, like the Wraith Calling Bell, are extremely valuable, as well as those that buff your throwing pot damage. Failing those, try using something that buffs your starting weapon with bleed or frostbite, so some useful extra damage in those early minutes.
Character Skill – Analyse
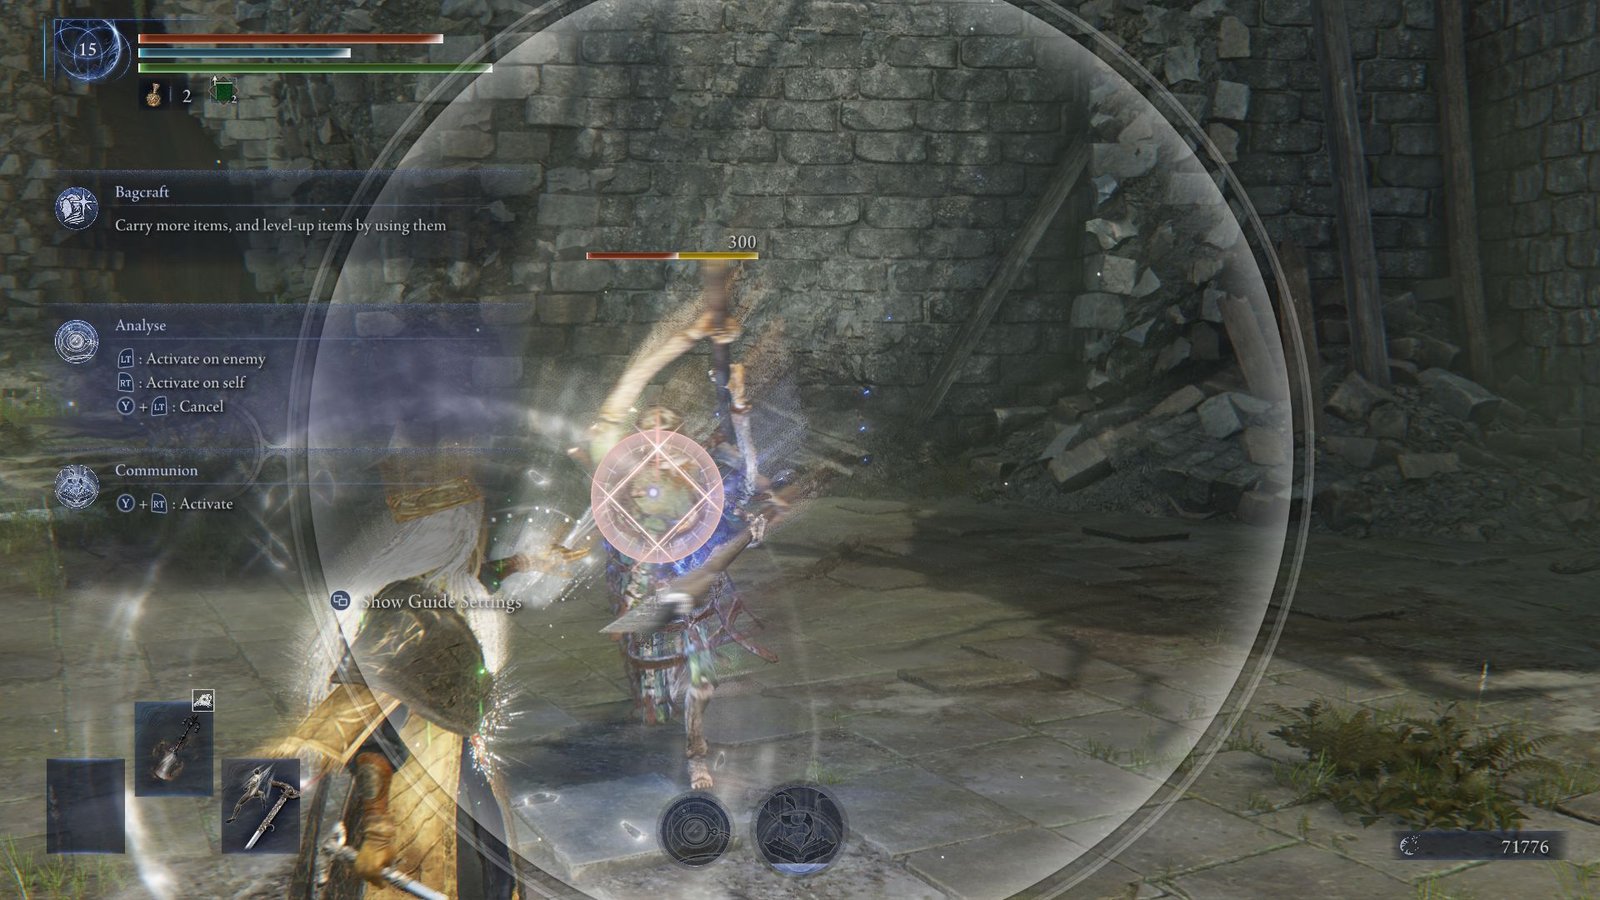
The Scholar’s Character Skill, Analyse, is also pretty complicated, but can really turn the tide of battle when used correctly.
When you activate this, a ring will form around all targets on screen. You fill up the gauge quicker the closer you are to them. When you trigger the skill again (LT), it will debuff your enemy depending on how full the gauge was. These debuffs can decrease the attack of an enemy and increase the amount of damage they take on subsequent attacks.

When performing an analysis, try and run into the fray, use your skill and then dodge back out again so you don’t spend too much time standing still. You can also choose to use this ability on yourself (RT), increasing your maximum stamina and granting you a small temporary shield, which, when broken, damages whoever broke it.
A lot of folks thought that this skill inherently buffs your allies too, but this isn’t quite right. Only once you gain the final Relic of the Scholar’s Remembrance Quest will you unlock the ability to buff your allies’ attack power upon Analysis. So, finish that remembrance quest as soon as you can!
The only downside of this ability is just how vulnerable you are when using it. Activation will cause your weapons to sheath and force you into a walking stance. You can dodge, but only with good timing, so make sure your teammates have the enemies under control first.
Ultimate Art – Communion

Oddly enough, the ultimate ability is probably the simplest thing about this character. Upon using your Ult, you will link together all of the enemies around you, and also your nearby teammates.
When you damage an enemy, the damage will be shared with every other enemy that is linked. So, if you’re in a group boss fight, something like the Balancers, this ability works fantastically. It also has a massive use time; you can utilise those I-frames to dodge big AoE attacks without having to run away.
In the case of your teammates, any healing that happens between the 3 of you will also be shared. Additionally, if a teammate is down, any damage you deal to linked enemies will also help deplete their death gauge. It’s a simple ability that has a surprising amount of complexity, which can be said about this whole character, to be honest.
Using the Scholar

So now you know his abilities, just how can we use the Scholar in our next game?
Well, first off, remember that he is a surprisingly adaptable character. You can either go all in on the Bagcraft mechanics and use sorceries for a strong support/ranged build, or you can look for powerful weapons that inflict ailments like Scarlet Rot, Bleed and Frostbite, like the Antspur Rapier or Frozen Needle.
In reality, the most powerful of builds will try to use a mixture of all of these things, running in and out of the fray as both a support and damage-dealer.

Churches and Merchants are your best friends here! Always break open the boxes to scavenge for useful items, and remember that the merchants always stock fire pots.
Purchase extra bag space and make sure to level up your items, even if that means eating random boluses left on the ground. Better to get that level up now than need it later on.
The Scholar might seem pretty weak and ineffective when you first use him, but honestly, he’s a character that you need to play around with a lot. When you start understanding his true strengths and weaknesses, he transforms into an absolute powerhouse! Don’t underestimate the Scholar!