


Runes in Prospecting offer bonus perks that will make your digging experience more rewarding and satisfying. Currently, there are a total of 13 Runes that are located in various locations inside the game, each offering specific bonuses to help you on your journey to become the digging master. You’re provided four Rune Slots, with the fifth Slot unlocked at Level 40 to equip your preferred Runes. Here’s how you can find all 13 Runes along with what they do in Prospecting.
Rune #1: Purity
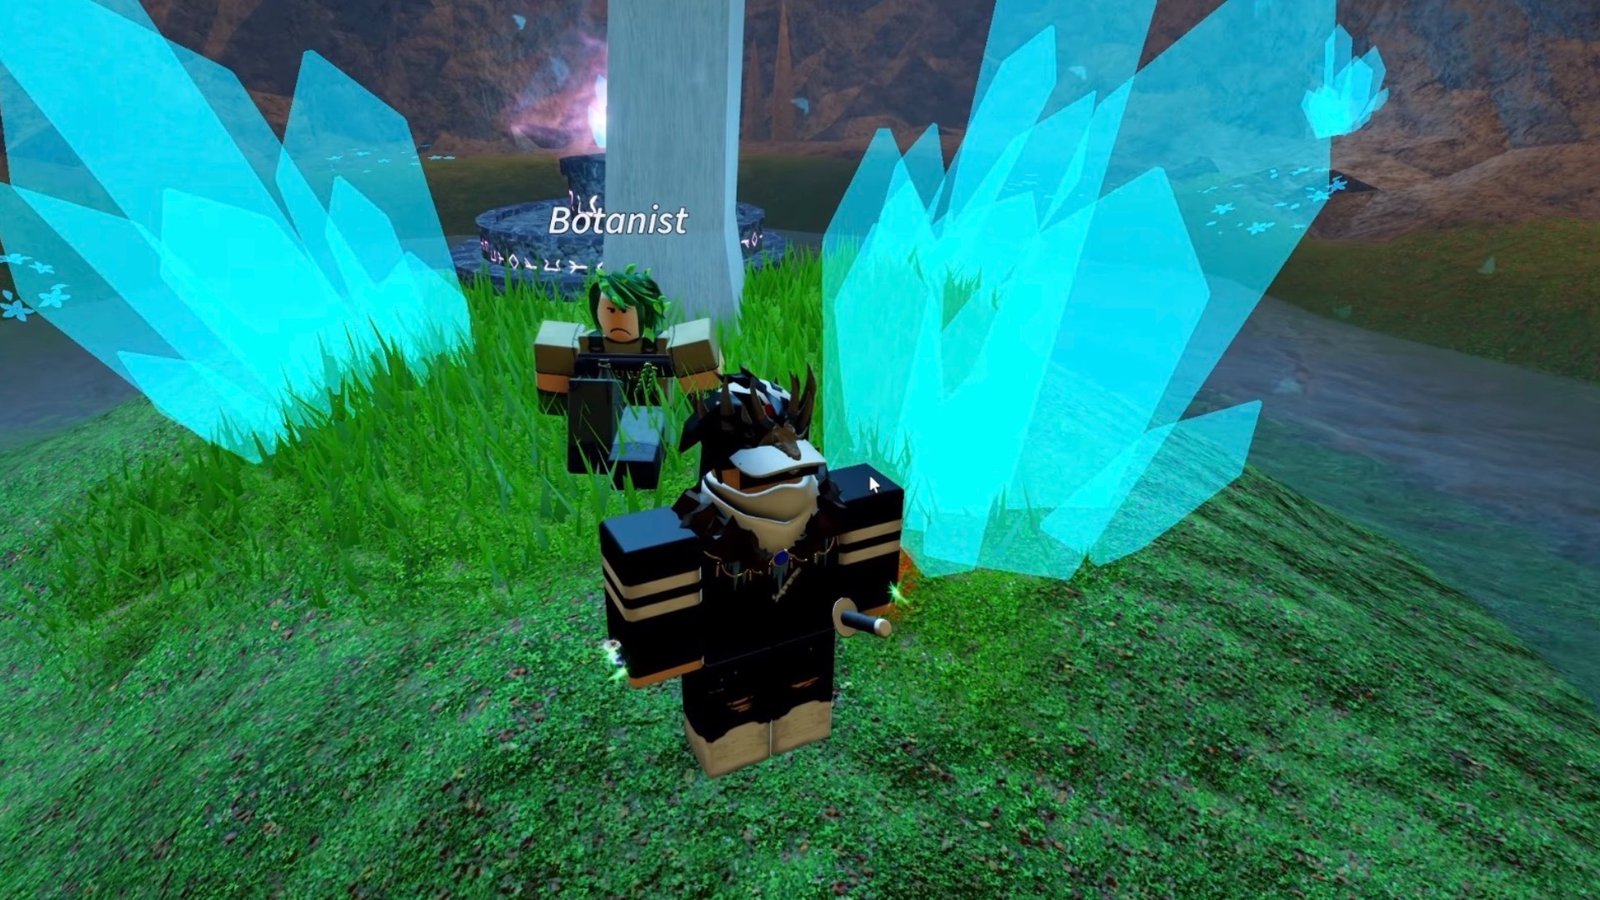
The first Rune, called Purity, is obtained after completing The Seed of Light Quest in Prospecting. To complete the quest, you must bring a Prismara (Mythic) mineral to the Botanist in the Azuralite Oasis inside the Crystal Cavern. Since it’s a Mythic mineral, the chances of finding it are slim, but the best shot you have is to dig at Azuralite Oasis itself. Once you’ve obtained the mineral, head back to the Botanist, and you’ll complete the quest, unlocking the Purity Rune.
Effect: +1x Luck multiplier, but modifiers can no longer be obtained.
Rune #2: Speed I
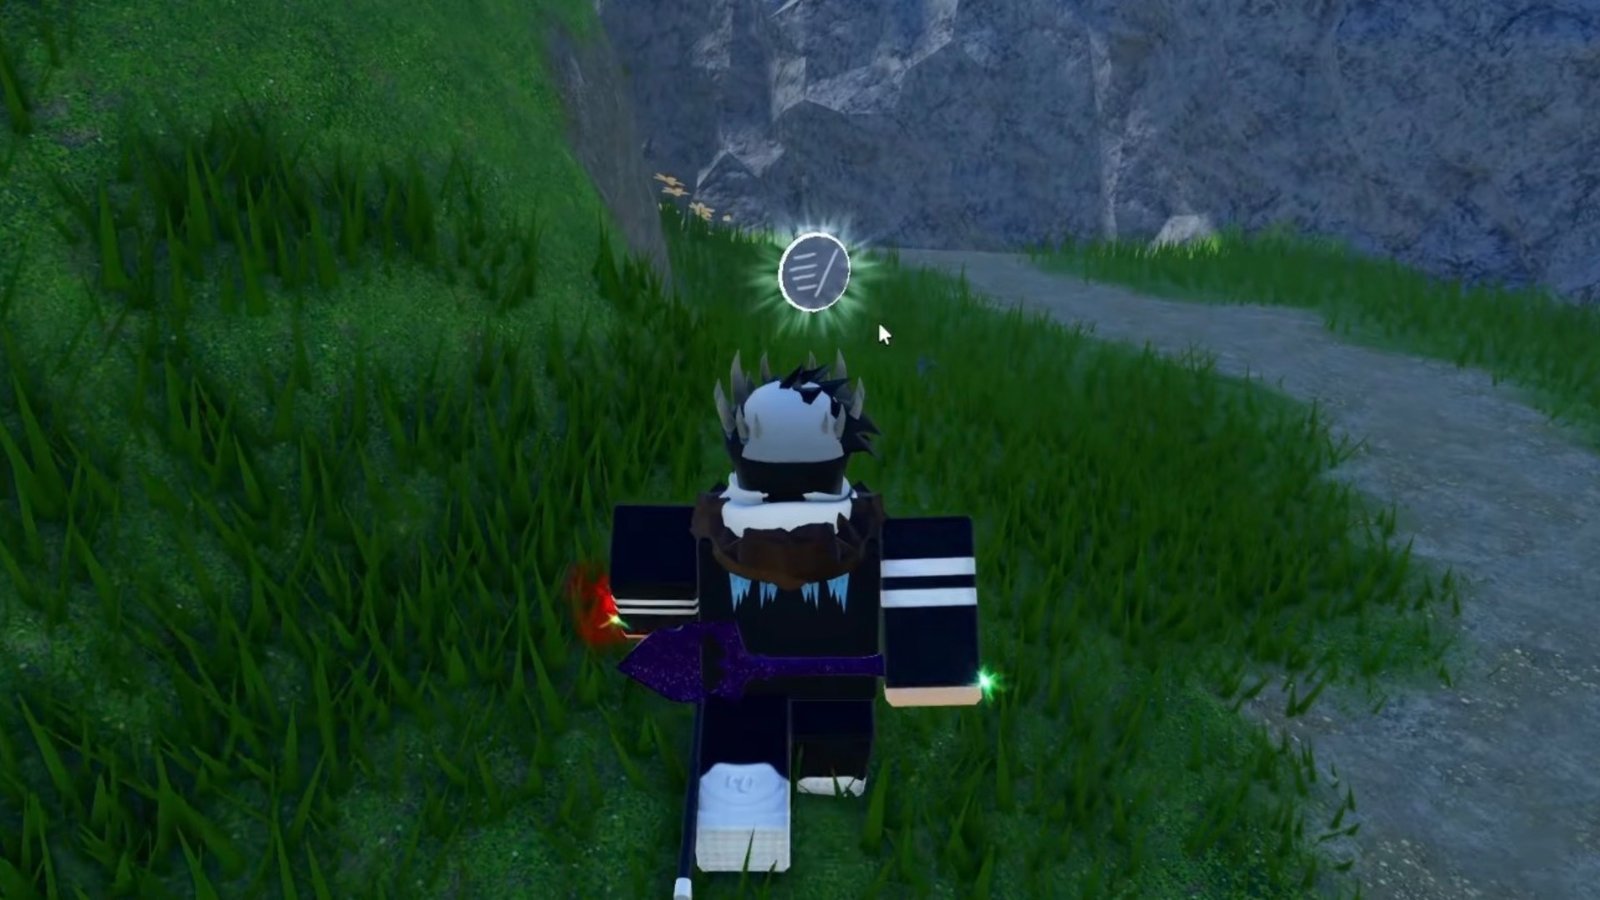
The second Rune, Speed I, is located at the Rubble Creek in Prospecting. Head to the old war statue located beside the Crafting station in Rubble Creek, then follow the path behind that leads upwards. Shortly after, you’ll find this Rune on the ground.
Effect: Gain 2 walkspeed.
Rune #3: Sunblessed

The next Rune, Sunblessed, is located at the Crystal Cavern River inside the Crystal Caverns in Prospecting. At the Crystal Cavern River, you’ll find a waterfall inside the area. Walk behind the waterfall to locate the Waterfall Temple, which is accessed by sacrificing an Emerald, a Starshine and a Diamond. Once you’re inside, you’ll unlock the Sunblessed Rune, along with a new NPC and shop.
Effect: Gain 20% more Luck in the sunlight.
Rune #4: Critical I
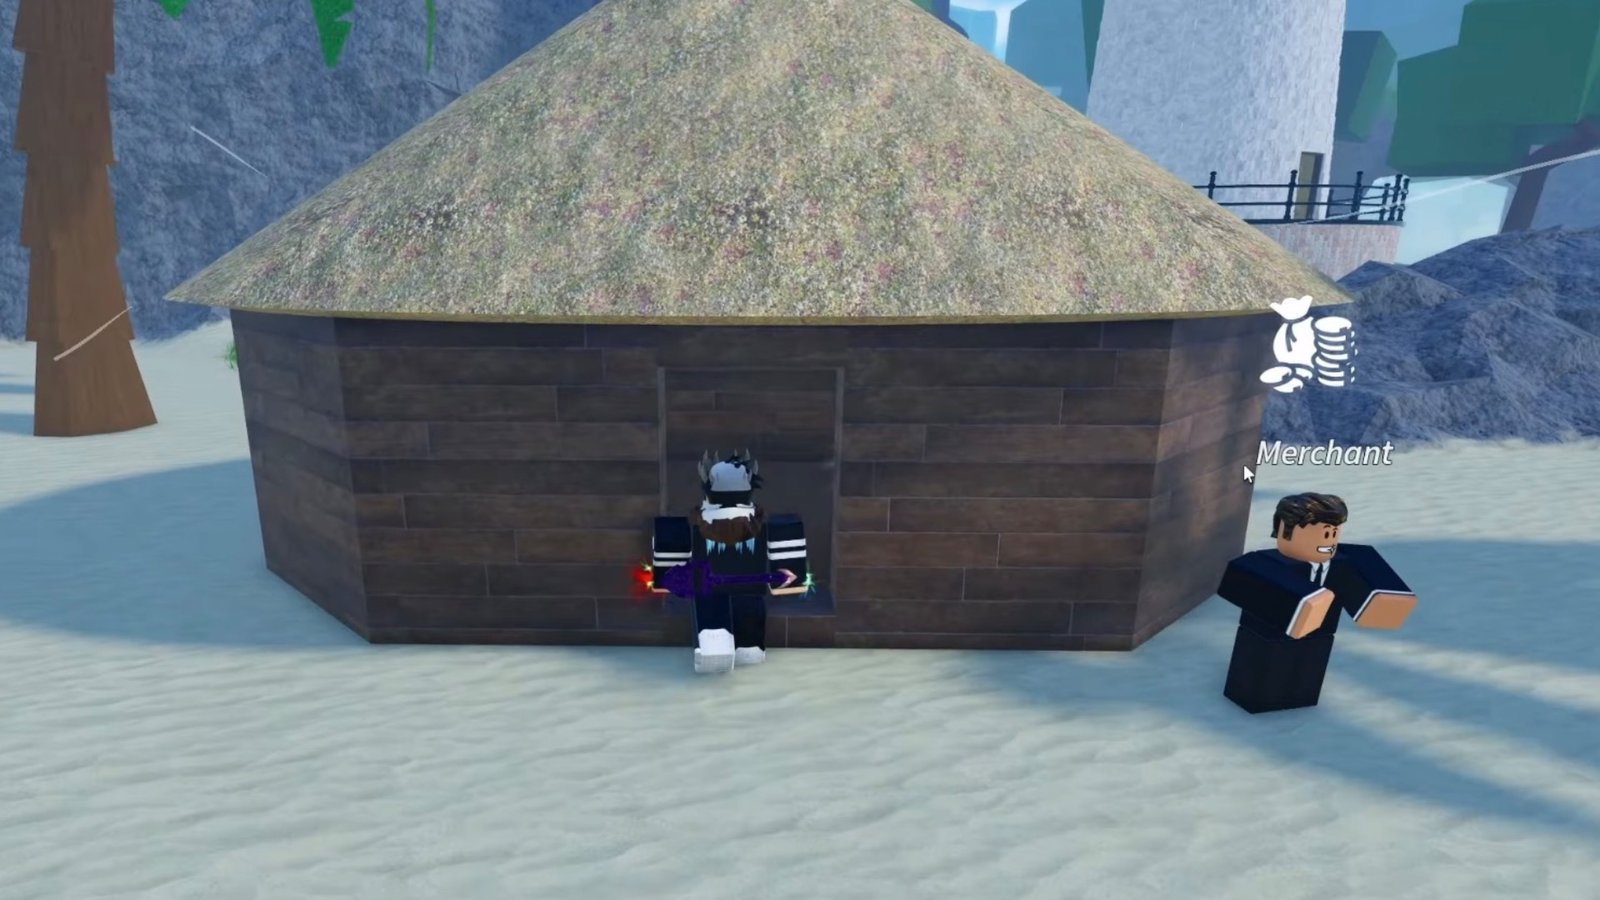
The fourth Rune, called Critical I, is located inside the hut beside the Merchant in Prospecting. Head to Sunset Beach and look for the Merchant near the Lighthouse. You’ll notice a hut behind him. Enter the small hut, and you’ll find the Critical Rune I.
Effect: Digging has a 20% chance to have 2x strength.
Rune #5: Equalizer

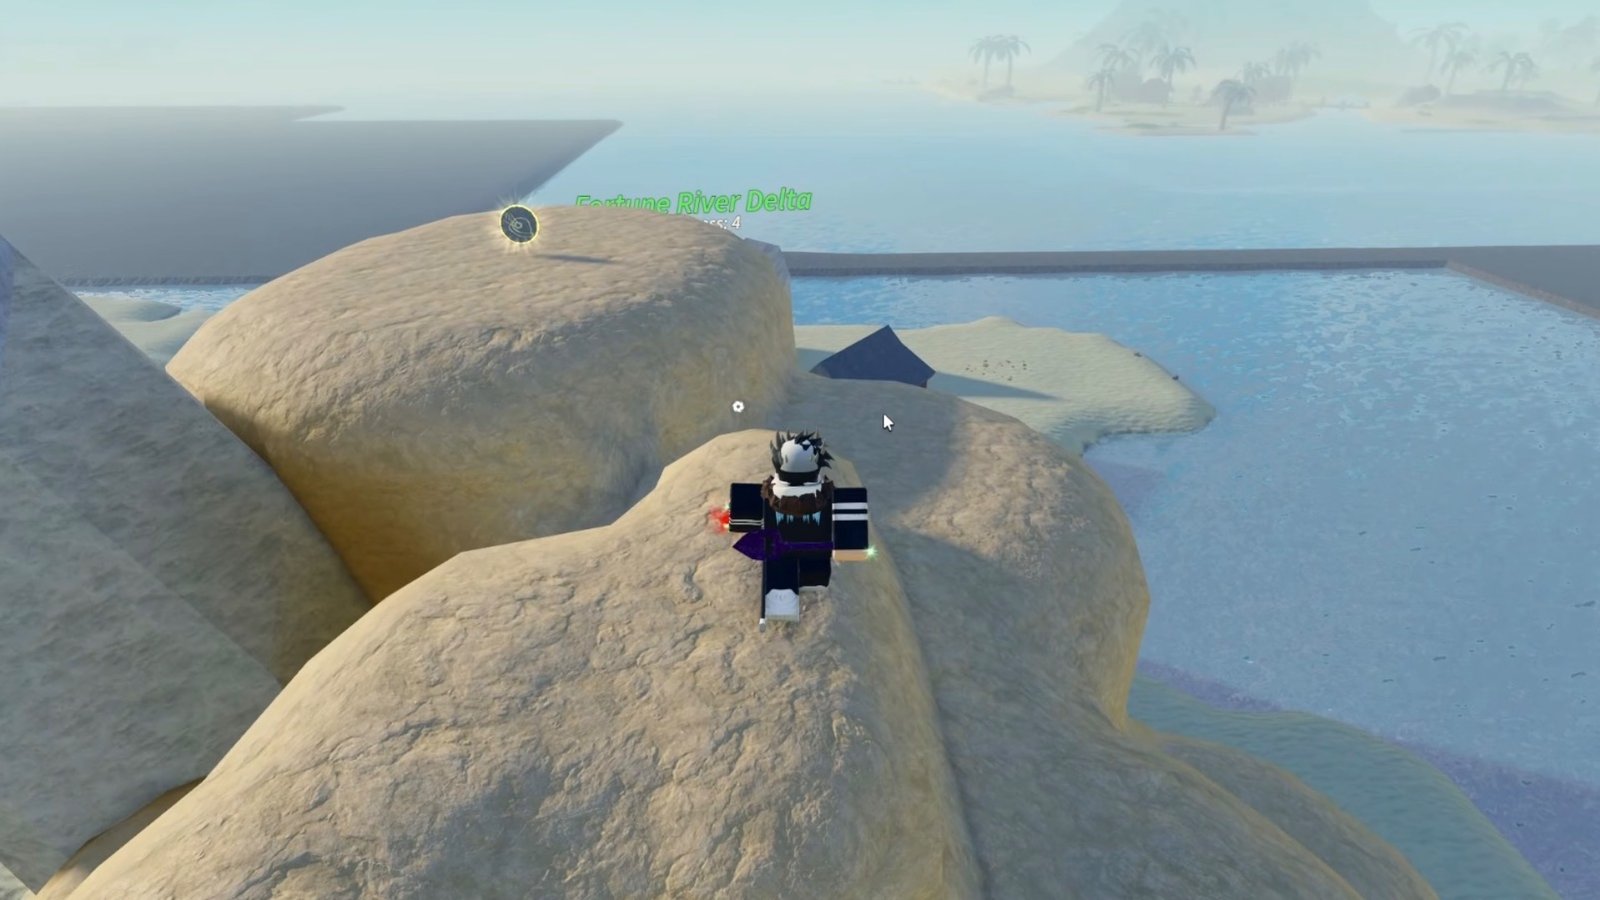
The fifth Rune, known as Equalizer, is located inside the Old Prospector’s cabin at the Fortune River Delta in Prospecting. Head to the Fortune River Delta and find the Old Prospector. Enter his cabin, located right beside him, and inside it, you’ll find this Rune.
Effect: Your dig speed and shake speed are equalized to their average.
Rune #6: Explorer
The sixth Rune, called the Explorer, is located above the sandstone hill at the Fortune River Delta, just above the Shady Merchant in Prospecting. Head to Fortune River Delta, then look for some giant rocks stacked on top of each other. This is the sandstone hill, and you need to climb this to find the Rune. Once you’re at the top, you’ll find the Rock Climber NPC as well. Head to the other end of the rocks at the top to find the Explorer Rune.
Effect: When collecting geodes, gain a 20% chance to collect another geode.
Rune #7: Critical II
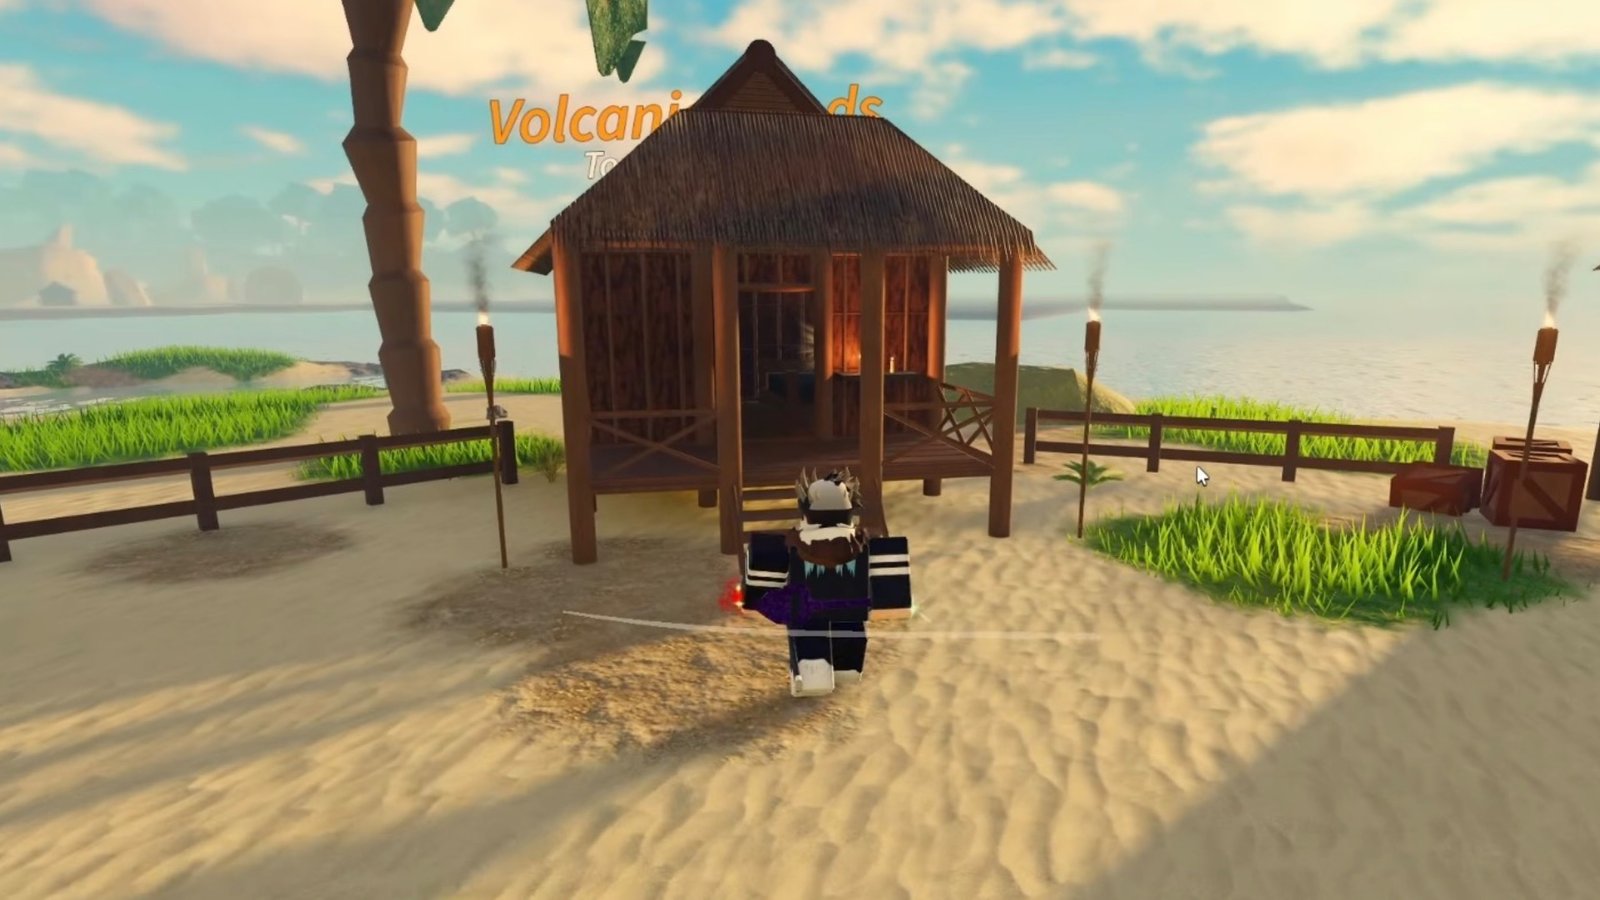
The next Rune, Critical II, is located inside a beach house at the Volcanic Sands on Caldera Island in Prospecting. There will be six houses located on Volcanic Sands. Go to the fourth house on the right, beside the Ranger NPC, to find the Critical II Rune inside it.
Effect: Digging has a 20% chance to have 2x strength. It’s the same as the Critical I Rune, but when paired together, you’ll have a 40% chance to have 2x strength.
Rune #8: Volcanic
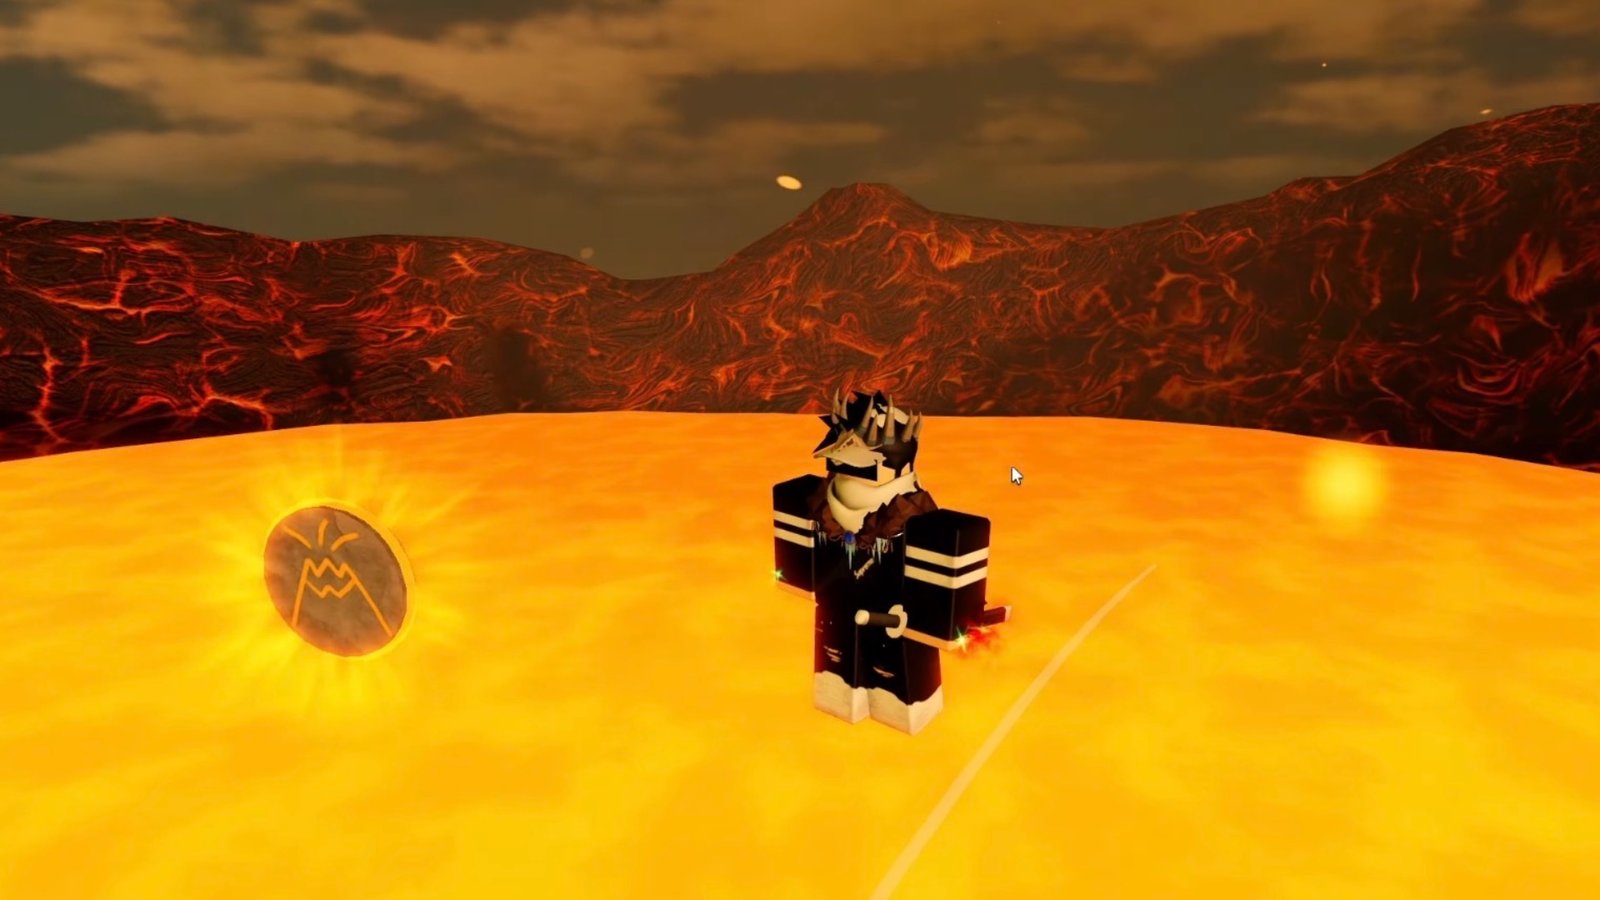
The eighth Rune, Volcanic, is located at the top of the volcano on Caldera Island in Prospecting. Volcano is one of the locations on Caldera Island, and to find this Rune, you need to climb to the top of the volcano. Once you’re there, you’ll locate the Volcanic Rune on the lava bed.
Effect: Ores with the scorched modifier gain 25% size.
Rune #9: Solitude
The ninth Rune, called Solitude, is located below the Lighthouse at the Windswept Beach on Caldera Island in Prospecting. The Lighthouse will resemble the one from Sunset Beach, so do not confuse the two. From the Lighthouse, climb down to the shore below on the right to find the Rune.
Effect: +20% Luck, but lose 10% Luck for every other player within 50 studs.
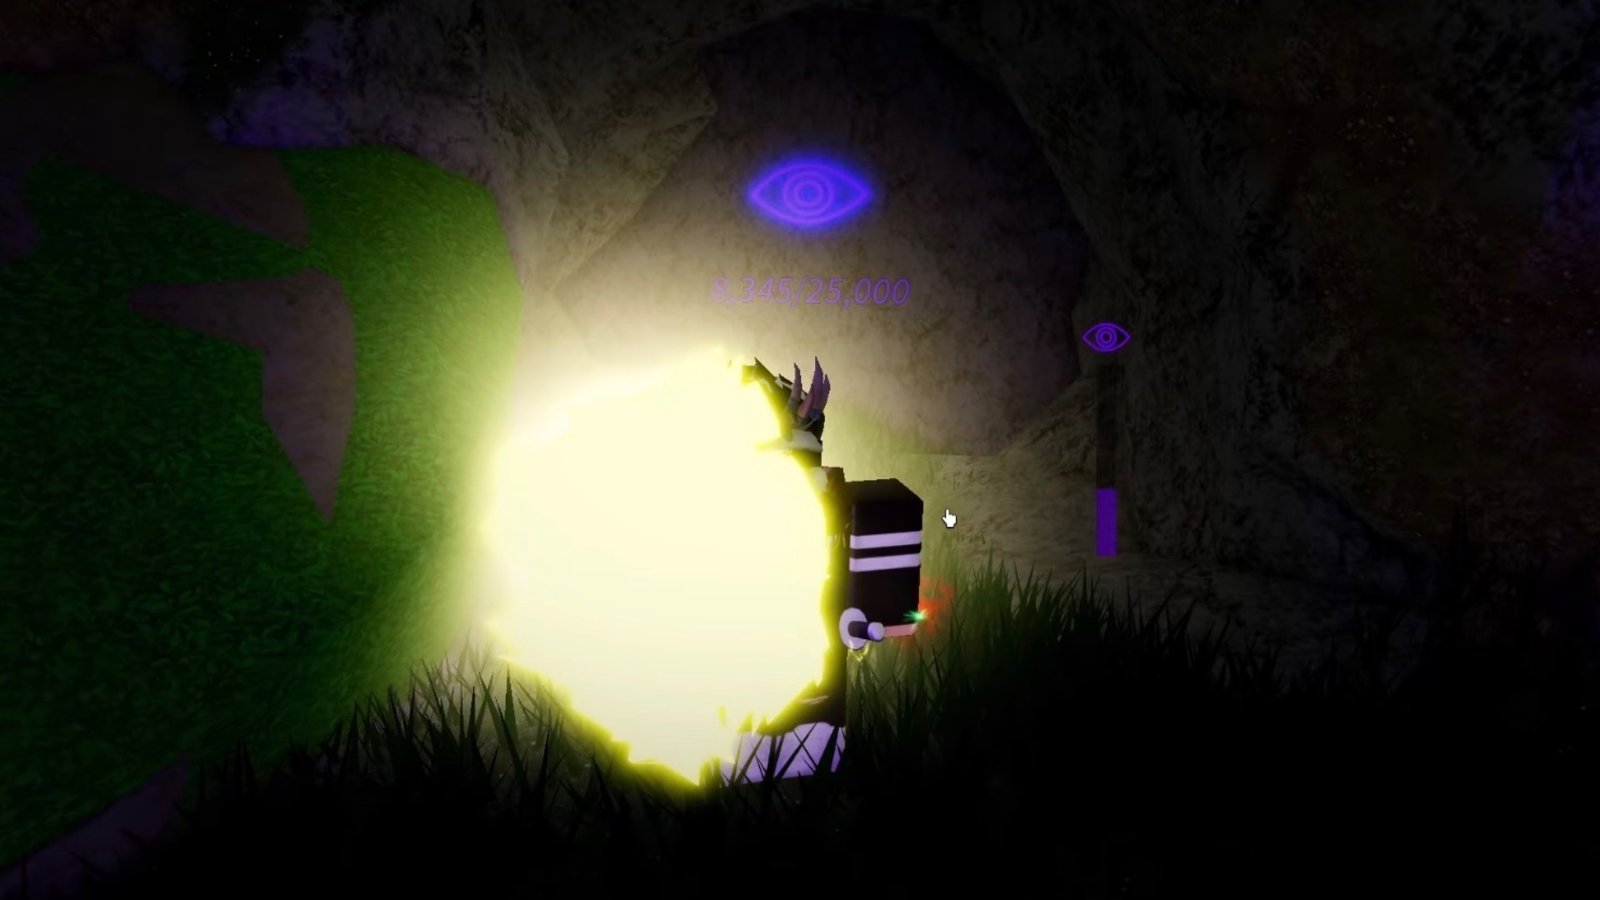
Rune #10: Discovery

The tenth Rune, known as Discovery, is located inside the Ancient Ruins maze, found under the Lighthouse on the Windswept Beach in Caldera Island in Prospecting. To get access to the Ancient Ruins, you need to go inside the Lighthouse, then unlock the trapdoor on the floor with a Volcanic Key, obtained at the Infernal Heart. Then, sacrifice a Catseye, Flarebloom and Uranium to enter the maze. Once you’re in, walk straight and you’ll find the Discovery Rune inside a room, beside a lava wall.
Effect: Chance of obtaining undiscovered ores is increased by 50%.
Rune #11: Summit Seeker

The next Rune, called Summit Seeker, is found near The Waypoint at the Frozen Peak in Snowy Mountains in Prospecting. From The Waypoint teleporter, walk towards the left, and you’ll find the Summit Seeker Rune lying on the ground.
Effect: Gain 5% dig and shake speed for every +1 bonus walkspeed. Pair this up with the Mountain Climber Rune, which we’ll talk about next.
Rune #12: Mountain Climber

The next Rune, known as Mountain Climber, is found just past the bridge in Snowy Shores on Snowy Mountains in Prospecting. Head past the bridge, and climb down to the area below with the help of the rocky platforms. At the bottom, you’ll find the Mountain Climber Rune on one corner.
Effect: Gain 3 walkspeed. Can be paired with Summit Seeker and Speed I.
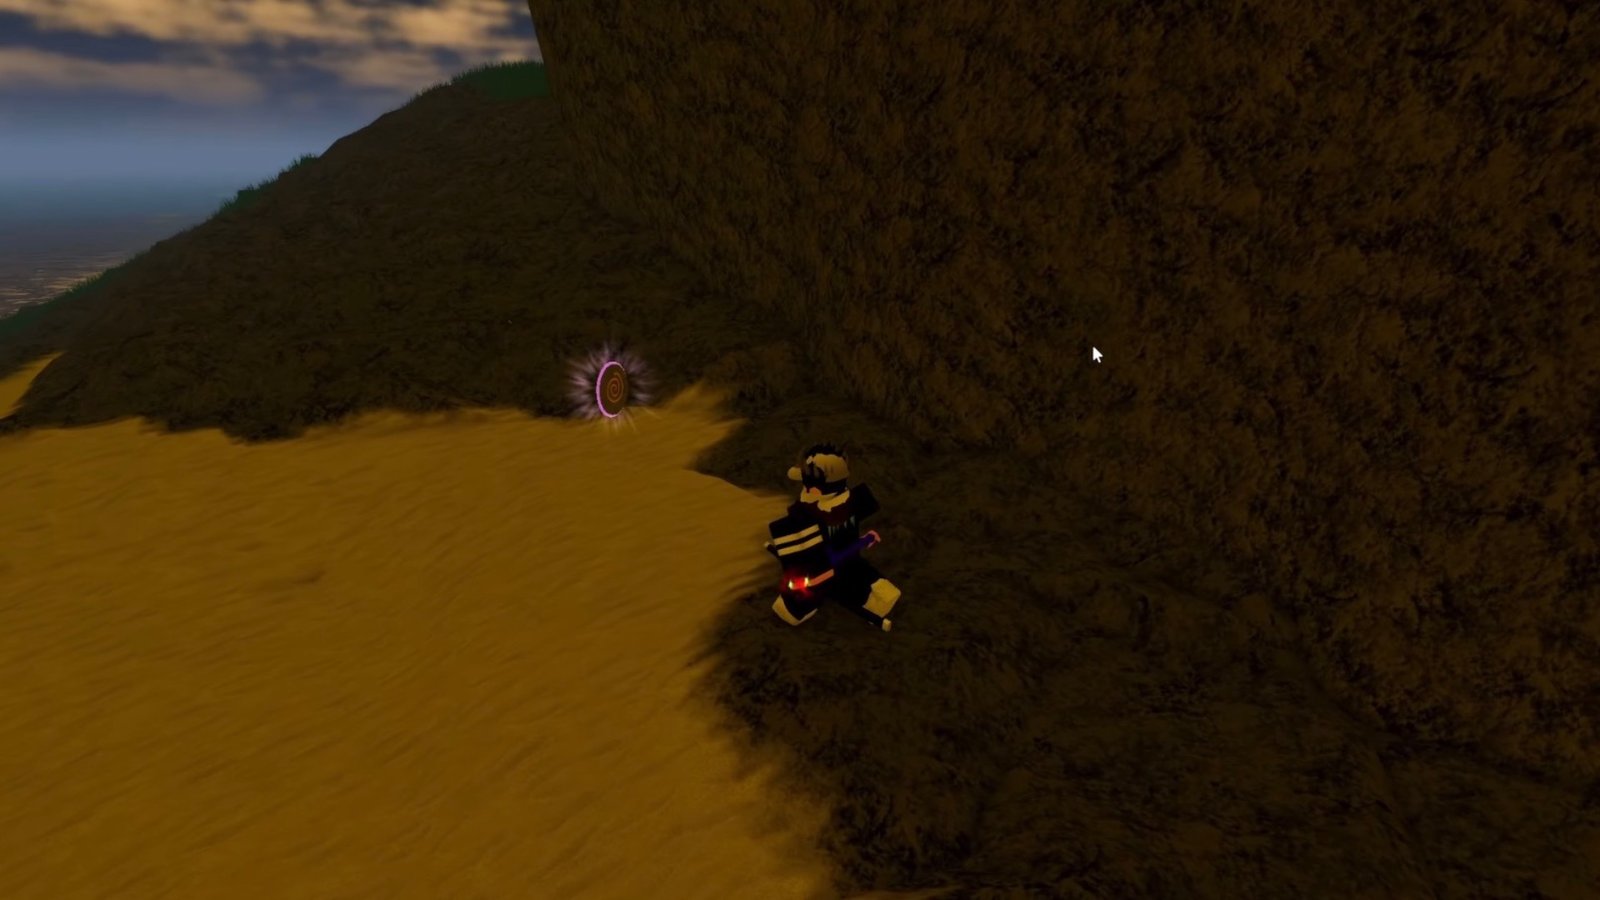
Rune #13: Abyssal
The final Rune, called Abyssal, is located inside the Maze in Abyssal Depths in Prospecting. Once you’re inside the Maze, reach the first intersection. Go down to the right towards the next intersection. Continue until the grass pathways, then turn left from the obby. Go past it, then turn right onto the path forward. Take another right, then a left, and finally another right turn to come across the Abyssal Rune, just before the Abyssal Pan.
Effect: Gain +20% Luck at night.
This brings us to the end of all 13 Runes that can be found in Prospecting. For more extensive and comprehensive guides on this digging experience, check out the ones on the Complete Guide to Shovel Enchants and All Codes & How to Redeem Them in October in the game.
Set TheGameSlayer as your Preferred Source on Google to find us more easily when searching for game guides and news!