


Base Building in Dune Awakening requires juggling many bowling pins at a time to complete the task. You will have your material requirements to find the proper location to set up the base to reap the rewards. There are many ways one can easily fumble on the base buildings. Here is our complete Baase Building Guide for Dune Awakening.
Setting up the Proper Base Building Plan
Having a plan will help us execute the course of action quickly with fewer mess-ups. Here are the steps we will tackle in the base building operation guide:
- Picking the Perfect Location for Base Building
- Setting up Sub-Fief Console
- Open up your Build Tool
- Building the Base
- Customise your Base
- Tips for Base Building
Picking the Perfect Location for Base Building
A flat land is a must for a perfect base-building site, as you will be able to fit more buildings without spending time aligning the building pieces perfectly. The location carries a huge importance for your survival, as the base you are planning to build should be near the key crafting materials. The materials that you should watch out for are Ores, Water, Lab, and Granite Stones.
- Water and Granite Stones are necessary for the base. These are key materials you should look for around the area of your base location.
- Ore around your base will improve your crafting experience.
- If you have found a lab around your base location, then you will have access to schematics. You can sell the schematics to make a good amount of money.
Setting up Sub-Fief Console

The Sub-Fief Console must be installed first on the ground before starting to build the house of cards. The type of Sub-Fief Console will also come into play, different types will impact the area coverage. Initially, a Sub-Fief Console might not cover a whole lot of area, but later, with research upgrades, you can expand the area coverage of the Sub-Fief Console.
Open up your Build Tool
The next step of action is to learn about the Build Tool, found on the right panel. The tool set provides the options: Build, Piece Picker, Repair, Move, and Demolish.
- Build – It allows you to build the object. You will also see a projection of the objects you want to build. The projection of the building pieces will be only visible if you have equipped the construction tool.
- Piece Picker – Allows you to sample and pick a building piece for smoother placement.
- Repair: Basically, repairs the damage done to the piece after combat.
- Move: Moving decoration and production items from one place to another.
- Demolish: Destroy the selected building piece.
Building the Base
While you can easily build your base without any care, knowing what to do will help out set up a base that will be robust with a minimal number of flaws. We highly recommend you to get a handful of Granite Stones before you start thinking about building anything in the game.
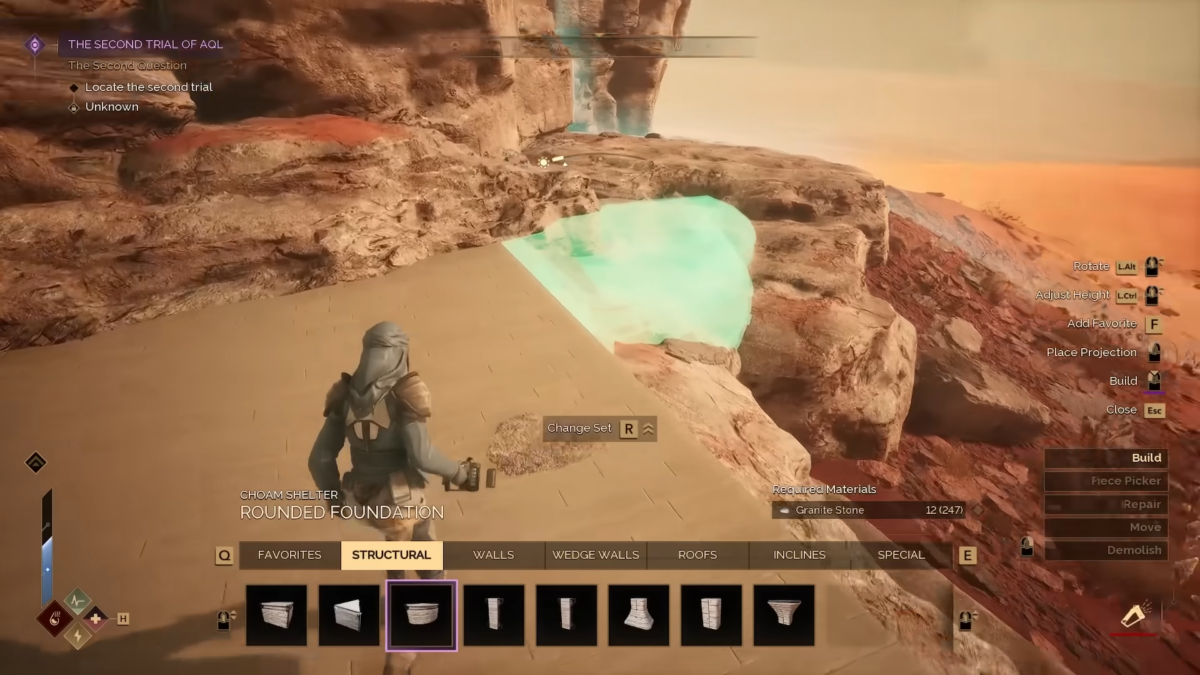
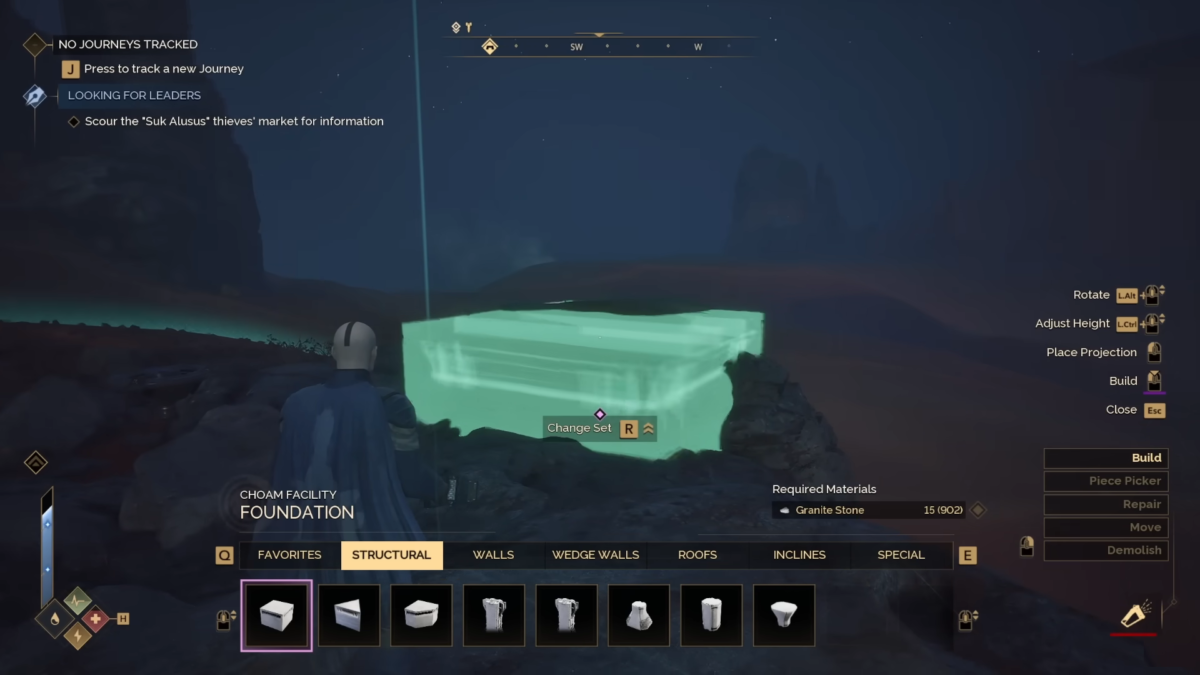
Setting up the Base Foundation: Head over to the Choam Facility> Foundation> Structural section to start building a proper Foundation for your base. Here, you will see a lot of options for base building. But the first item on the menu that you should focus on is laying out the Foundation for your base.
Just head over to the Structural section, you will see a wide variety of selection for building pieces, choose Foundation and start placing them on the ground. If you don’t like the alignment or the direction of the foundation on the ground, you can always change it with options.
Customising Building Pieces:
- You are allowed to rotate the piece by pressing L.Alt + Mouse Wheel up or down.
- You will be able to adjust the height of the building piece by pressing L.Ctrl + Mouse Wheel up or down.
- A simple Left-Click will allow you to place the projection, and finally, holding the Left-Click will allow you to build the item. The same mechanics apply to all the structural pieces you see in the building section.
Select Foundation Structure under Structural and start building it on the ground. Each Foundation Structure will cost around 15 Granite Stones. After the Foundation, start building walls, and cover the corners with rounded walls. You will see the option for Walls next to the Structural section. After the walls, you can focus on the Roofs and Railings to add more to the base.
Set up Power: Power your base by using a Fuel-Powered generator at the beginning, which turns Fuel Cells into Electricity. A good little amount for initial base building, it will be sufficient to cover a decent number of crafting stations in the base.
Move your Base: After crafting your perfect base, you can move it without micromanaging everything. Just build a Solido Replicator in the Fabricator to store the blueprint version of your base. This can be used to carry out bases in different areas without starting from scratch. Solido Replicator will bring the blueprint but not the base itself, you must craft it using the blueprint.
Customise your Base
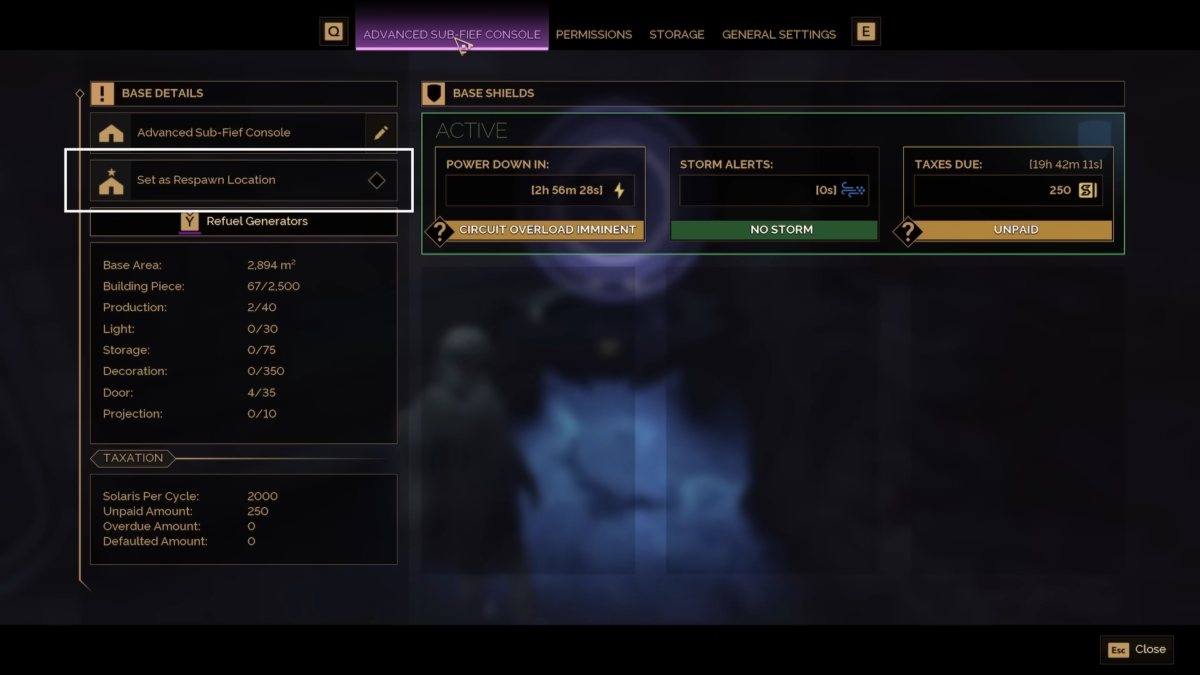
Interact with the Sub-Fief Console, in the menu, head to the Sub-Fief Console Section next to Permissions to get the base details. Here, click in the Sub-Fief console menu and add your name for the base. This section also gives you the option to set up a respawn location for your character. The base detail also covers information on Decoration, Door, Projection, Light, Production, and Building Piece. You can also view your taxes for your base.
Setting up Permissions: Head over to Permissions in the Sub-Fief Console menu, which will allow you to add players (friends) to access your base. You can also gain access to the permission feature via the Players section
- Owner: The player who owns the building can create and destroy any piece of the building.
- Associate: It allows the players to open doors, access your storage, use the machines, and place items.
- Co-Owner: You can promote your friend to Co-Owner, which enables the function to build. Co-Owner title also allows the players to remove/add other players, and lastly, adjust permission for your base.
Note: Co-Owners will not have the ability to demolish any part of the base; it is only allowed by the Owner.
Permission Ranking Details: You can set up access levels by pressing F to Manage, to your storage containers or doors by locking them to a specific group of people. Here, you are allowed to set the access level to Public (Lv.5), Guild (Lv.4), Associate (Lv.3), Co-Owner (Lv.2), and Owner (Lv.1). The level number will be visible on any door in the base, it informs the people about the access detail on the door or storage.
Setting up Circuits: Circuits will allow the machine to pull its required material from the storage, process it and store the end product in the same or different storage. Every machine in the game has an Input and an Output. The input will help the machine to pull the materials from its source, and the Output will send the finished product to its designated source.
You can set up the machine’s Input Circuit 1 to the storage container’s Input Circuit 1, and the machine’s Output Circuit 1 to the Storage Container’s Output Circuit 1. Here, the machine will pull the materials from the storage container via circuit 1 and place the finished product back in the storage container via circuit 1 in the output
Tips for Building
- Never put too much energy into crafting your first building. As you progress in the game, you will move to other areas, and abandoning your base will be a common occurrence. So, always put bare minimum effort when you are crafting your first base.
- Even if you don’t have Granite Stone to craft the building, you can set up a blueprint to craft the real building later. Blueprint acts as a placeholder for the real building.
- When you abandon your Sub-Fief Console, it can get claimed by others, or the base will start deteriorating and will eventually become part of the sand.
- You are allowed to build three Sub-Fiefs, but one must be an Advanced variation.
- Building at night is preferable compared to the daytime, where dehydration and heatstroke. Night also brings its fair share of problems, which include getting caught in the searchlight and enemy patrols.
Once you are done with setting up your base, the next thing you may want to do is bookmark our guides on all Trainer locations in Dune Awakening, and one of the early contract missions, ‘Wrecking Crew’ quest.