


Pragmata has mountains of customization, from weapons to Mods, even costumes for both protagonists. With all these options, it can be daunting to try and put together something that works.
To solve this issue and help propel you through the later areas of Pragmata, I’ve put together a few builds I think are worth giving a shot. Whether you’re here to hack, run and gun, or put your life on the line, I guarantee you’ll walk away with something worth running.
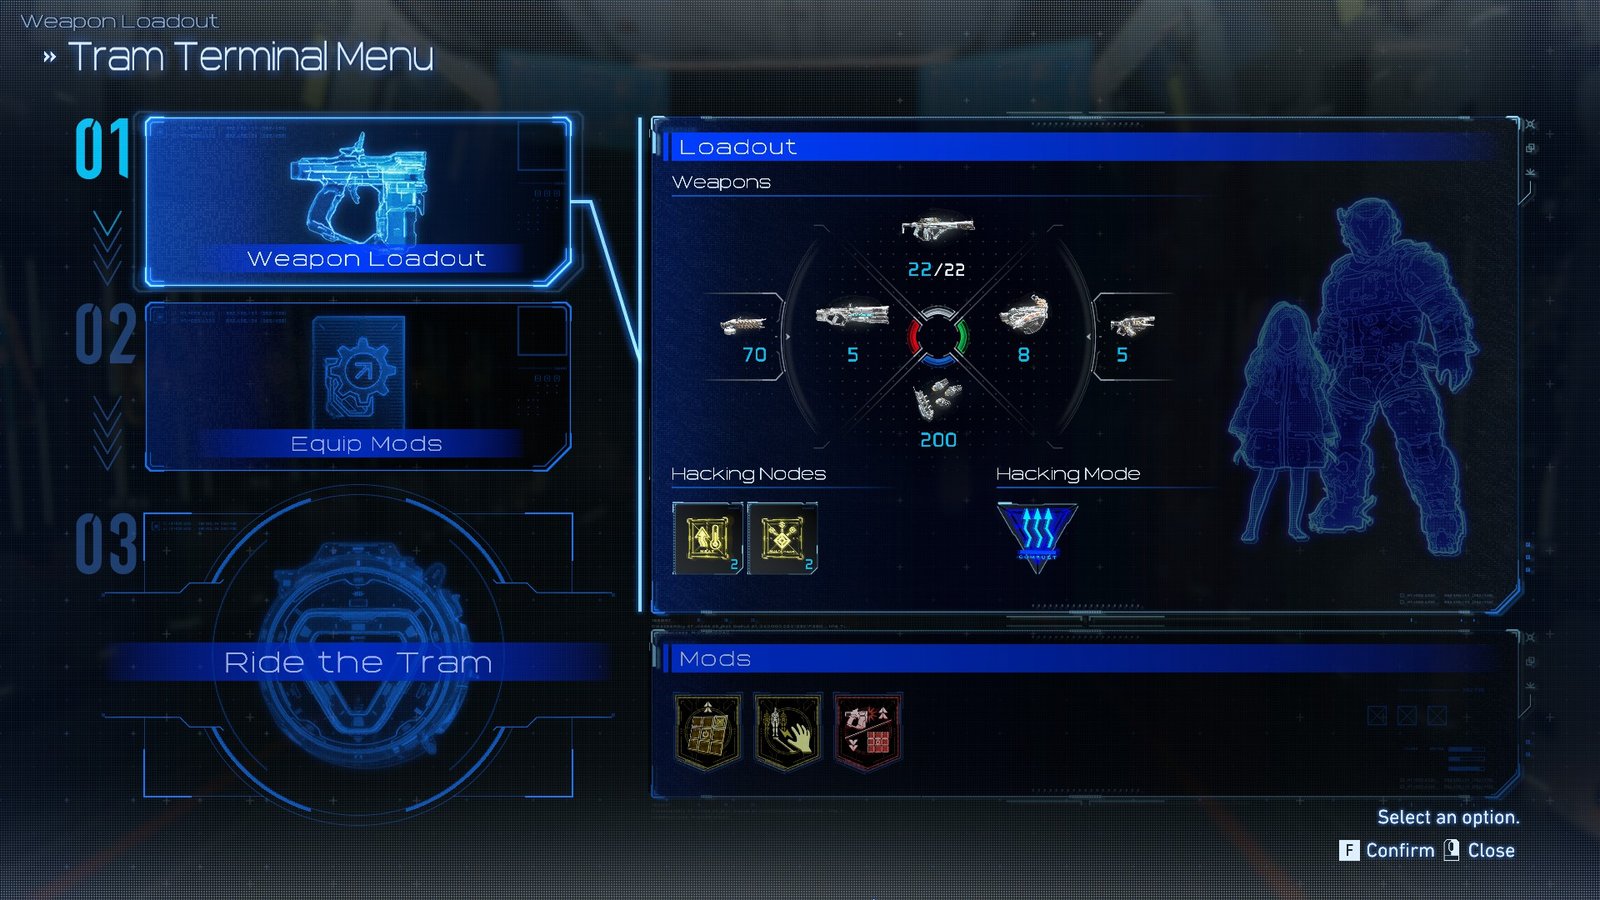
Build 1 – Hybrid Heat Buildup
| Recommended Weapon Kits | Pulse Carbine, Shockwave Gun, Statis Net |
| Recommended Hacking Nodes | Heat, Multihack |
| Recommended Hacking Mode | Overheat |
| Recommended Mods | Performance Boost, Relay Amplifier, Analog Aggression |
While not properly introduced until a ways into the Mass Production Array, all enemies in Pragmata have an Overheat bar, positioned under their HP. As the enemy takes damage, they’ll build up heat, eventually staggering for a heavy duty haymaker from Hugh.
Our first build looks to maximize these openings, using a combination of hacking via the Heat hacking node and the Pulse Carbine. While lacking in damage compared to the Grip Gun, the Pulse Carbine builds mountains of heat with continuous fire, especially once the Heat hacking node is active.
Your various other weapons are largely up to preference, but the Stick Bombs get a special shoutout, minimizing the time you need to spend jumping between nodes for your hacks.
The largest buff to this build comes from the Overheat hacking mode, which swaps out Open nodes for Heat nodes when the enemy is vulnerable, allowing for ridiculously fast staggers.
For mods, top it all off with Performance Boost to increase Heat’s uptime, Relay Amplifier for a bit more breathing room, and Analog Aggression, since most of your actual damage will come from your weapons.
Combo the Heat hacking node with Multihack to build up heat on entire crowds, and you’re golden. Be ready to abuse the frequent invincibility frames of the critical attack animation; it’s saved me more times than I can count.
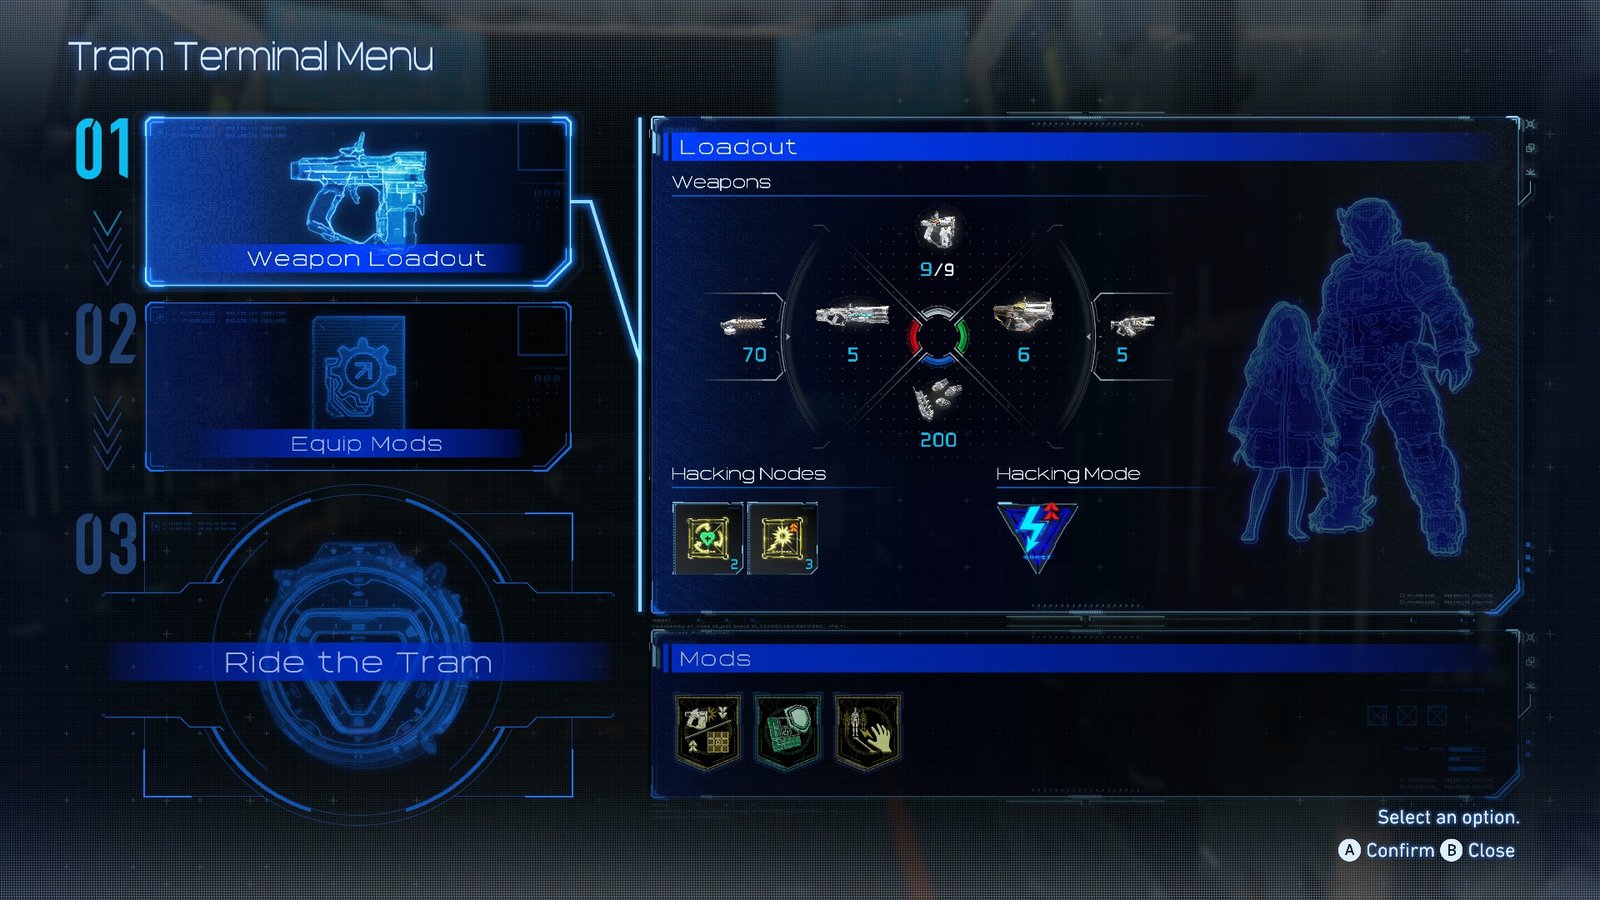
Build 2 – Pure Hacking Sustain
| Recommended Weapon Kits | Grip Gun, Riot Cannon, Sticky Bombs |
| Recommended Hacking Nodes | Drain, Expose |
| Recommended Hacking Mode | Boost Mode |
| Recommended Mods | Digital Dominance, Relay Amplifier, Hyperfocus |
Now let’s say you wanna lean on your automaton daughter a bit more for fights, we’ve got you covered. Our second build rewards your ability to hack during the midst of combat, amplifying both damage and granting Hugh some much-needed healing.
I recommend the Grip Gun for your main weapon, as its substantial damage and quick reloads make it great at finishing off suffering bots. Your Tactical weapons should focus on keeping the enemy still, so both the Net and Riot Cannon work wonders.
For extra damage, the Laser is great at punishing trapped enemies, but our focus here will be on making the most of hacking damage over weapons.
As such, our first Mod is Digital Dominance, buffing our hack damage in exchange for weaker weapon output. Pair it with Relay Amplifier and Hyperfocus to ensure you never lost a lock, and you’ll be able to fry the other guy every time.
For Hacking Nodes, Expose allows follow-up hacks to deal massive damage, both to bot HP and stagger thresholds. Pair it with Drain for some extra healing as you focus on hacking, and you’ll be able to facetank most enemies.
Finish the build with the Boost Mode chip to empower your hacks whenever the enemy is already weakened, putting them on the ropes 24/7.
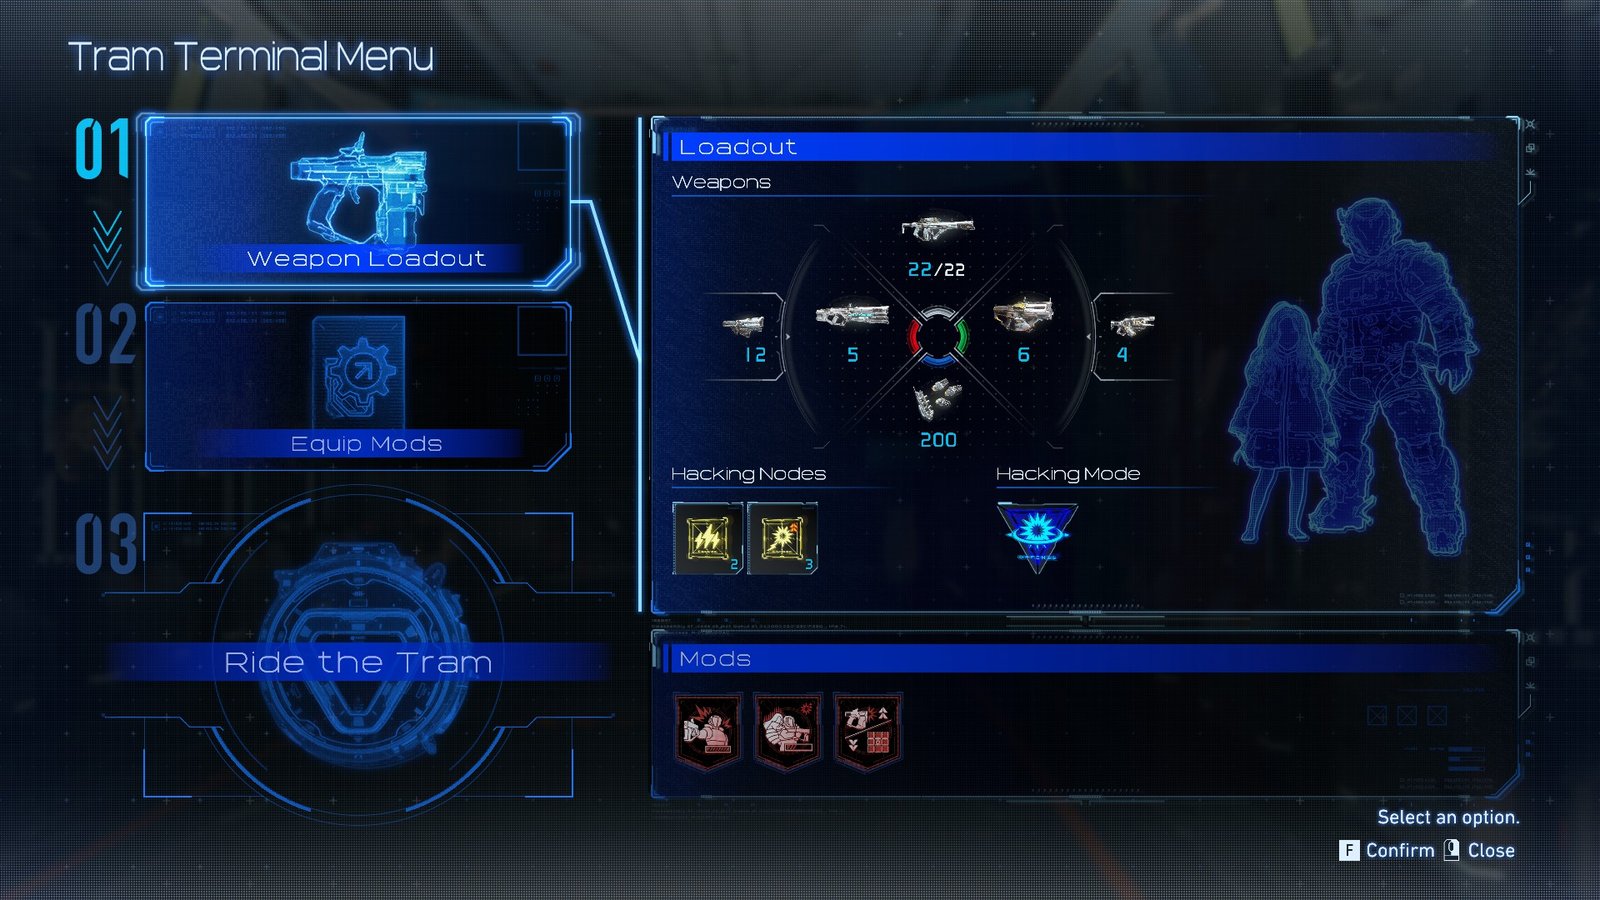
Build 3 – High Risk Gun Focus
| Recommended Weapon Kits | Grip Gun/Pulse Carbine, Drone Hive, Shockwave Gun |
| Recommended Hacking Nodes | Freeze, Expose/Drain |
| Recommended Hacking Mode | Offense Mode |
| Recommended Mods | Cursed, Analog Aggression, Optimal Performance |
Want to give Diana a day off? Our final build focuses entirely on Hugh’s damage output, stacking weapon buffs, and flying close to the sun thanks to the Cursed mod. Cursed is the linchpin of this build, granting a huge 20% damage buff in exchange for cutting your max HP by half.

We can make this work for us though, combining Cursed with Optimal Performance, extra damage at max HP, and Analog Aggression to keep our gun the priority.
We want big damage here, so pack the Shockwave Gun and Charge Piercer for really stupid numbers. The Drone Hive is also technically a weapon, meaning you can toss out the swarm and swap to another gun to maximize your amped damage.
As you can expect, Hacking Nodes are less of a priority here, though Freeze and Drain seemed the most useful for top-offs and keeping enemies easy prey. The Offense Hacking Mode lets you turn some of your gunshot damage into extra hack damage, giving a boost to the hacks you need to open up enemies.
You’re very squishy with this setup, but you’ll be able to tear through everything in your way as you venture across the cradle. Make sure that Dead Filament lives up to its name!