


Act 2 is a real difficulty spike in Slay the Spire 2, a theme set by the original. Harder fights, meaner events, and some real bruisers in the boss line-up mean you’ll need to do everything you can to prepare.
The biggest wall blocking progress through Act 2 is the Knowledge Demon, a boss that forces players to choose between a number of debuffs that make the fight harder the longer it drags on.
Let’s go over its pattern, mechanics, and what you can do to be ready should the Knowledge Demon bar your path.
The Knowledge Demon’s Pattern

Each and every boss in Slay the Spire 2 follows a preset pattern, and the Knowledge Demon is no different. Knowing is half the battle, so let’s go over each step of the fight!
Turn 1 – Demonic Choice
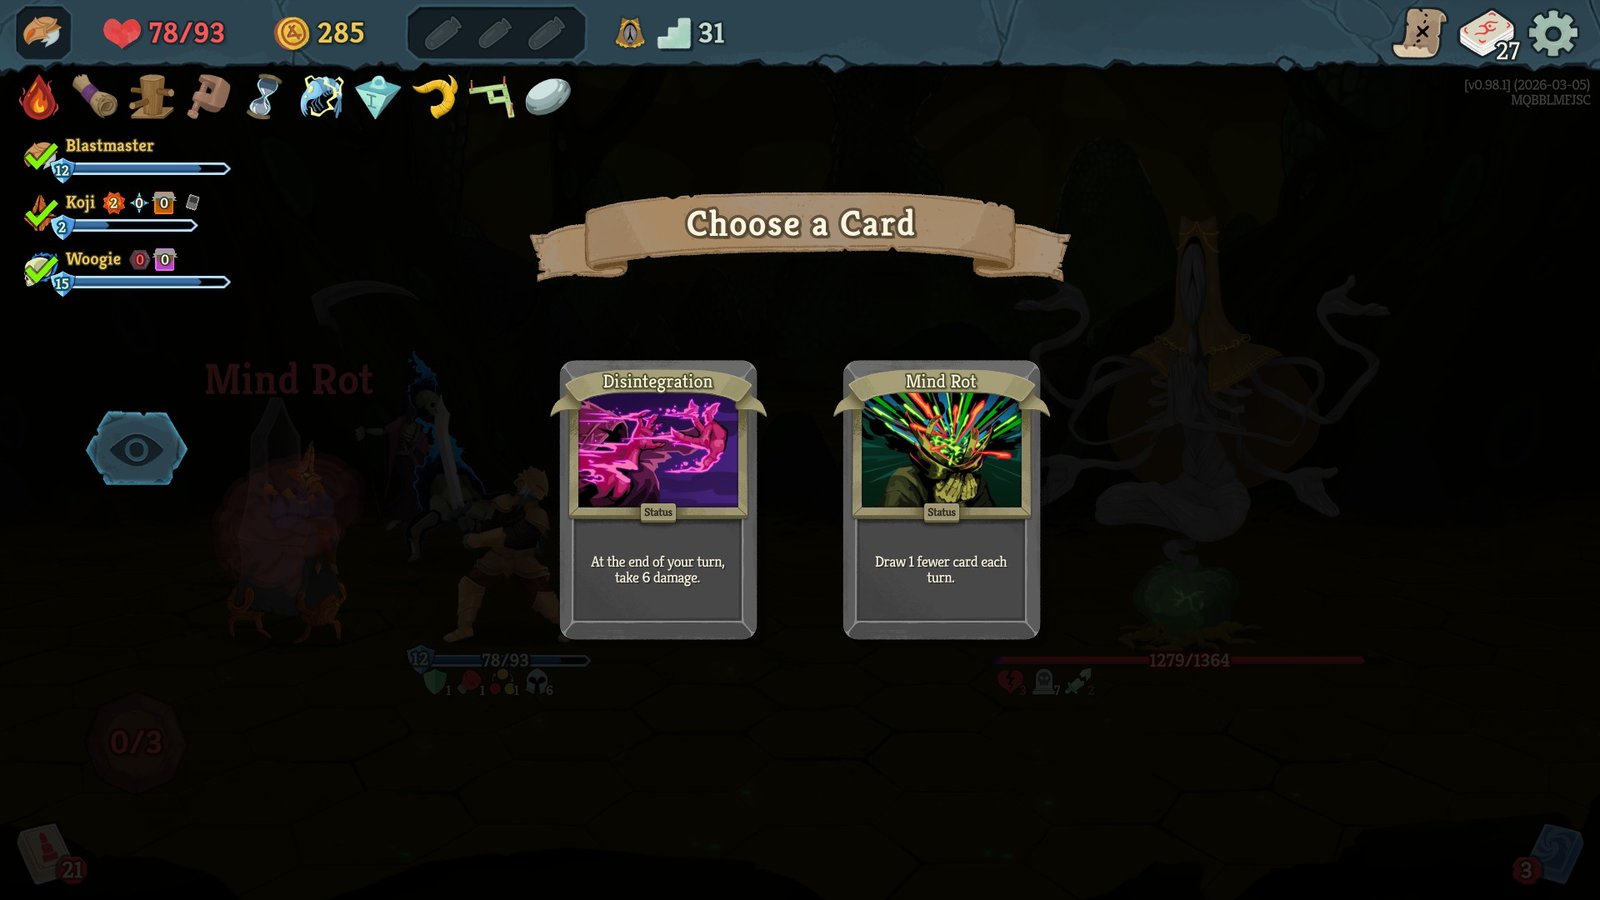
The battle opens with the Knowledge Demon preparing a debuff, a hex that forces you to choose between two status cards. The first choice is always between Disintegration and Mind Rot.
Disintegration deals 6 damage to the Climber at the end of every turn, while Mind Rot lowers your start-of-turn draw by 1. Both of these are major hurdles, but the choice largely comes down to waht you can handle.
If you’ve got the Block to keep up with Disintegration’s damage alongside the Knowledge Demon’s standard attacks, it’s worth taking. Alternatively, if you have cards that let you draw extra cards, Mind Rot won’t be much of a hindrance.
The Knowledge Demon always restarts it’s pattern with this attack, changing the selection of Status cards each time. Other possibilities from rotation 2 onward include Sloth, limiting you to three cards a turn, and Sap, lowering your maximum Energy.
Both of these statuses are much harder to play around, so it’s best to play aggressive as possible when taking on the Knowledge Demon.
Turn 2 – Blast
A much simpler follow-up, turn 2 sees the Knowledge Demon firing off a burst of magic, ranging between 16-18 damage during the first rotation of the fight.
This is a slower turn for you to get some damage in while defending yourself, but don’t spend anything that might exhaust or can be retained for the next few turns.
Turn 3 – Barrage
The Knowledge Demon fires off a three hit strike, threatening a whopping 24 total damage right out the gate if you’re not careful.
This is the attack to really hunker down against, especially on subsequent rotations. If you’ve got weakening effects or strong defensive options, now is the time.
Thorns do wonders, as does the Ironclad’s Flame Barrier, to return some pain while keeping yourself safe. Whether you want it or not, this battle will be a test of endurance, so make sure you’re not taking unnecessary damage where you can avoid it.
Letting yourself get tagged here can really slow you down, so make sure you have some kind of defensive options before you get this high on your ascent.
Turn 4 – Rejuvenating Runes
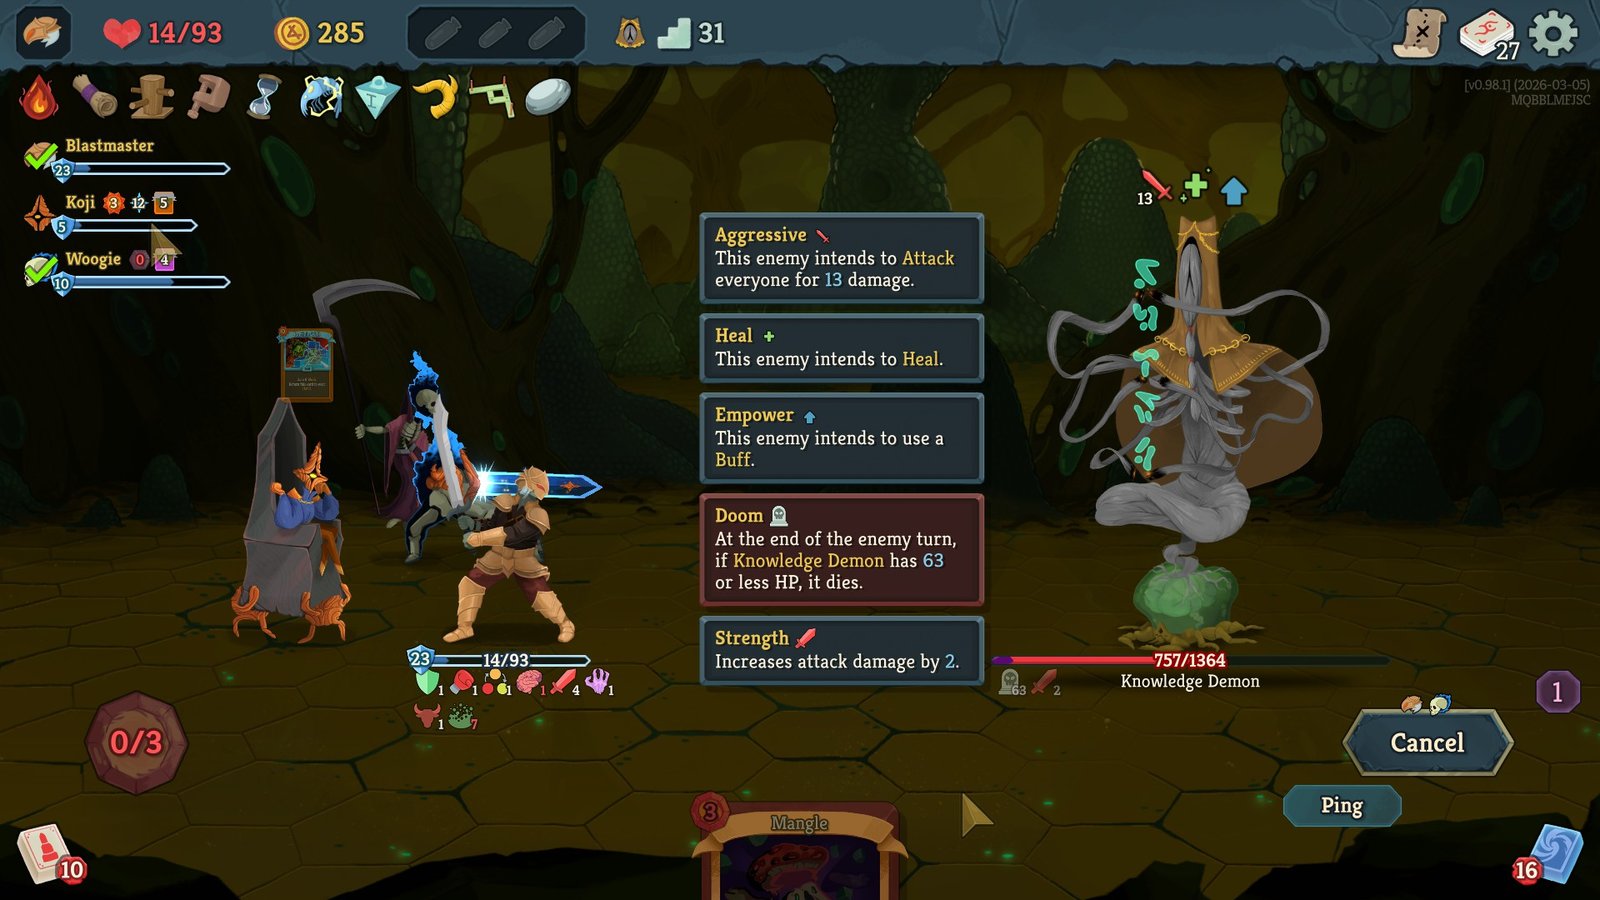
This turn is the big flashy attack every boss seems to have now, marking the end of the pattern by projecting a series of runes into the air.
These runes deal moderate damage, about 11 during the initial rotation, heal the Knowledge Demon, and grant it two strength for the rest of the fight, permanently buffing its damage output.
That damage buff, paired with the heal and the constant harassment of the turn one Curse, is what makes this fight such an uphill battle. After this turn, the Knowledge Demon reapplies the Curse, giving you another choice of status cards to deal with for the rest of the fight.
Playing too passively will see the Knowledge Demon simply outpace you, whittling you down with constant damage while keeping itself healthy.
As such, it’s paramount that you keep on the offensive, applying your effects, getting in your damage, and always progressing a game plan your class centers around.
While you can’t plan your entire build around a fight you’re not sure to get, there are some things you can avoid. The biggest killer in this fight, and most of the harder battles in Slay the Spire 2, is apathy.
You need to come into every fight with some kind of goal, be that reaching the point you can play important Powers, set up strong combos, or utilize run-defining relics.
Whatever your class or build, go in with the skeleton of a plan, and you’ll be in a much better spot than if you just constantly played back.
After the Fight
With another boss down, you’ll get a choice of a Rare card, a chunk of gold, and a visit with another Ancient, likely the First Demon.
His Relics are extremely powerful, but each comes with a hell of a downside. These relics can define your endgame, so make the choice carefully as you ascend into Act 3: the Lab.