


Poppy Playtime brings the tension of survival horror with the twist of puzzles to make the game feel more hectic. You must figure out how to solve the intricate puzzles while watching out for the furry monsters waiting in the dark. Here, in the guide, we will give you a full walkthrough of the Escape the Prison quest in Chapter 4 of Poppy Playtime.
List Of Objectives For Escape The Prison Quest
Here is the list of objectives we must tackle to proceed with the mission. You follow each one to get to the end of the route.
- Getting the Red Hand
- Surviving the Enemy Ambush
- Solving the Cell Puzzle
- Getting the Red Keycard
- Retrieving the Yellow Wheel
- Solving the Cage Puzzle
- Solving the Block Puzzle
- Powering the Blue Scanner
Getting the Red Hand
The first goal is to look for the Red Hand, which will come in handy in getting past scanners throughout the mission.
- First, make your way to the area with a broken ladder on the side. Looking up will reveal a metal bar that we can use to lift up to the upper floor. Take the vent to your right at the end of the room.
- Keep moving straight until you reach the end. Here, through the hole on your right, use your hand on the scanner down below. Put your hand on the scanner until the blue color turns to green.
- Now go back to the starting place and head through the recently opened door. Here, get to the other side of the room via the walkway in the middle. Close the door to the cell to gain access to the cell on its left. Open the door to the cell and head inside, you will find a giant hole in the middle of the floor.
- Jump down the hole and you will land in a cell through the floor below. Open the cell door to get out, and head towards the active cell across from your cell, to your left. The active cells would have a green light above them.
- Open the door to the room, and then use your hands to pull out the plyboards covering the hole at the bottom of the wall. Don’t head inside the hole, we must activate a scanner before heading inside. So get out of the cell, look to the left and you will find a scanner.
- Use your hand on the scanner to activate the cell next door. Then you can head through the hole in the wall (used to cover it with a playboard), turn left, and then walk out of the area by going through another hole on your left.
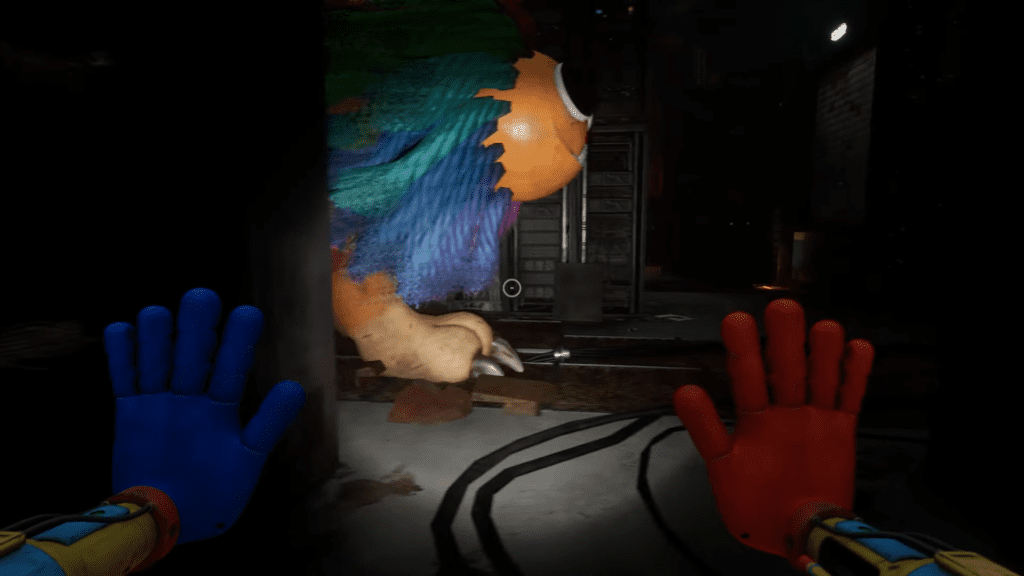
- Open the door, get out of the cell, and take the doorway on the left. Here on your left, you will find a dead body at the bottom of the wall along with a Red Hand. Grab the Red hand and then get out of the room by taking the same doorway we used to enter.
Surviving The Enemy Ambush
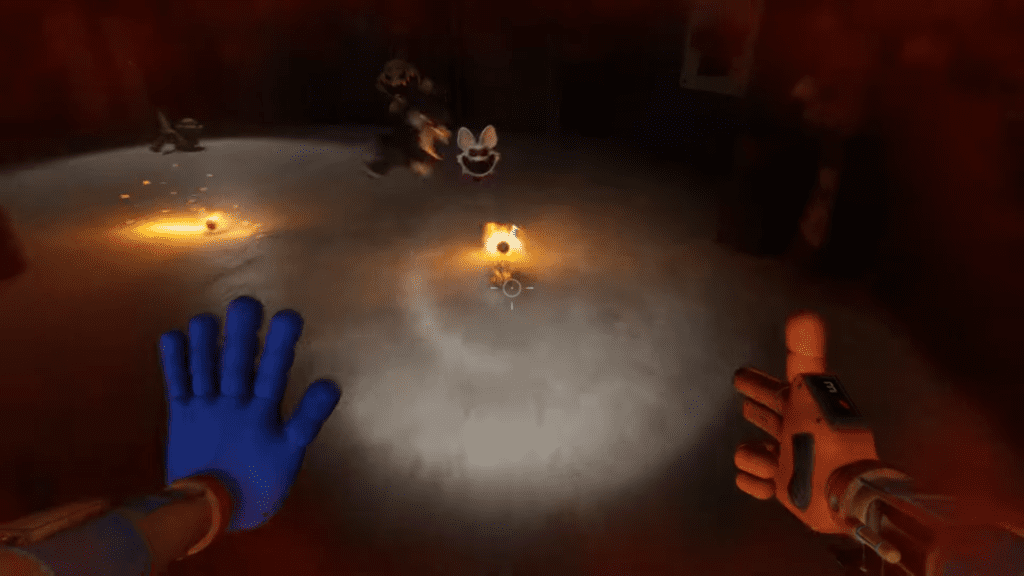
- You must wait in the room for a few seconds before the cells around you will open up. Prepare for a critters fight. Your job here is to kill the critters attacking you, while at the same time closing the cell doors around you by interacting with them.
Tip: Closing the Cell doors will stop the critter attack. Make sure to close the door as quickly as possible to prevent more of them from spreading out.
- The whole fight will last for a few minutes, as the voice on the radio will come on again signaling the phase to end.
- Now head to the end of the room and you will find a locked door on your right with a Red Scanner, use your Red Hand to scan it to open the door. Take the stairs to go to the upper room.
Solving The Cell Puzzle
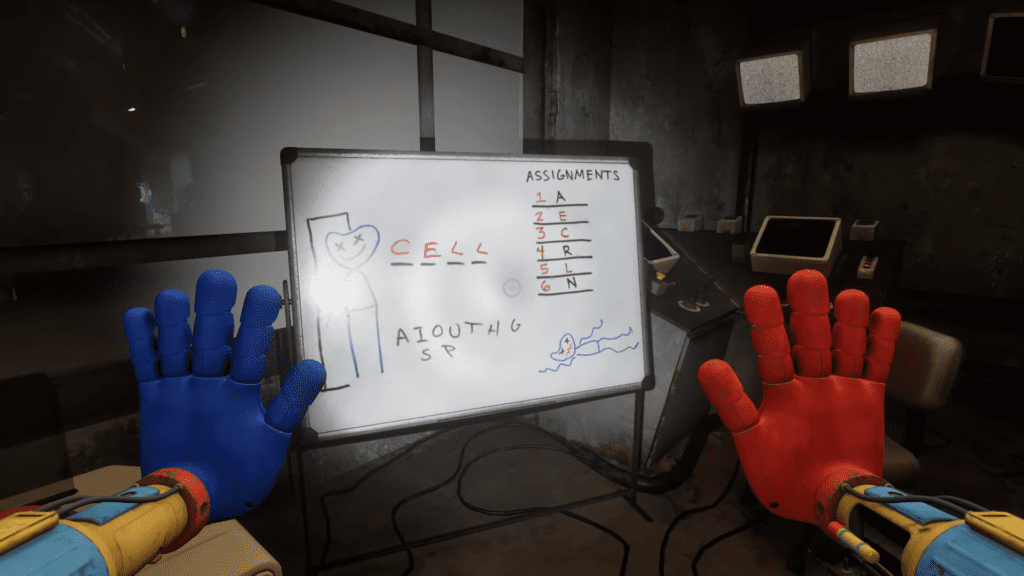
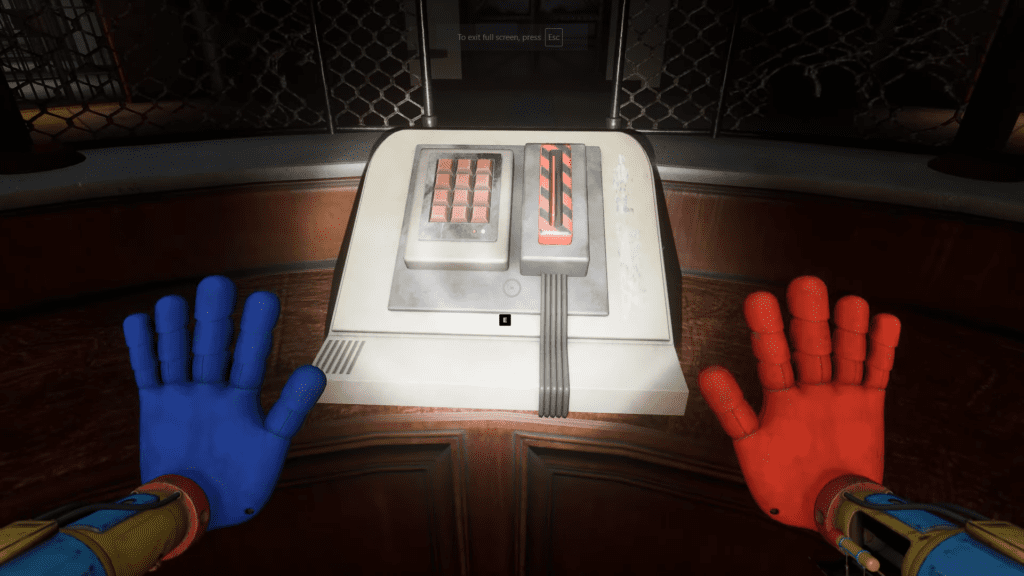
Puzzle Details: In the room, you will find a computer terminal to your left with a keypad next to it. Right next to the keypad, you will find a whiteboard giving us the clues to solve the puzzle. The whiteboard features a single unique word and a random list of numbers assigned to the letters to its right.
The word we have here is CELL
The list of numbers for letters:
- 1 – A
- 2 – E
- 3 – C
- 4 – R
- 5- L
- 6 – N
The code for the computer terminal would be 3255 for CELL. Inputting 3255 on the keypad will unlock the Red Button on the computer. Activate the Red Button, then go out of the room and head through the blue metal door on the right (Which was previously locked).
Getting the Red Keycard
Now our goal is to retrieve a Red Keycard for the machine.
- Make your way to the opened door at the end of the room. Take the walkway to reach the door, it will have a red siren blasting above it, you can’t miss it. Get inside, and pull out the broken bars on the metal door with your hands. After you have taken all the bars out of the door, you can go through it.
- Make your way to the computer terminal room surrounded by a metal fence. Here use your Red Hand on the scanner on the terminal. This will open up the metal door behind the scanner.
- Get inside the room and wait for the giant red bar to move, so it will open up the locked white door on the left. Head inside the room, pass the dead bodies then squeeze through the narrow gap at the end.
- Here you will find a Red Keycard on the ground next to a dead body, grab the card, and head back to the Computer Terminal room. Now use the Red Keycard on the card panel to activate the scanner on the left.
- Use your Red Hand to activate the scanner to open up the cell with a yellow light in the room.
Retrieving the Yellow Wheel
Now our job is to bring the Yellow Wheel to reveal a scanner covered with fumes.
- Head inside the unlocked cell from the keycard and keep moving straight, crouch under the gap on the ground and then turn right, here you will spot two busted yellow bars on the broken railing.
- Pull out both of them and then jump through the hole in the floor. Turn left and you will find a doorway covered with two wooden plywood, use your hands to pull both out.
- Get inside, squeeze through the narrow gap, and turn left to head to the doorway straight ahead. Inside the room, you will find a Yellow Wheel on a table next to a blue-colored toolboard. Use your hand to pick up the wheel and then get out of the room and take the open door, left of the room.
- Make your way through the narrow gap, the left path is locked and the path on the right is blocked by a single blue block. Use your hand to move the block and crouch through the hole.
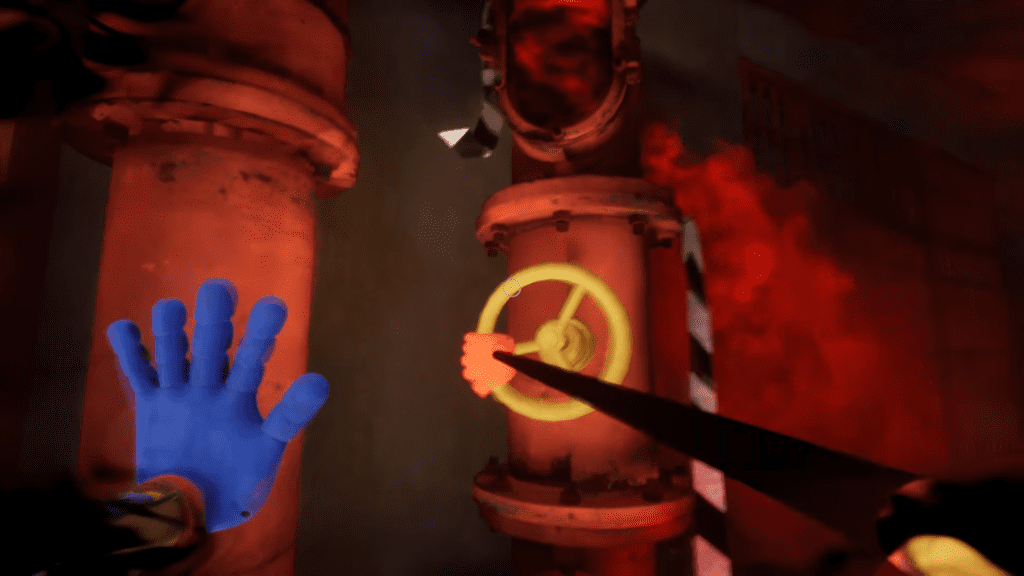
- Move to your left, and you will find a red pipe with a yellow spot where we can attach the Yellow Wheel we have on our hand.
- After hooking the Red Hand, rotate it to stop the red smoke from spreading. This will reveal the Red Scanner on the wall (which was blocked by the red smoke). Here, use your Red Hand on the scanner to unlock the metal door next to it.
Solving the Cage Puzzle

Take the stairs inside the door and then turn left, which will lead you to a new room with a brand new puzzle waiting for you to solve.
Puzzle Details:
You will find a computer terminal in the room with a keypad. Our goal is to find the right combination for the Keypad. If you look to your right you will have a whiteboard, just like before, it will have information to help us solve the problem.
Solution:
On the whiteboard, you will see a calendar, and to the bottom left, you will find a sticky note with the word ‘CAGE’. If you look at the calendar, some dates will have a Letter inside of them. To solve the puzzle, we need to analyze the number assigned to the letter to reach the final conclusion on the solution.
- Day 2 – E
- Day 3- C
- Day 4 – G
- Day 6 – A
- Day 14 – P
- Day 20 – S
- Day 22- N
- Day 26 – W
Now we just have to match the Day number to the code word ‘CAGE’, the answer will be “3642.” After inputting the proper code, the Red Button on the computer will unlock, press the button to activate the gas.
After a few seconds, the glass window to the left will get broken, that’s our way out of the room. Jump over the window and head through the busted wall in the front, Turn right, and use your purple hand to jump over to the floor above. Here turn right through the half-opened mechanical door. Then head through another half-opened door on the left.
Now follow the route until you arrive at another purple hand sign on the floor, use your purple hand to jump to the floor above. Here head through the vent in the corner of the room. The path inside the vent is linear, just follow the route and land on the floor. Here you will encounter one final puzzle.
Solving the Block Puzzle
Puzzle Description: Basically, we will have to open the giant door in the middle. To open it we will have to use the scanner on both sides. Once we put our hands on both scanners, only then the door in the middle will open.
While it may initially come off as simple, the mechanics embedded in the puzzle make it a bit confusing. The twist here is, that if you press the red scanner, the door to the blue scanner will get locked up, the same goes for the other way around.
Solution: We must have access to each scanner even after activating them. So we will have both of them turned on for the middle door. The only way to keep the doors to the scanner open is by blocking the door from ever getting closed completely.
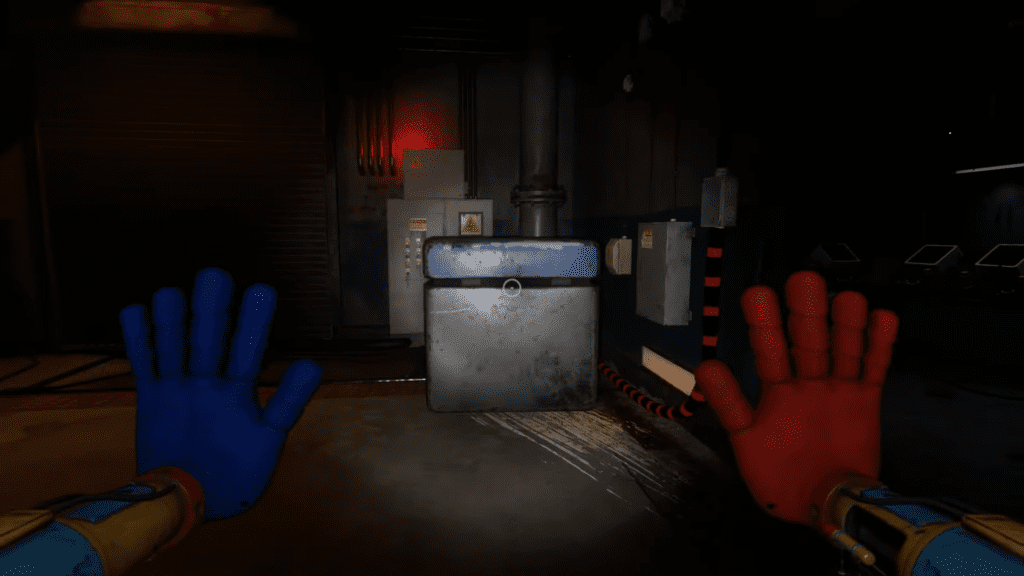
Here head to the room with a giant door in the middle, you will find plenty of blue crates lying there. The blue crates or boxes are just like the one we integrated earlier in the mission, now you just have to drag the blue boxes or blocks and place them under both gates to the scanner.
Placing the blue blocks under the gates next to the blue scanner and red scanner will allow us to have access to both scanners without blocking the route. Once you have placed the blocks under the door, use the scanner on either side. Now head to the other scanner to activate the giant door in the middle.
Note: There’s a sequence here, you can either start with Blue Scanner and then move to Red one or vice versa.
Powering the Blue Scanner
Head through the door, and then go to the room on your left. Soon the door behind you will get locked and you get trapped in the room. If you look to your right, you will find a deactivated scanner on the wall. Our goal is to turn the machine on and scan it to head to the next section.
To activate the scanner, look to your left, you will find the electric panel. The door to the panel will stay locked until the cutscene is over. Wait for the dialogue to end, and soon Yarnaby will make an appearance, this is the point when the cutscenes come to an end.
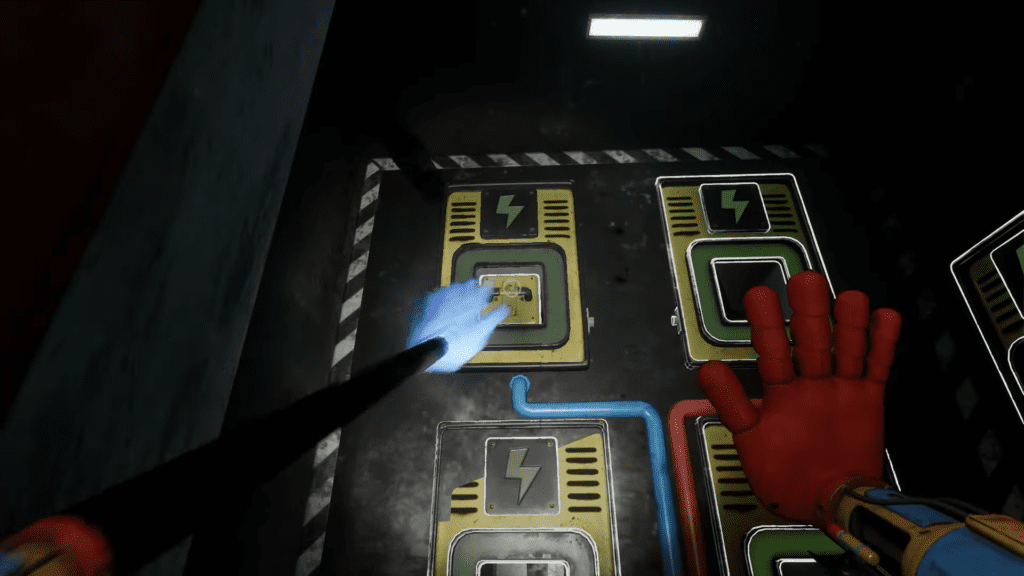
Activate the Panel: Once the cutscene ends, you can interact with the panel. Here you will find four empty cubes but one will have a Power Plug. Each one of the empty boxes has a colored wire coming out of it. When you first open the electric panel, the plug will be located in the yellow box.
Solution: The only thing you will have to do is to move the Power Plug with your hand from the yellow wire empty cube to the cube with the blue wire coming out of it. Once you plug the chip into the Blue box, the scanner across the panel will get activated.
Now you can use your hand on the scanner to unlock the door next to it. The next objective on the list would be to Avoid Detection from Yarnaby. Check out our guide to make sure to get out of Yarnaby’s radar quickly without making the monster mad.