


The Forging Destnity quest seems to harbor many of the tricky puzzles in the game all in one place. Most of the puzzles found in The Forge are tied to the main quest line, so have no choice but to complete all of them and move forward in the game. The lift puzzle can get a bit complicated, as it’s all about timing here, with perfect timing you can nail most of the solutions here. Since there are so many hurdles we have to jump through here, let’s start with the guide.
Guide To Solve The Lift Puzzle At The Forge In Svartalfheim
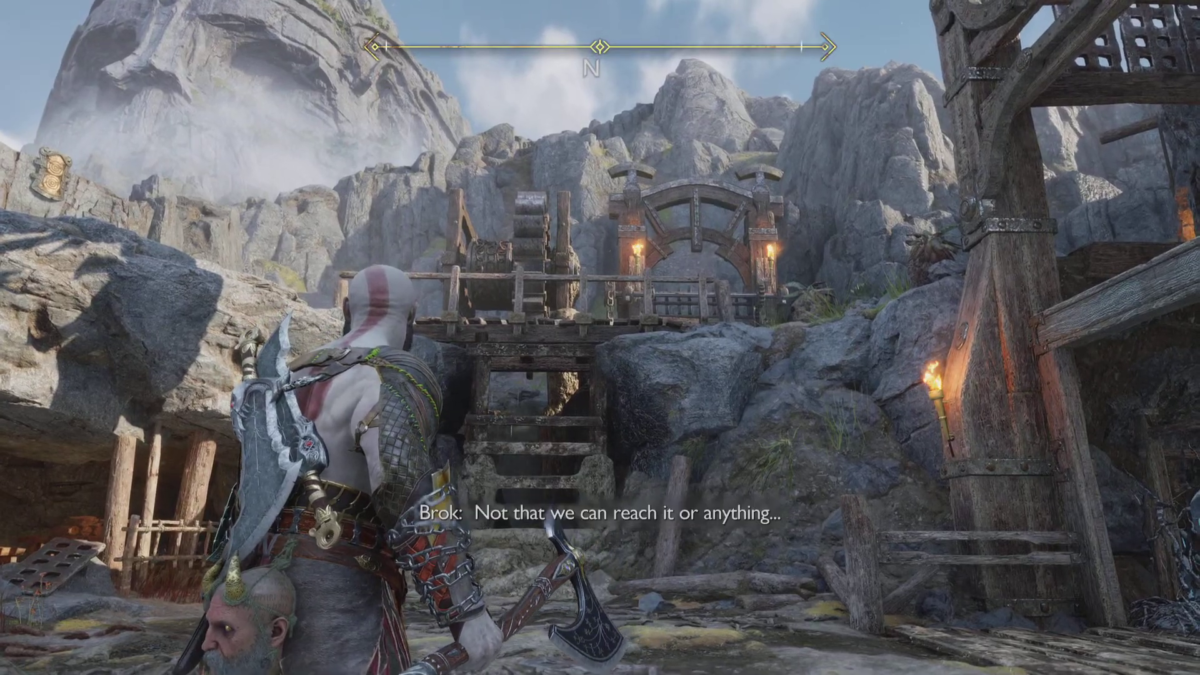
- Brok will ask us to destroy the nest made up on the cable wire to continue with the mission. The objective will then change to ‘Destroy the Nightmare Haunt to release the lift’. Take the right from the bridge to get to the puzzle section.
- Here Brok will let us know about the wheel that opens the gate. But we need to focus on the lift covered with brambles on the right.
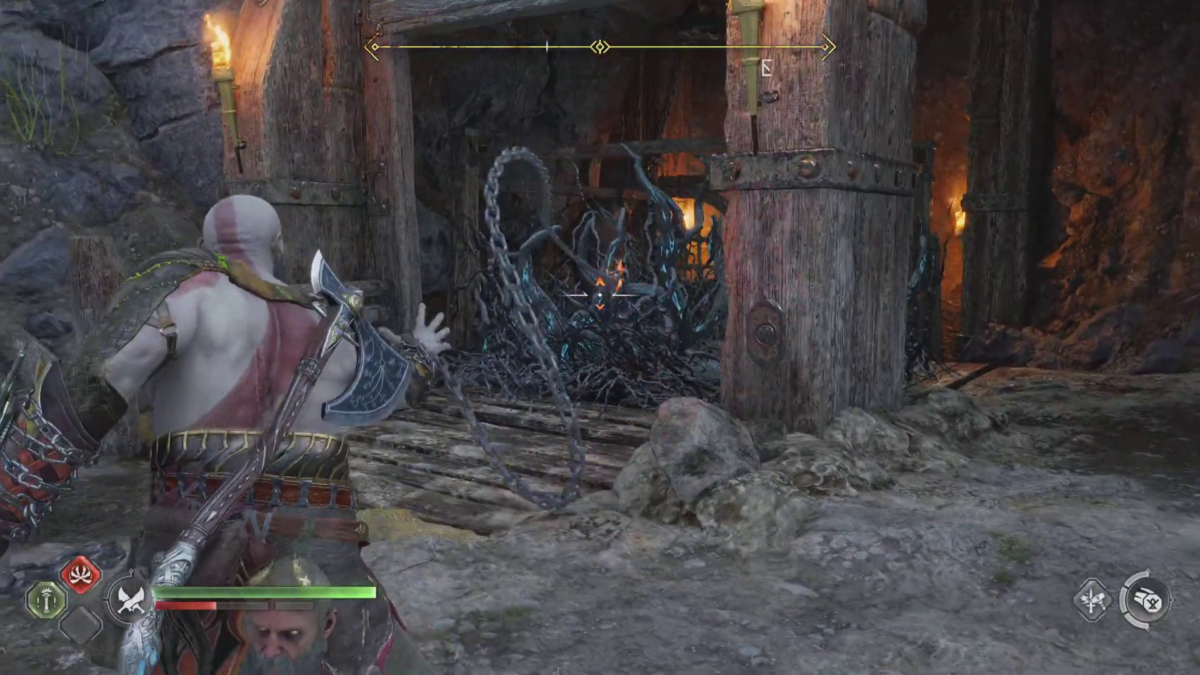
- First, we must burn down the brambles by using the Blades of Chaos, igniting and throwing them at the brambles surrounding the elevator. Once they burn up, you can get in the elevator but you will soon find out, it doesn’t move.
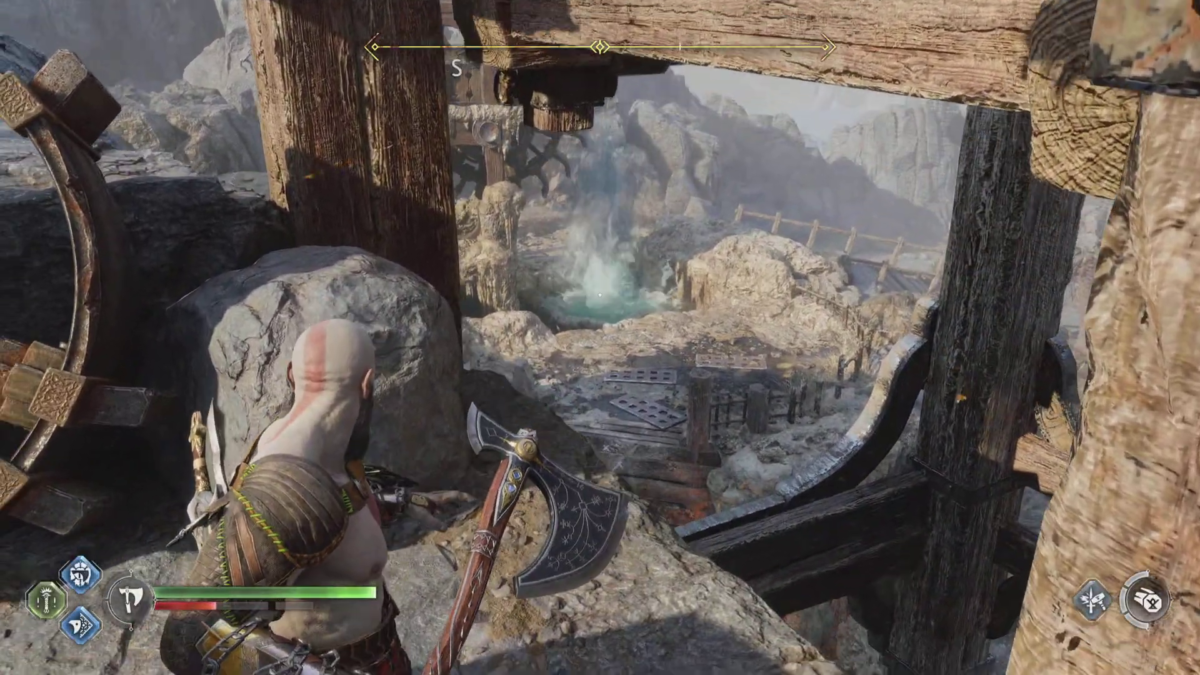
- Head right from the elevator, and use the Blade of Chaos to get to a higher ledge. A small Geyser will be blocking your path, use the Leviathan Axe to freeze it. Jump across the Geyser and take the right turn.
- The path will lead you to another Geyser, use the Levithan Axe to freeze it. This will activate the lift we unlocked earlier by burning down the brambles.
- Once the Geyser is frozen up, the lift will activate carrying Brok to the floor above. Here we also need to make our way back to the elevator by retracing the route.
- When you have made it back to the lift, you can give a signal to Brok to activate the lift from the other side. This will move the lift to the floor above, where the last piece of the puzzle will be waiting for us.
- Once you arrive on the platform above, the door in front of you is barricaded, next to the barricaded door, you will see an immobile waterwheel. Our goal is to turn on the waterwheel by making the water flow once again.
- Turn right and climb up the ledge using the Blade of Chaos. Then signal Brok to turn the lever once again to raise the lift.
- When the elevator moves up, you can see the Geyser through it. Here throw the Leviathan Axe at it to freeze it. Then come back to the ledge overlooking the barricaded door, and ask for Brok to turn the lever once again.
- With the Geyser frozen up, and the lever being moved, the waterwheel starts moving again, this will lead to the barricaded door sliding up, revealing the path inside.
Note: Make sure not to call your Leviathan Axe back or you will have to do the whole section over again.
That’s it, now you can move forward with the rest of the mission. Meanwhile, do check out our guides on the game like how to solve the Giant Geyser puzzle in Bay of Bounty, or the best shields in the game and how to get them.