


Cores are one of the most valuable resources in Frostpunk 2 and there is much dilemma when it comes to gathering them in the survival game. Unlike other resources like Coal, Food, Oil, etc., Cores are difficult to find. But, don’t worry, as we have got your back! In this article, you will get all the details to help you find Cores in Frostpunk 2.
Guide To Get Cores In Frostpunk 2
The only way to obtain Cores in Frostpunk 2 is by exploring the Frostlands and sending Frostland Teams for expeditions to areas with the highest chance of having Cores. Cores are basically components of machinery that were available before the Great Frost. Since the areas are covered in a thick layer of snow now, this resource cannot be manufactured and can only be found.
The first step is to create a Logistics District on the edge of your city map. Once you do so, you will have access to the Frostland Teams. Each Expanded Logistic District has fifteen Frostland teams. When you have the option to recruit them, you will need to deploy them to explore the Frostlands.
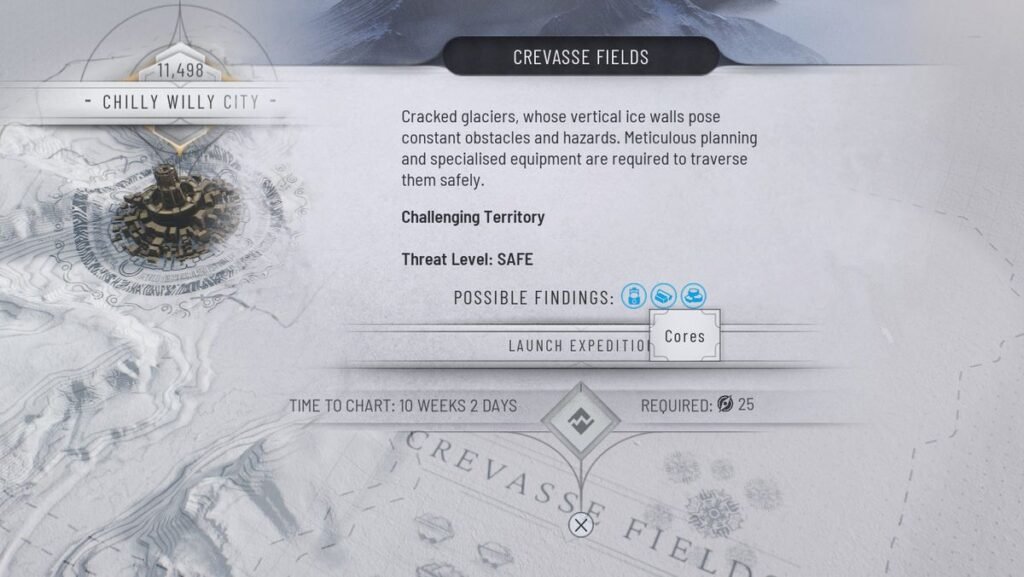
Before sending your team off to scout the regions, open up your map and check the nodes outside your city to learn more about what you can expect to find there. Next to “Possible Findings” you will be able to see what that city has to offer. If you see a blue Lantern icon, it means that you have the possibility of finding Cores there.
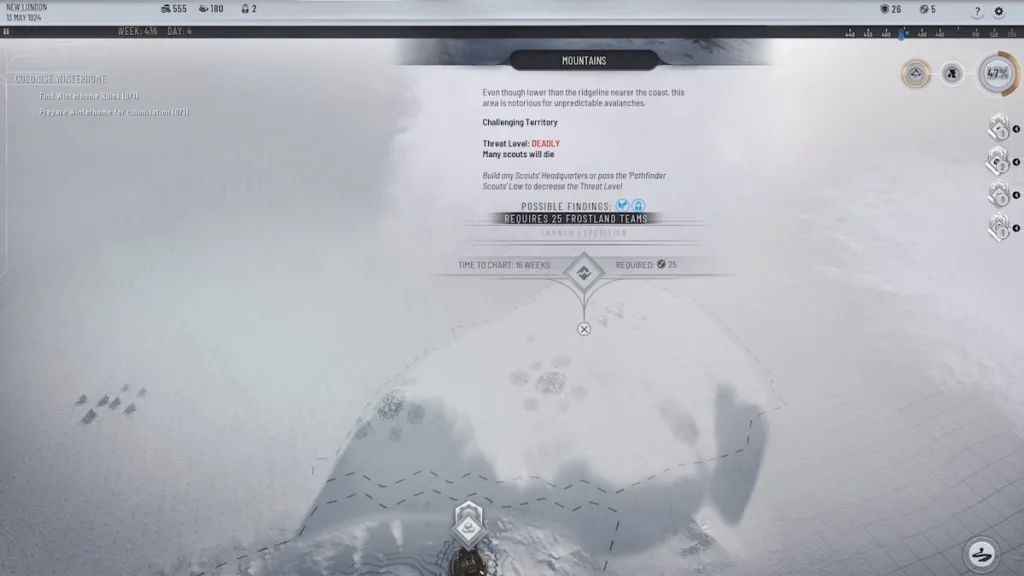
The Cores are usually found in areas with Dangerous (needs 20 Frostland Teams) and Deadly (needs 25 Frostland teams) levels of threat, and the findings are not guaranteed. However, if you feel that your need for Cores trumps the danger levels and the resources needed for the exploration, go ahead!
However, be prepared to repair the Logistic Districts as it is likely that scouts might get injured or die exploring areas where Cores can be found. It should also be noted that very limited Cores (maybe 1 or 2) can be found from a specific area, so you must weigh the options before making a decision.
Towards the later part of the Story Mode, you will have access to Core deposits in certain colonies like Winterhome. However, to access them early on, your only option is to explore the Frostlands.
Why Are Cores Needed In Frostpunk 2?
You can use your first finding of Cores to build a Colony in Frozen Bay. These relics from the past are essential in unlocking advanced buildings like Deep Melting Drill and upgrading the Generator in the Central District. Unlocking and upgrading these are important to ensure the flow of resources in case of a Whiteout.
Since Cores are very rare and precious, make sure that you effectively utilize your existing resources before investing in advanced technology.
Do check out our other guides on Frostpunk 2 like the best laws to enact first or how to create outposts & settlements in the game.