


A new update has hit Slay the Spire 2’s beta branch, packed with balance changes, the bestiary, and an all-new boss! This new rival, the Aeonglass, will be our topic, and going over exactly how to handle it as it tries to wither you away.
Preparing for the Aeonglass
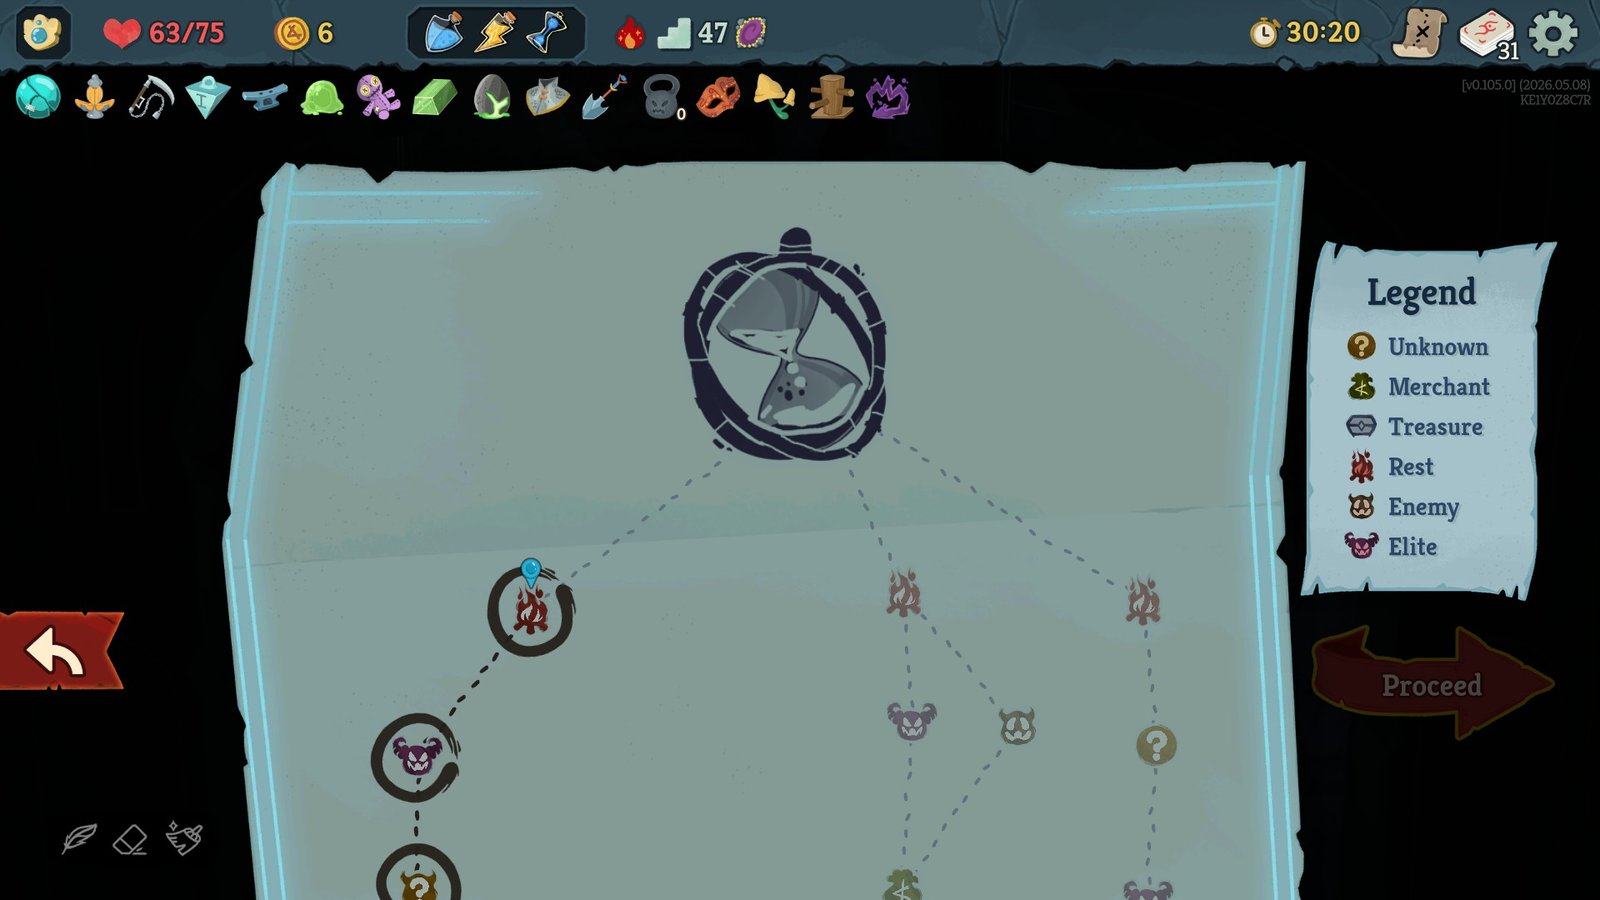
While the random nature of Slay the Spire 2 makes it impossible to know exactly how a run will go, you’ll know if Aeonglass is on the chopping block right as you enter Act 3 thanks to the boss portrait at the top of the map.
The Aeonglass’s strategy focuses on flooding your hand with hard-to-remove status cards that will drain your HP if you still have them at the end of the turn. As such, exhaust and discard cards are fantastic at handling them without having to spend extra energy.
Ironclad and Silent will have plenty of options, so try to hit some fights or a shop to get at least one. Otherwise, try to ensure some source of bonus energy, so you can still play most of your hand while handling Aeonglass’s chaff.
That’s the best we can do once we know the battle is coming, so let’s take a deeper look at that pattern.
Turn 1
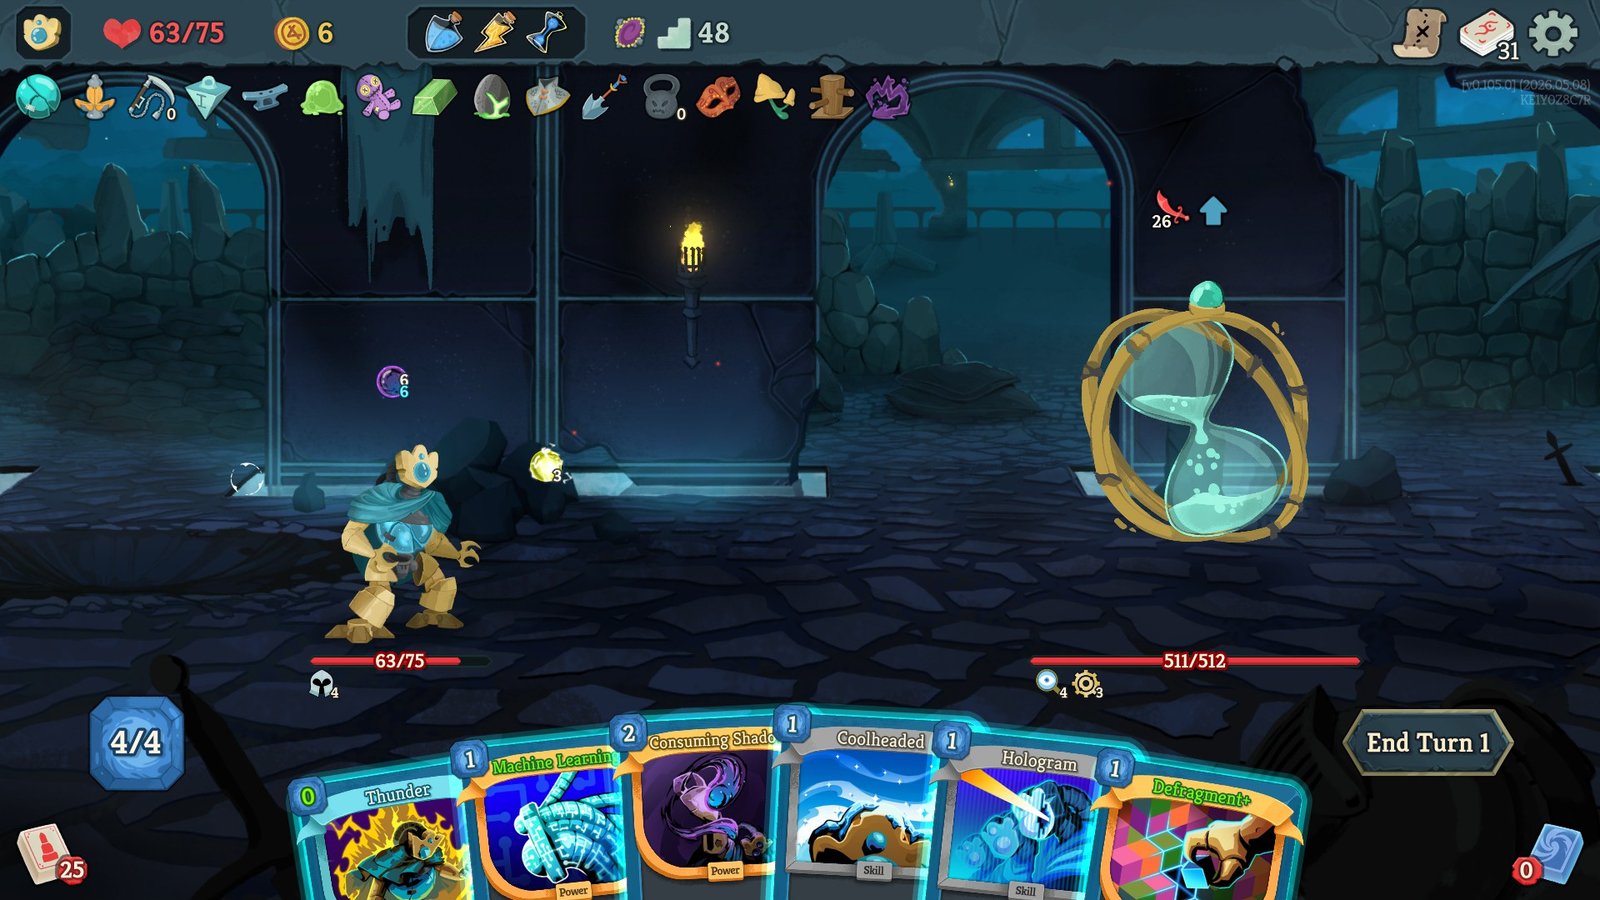
Once the fight opens, take a moment to read Aeonglass’s central effect, Withering Presence. For the whole of the fight, Aeonglass will place a Wither in your hand every time you play 4 non status cards.
This count is consistent over multiple turns, and can’t be reduced, only reset back to 4 after it goes off. Withers are 1 energy status cards that deal 2 damage to you if they’re in your hand at the end of the turn. Withers have both Retain and Exhaust, meaning they won’t be discarded at the end of the turn, and will be destroyed when played.
As such, the only ways to deny Wither’s damage is to play it to Exhaust it, or have some other way of cycling the card out of your hand. This is why Discard and Exhaust decks are so effective against the Aeonglass.
The Aeonglass spends the first turn swinging out for a whopping 26 damage while preparing a debuff. Aeonglass spawns with 3 Artifact, so you’ll need to waste some debuffs if you want to start lowering that damage.
Turn 2
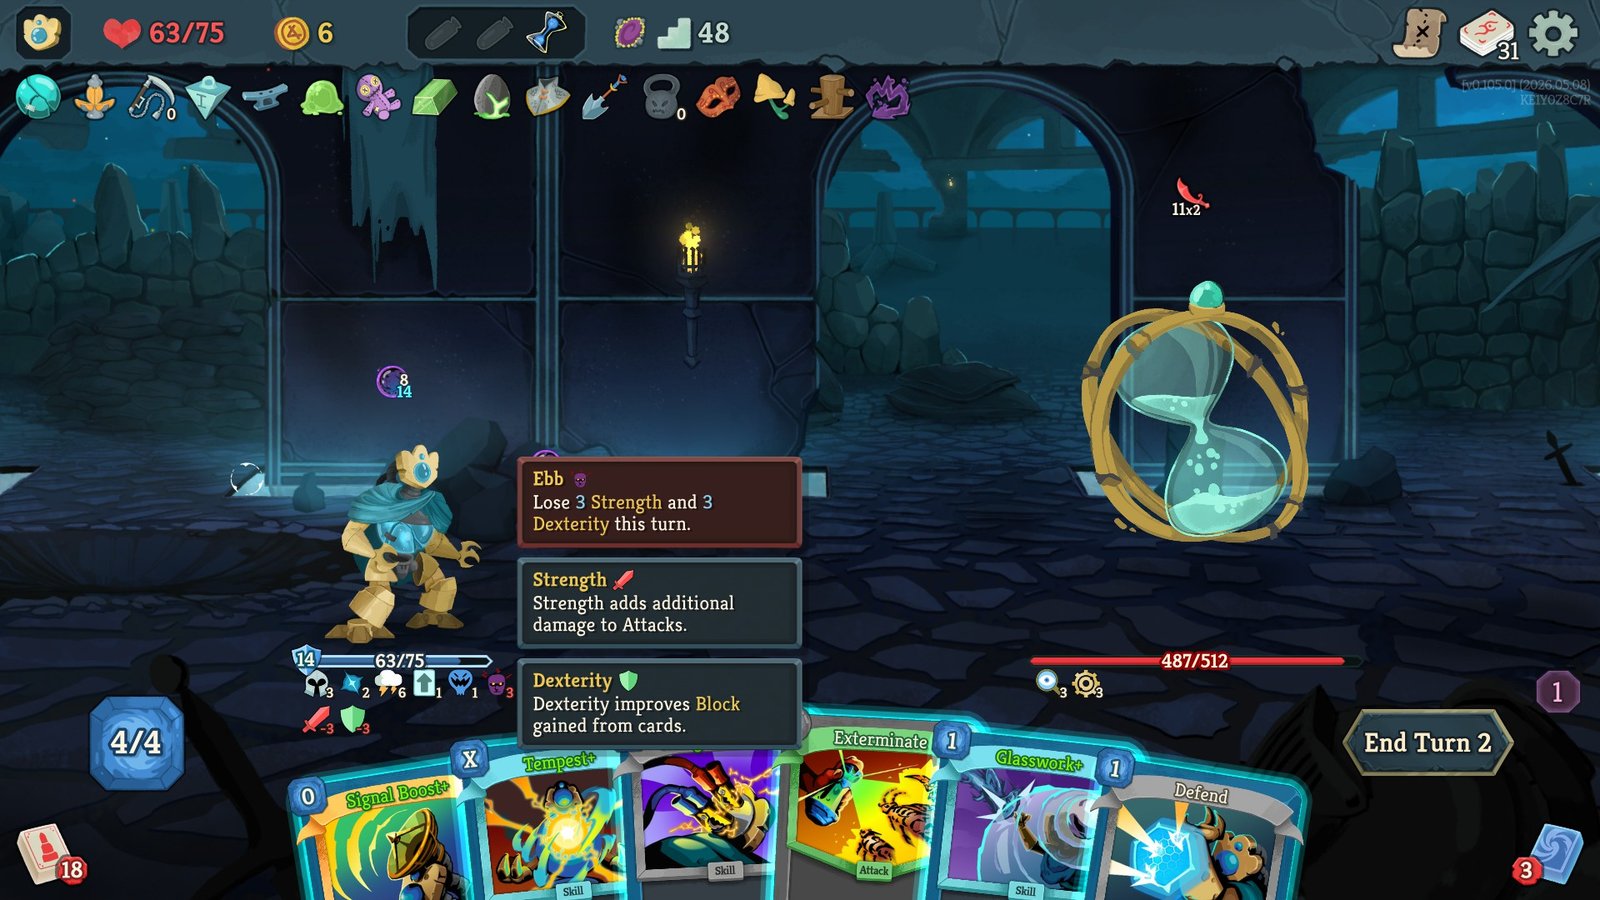
Turn 2 is where that previously set debuff goes off, infecting all players with Ebb. Ebb drains three Strength and Dexterity from players for the turn, dropping your overall effectiveness right as the Aeonglass prepares another heavy swing.
Aeonglass hits for 11 damage twice this turn, starting a cycle of multihits that will only grow scarier as the fight goes. This turn is the perfect time for debuffs once you cut through its Artifact, as Ebb will make blocking much less effective.
Turn 3
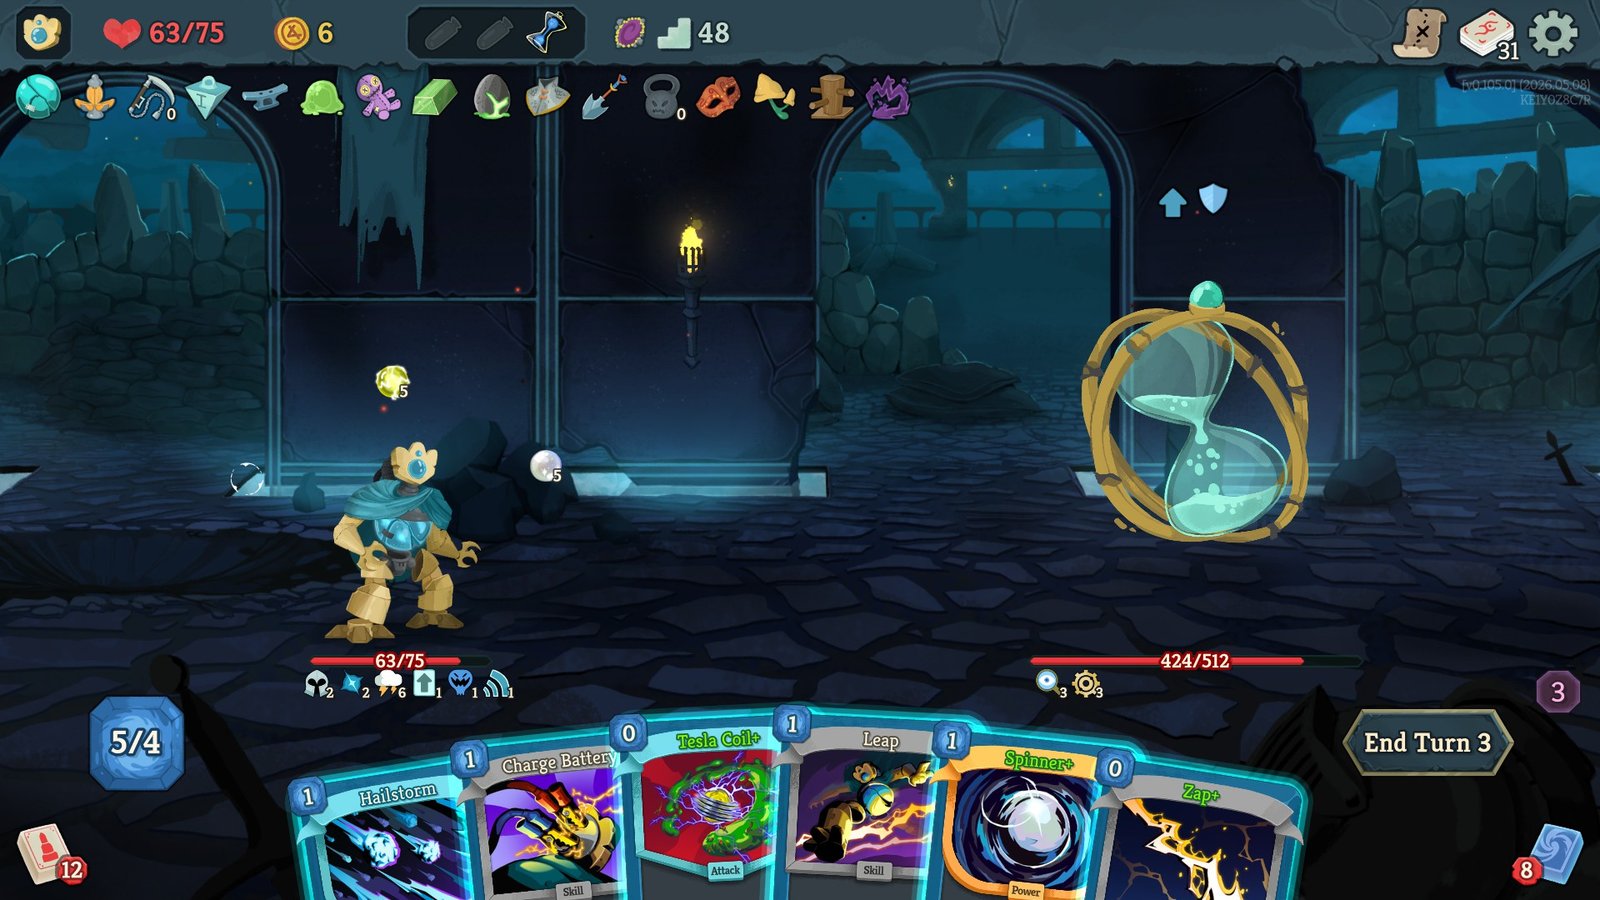
Turn 3 is the final turn of the Aeonglass’s pattern, and is your biggest oppurtunity to pump damage out. Instead of attacking, Aeonglass will prepare a block for next turn, and a permenant buff.
While the block isn’t huge, the scary part is the 3 Strength Aeonglass gains at the start of the next turn. With such a short cycle, Aeonglass will be activating this buff every three turns, greatly increasing its damage on Turn 2 of the cycle and raising its threat substantially.
Between this quick pattern and the constant outpour of Withers into your hand, it’s important to think out plays before they happen. For veterans of Slay the Spire 1, this fight feels very similar to Time Lord, another fight that punishes haphazard play.
Ensure you have the energy to deny any Withers that make it through and carefully plan your turns out, and the Aeonglass will quickly shatter, ending your run and earning you another audience with the Architect. There’s no beating Time at attrition, so play fast and play smart.