


The Junkyard is an incredibly dangerous region in Mewgenics, especially for how early it shows up. You’ll be onset by thorned enemies, constant sources of Bleed, Creep puddles and all kinds of new enemies.
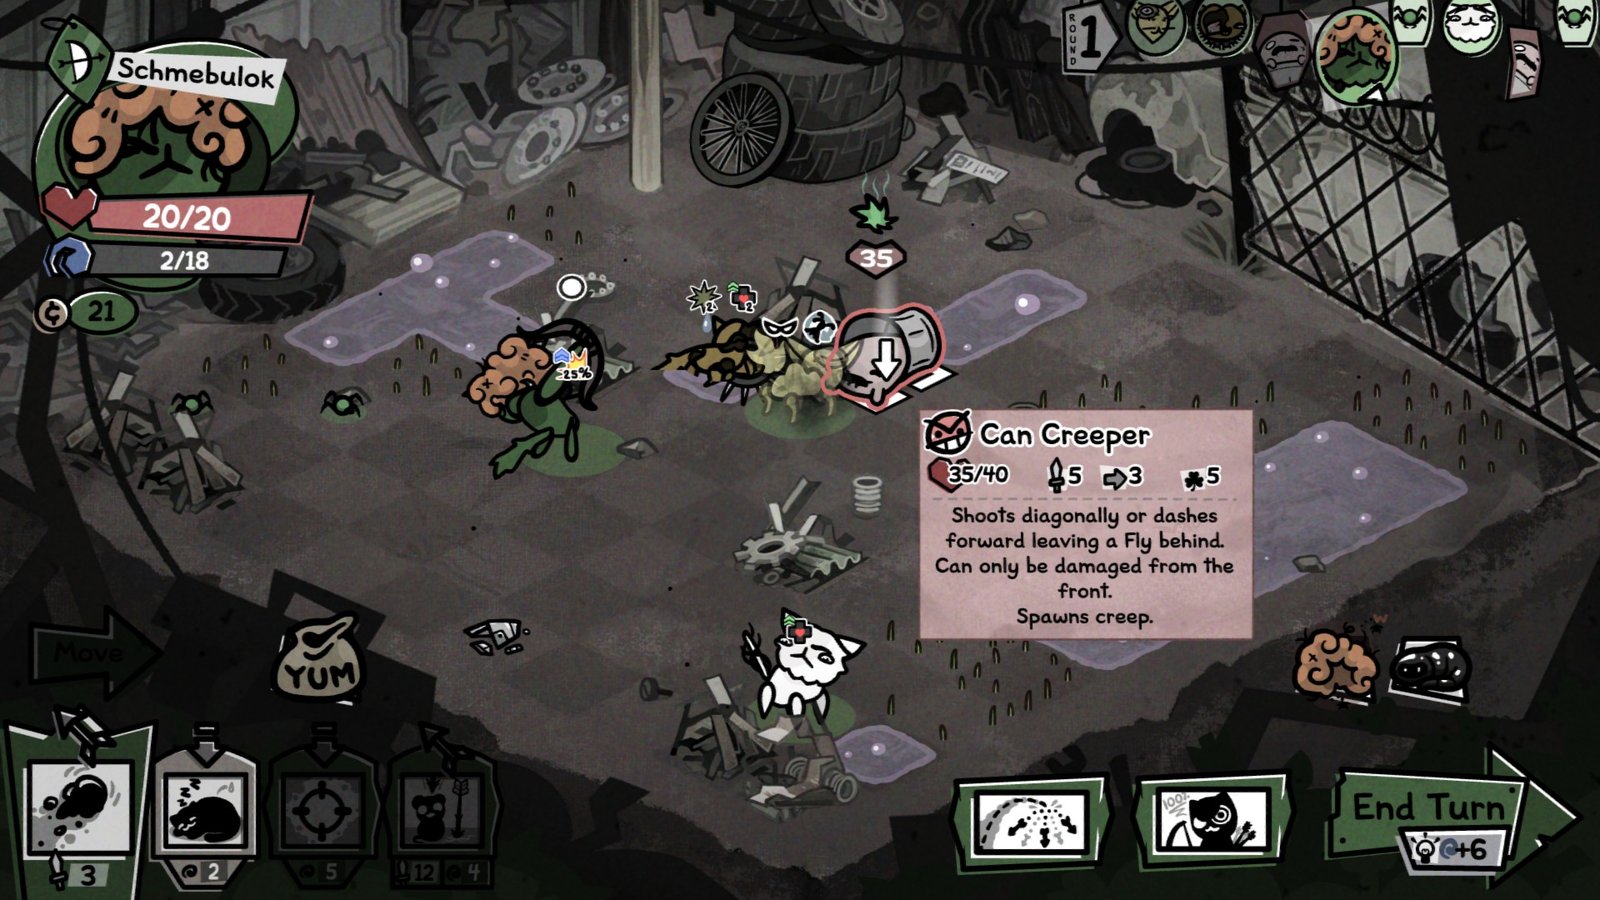
Even the region’s Mini-Bosses can be quite the challenge, as shown by Can Creeper, a shuffling mass hiding in a metal can. His battle tasks you with managing your party’s positioning, angle of attack, and endurance through his twin phases.
It can be a lot to handle, luckily I’m here to fill you in on everything you need to know about the Can Creeper fight in Mewgenics!
Can Creeper Phase 1
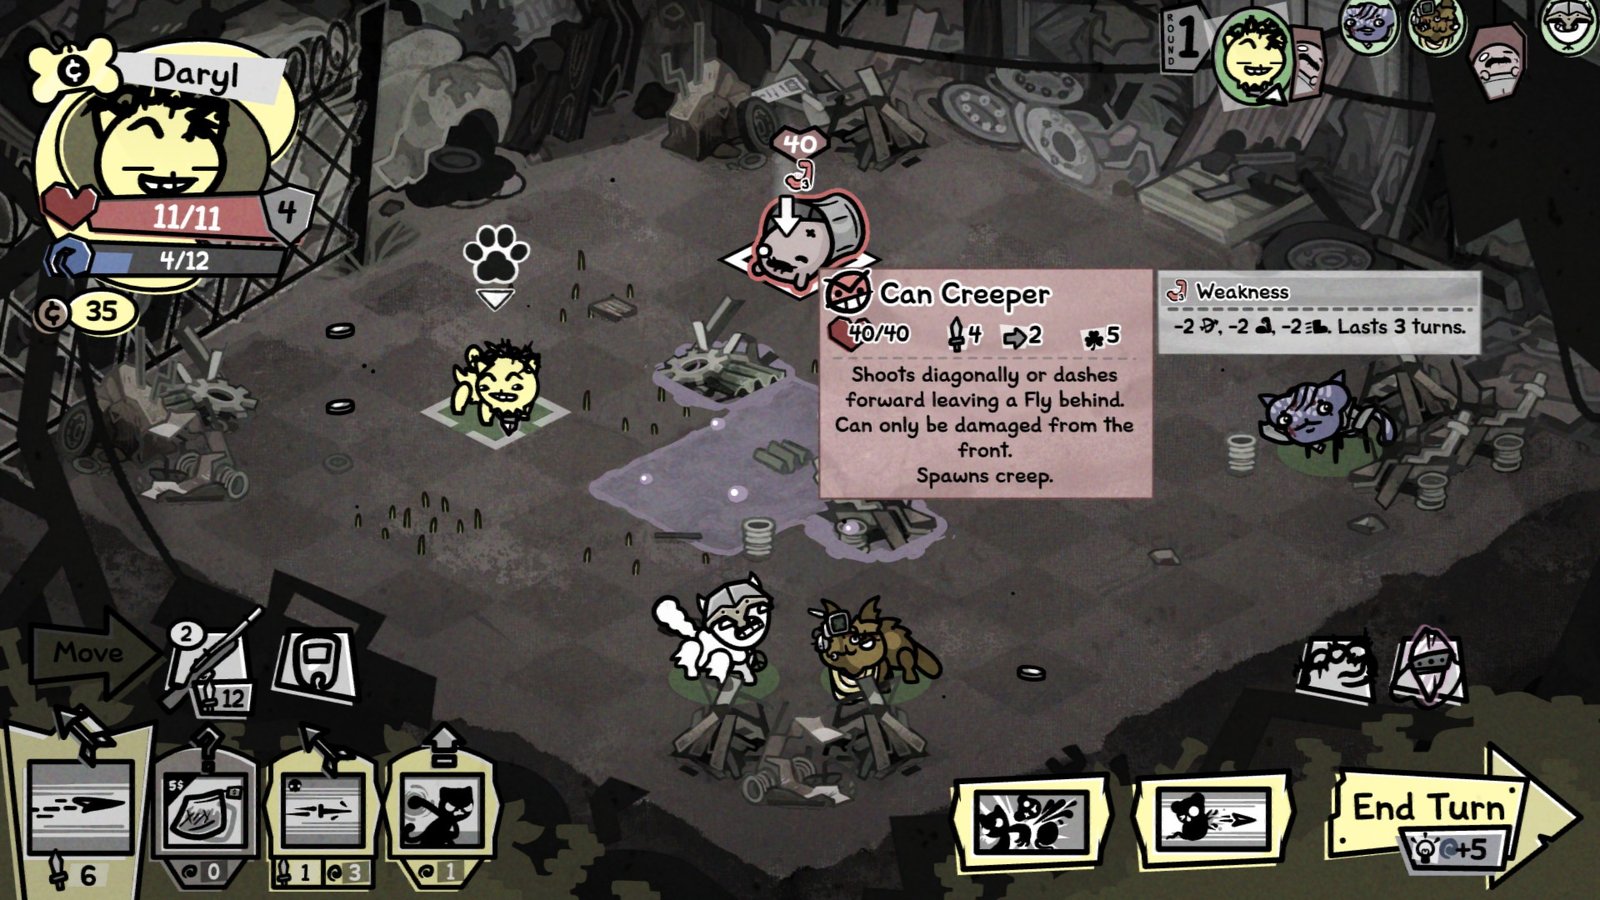
Can Creeper’s two phases play fight very differently, so it’s important to understand how both work. Phase 1 is the major pain point, mainly due to Can Creeper’s constant movement and damage negation.
Can Creeper can only be damaged head on, requiring careful spacing if you want multiple units to be able to harm him in a single round. Hunter’s ability to attack over obstacles proves very useful here, since as long as they’re attacking from the proper direction, they’ll be able to hit Can Creeper.
Can Creeper’s primary attack is a long-range dash that leaves a line of damaging Creep behind, spawning a Fly from wherever he started the charge. The same advice that helps against knockback bosses like Magnus works here: don’t line your units up, and stay mobile.
Can Creeper can also fire projectiles in a split shot diagonally. This shot comes from all four corners of the Can Creeper Simultaneously, so be careful not to crowd it from those angles.
Once you drain his HP, Can Creeper loses his Can, and transitions to phase 2.
Can Creeper Phase 2
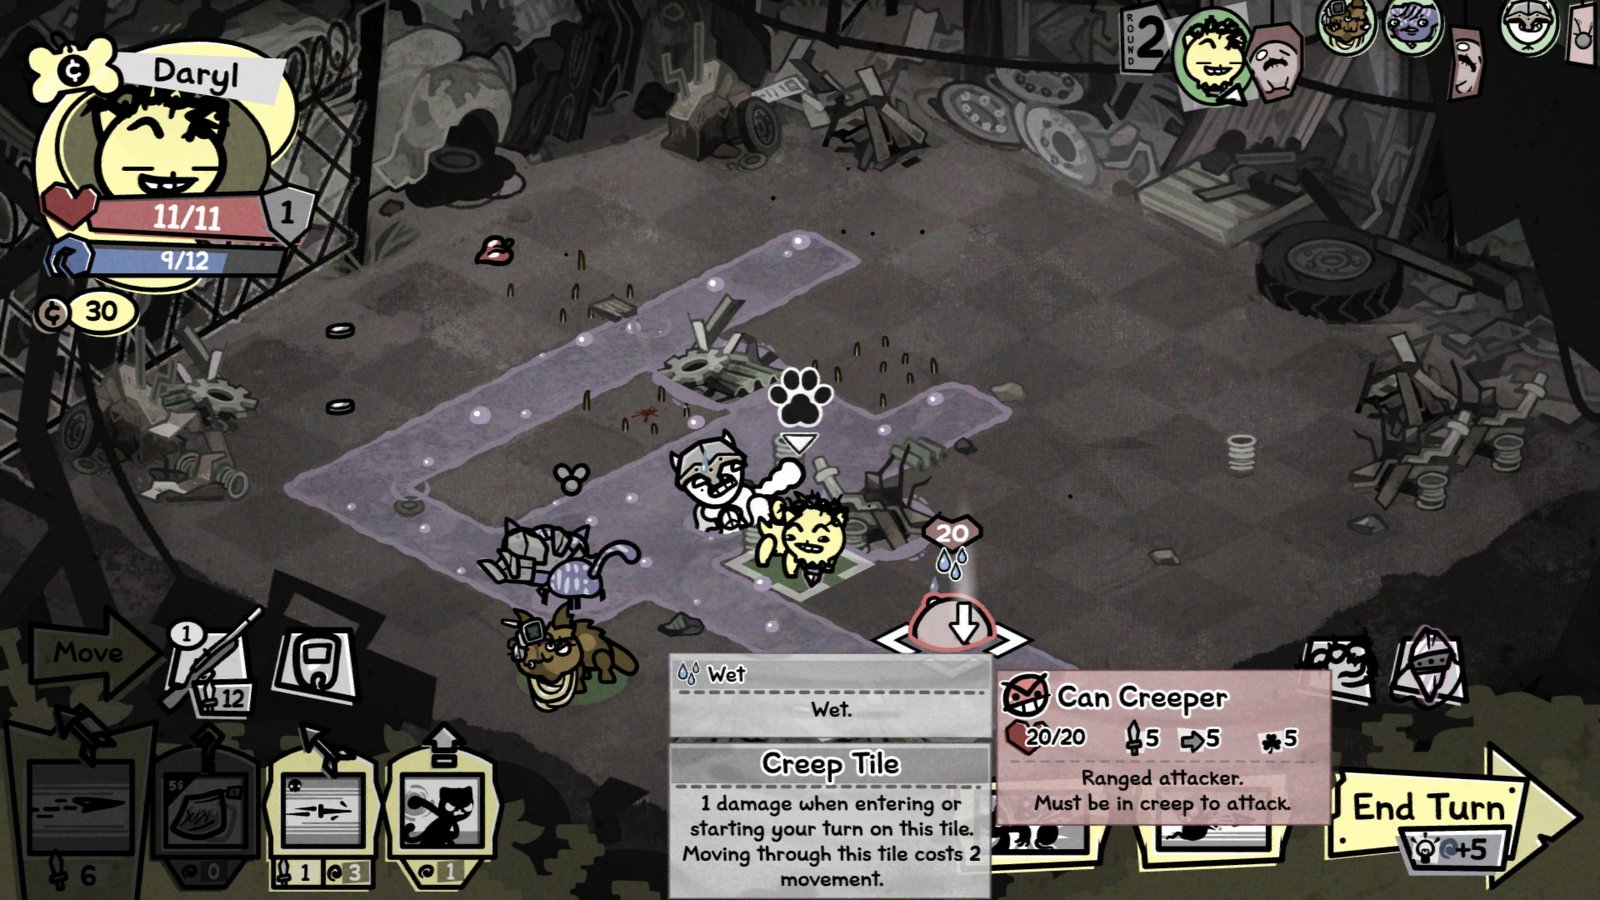
Can Creeper’s second phase is far more straightforward, but equally as dangerous. Without his Can, Can Creeper pivots to ranged attacks, firing at the party from puddles of Creep. Like the waterlogged enemies found in the sewers, Can Creeper needs to be in Creep to attack.
Can Creeper moves by teleporting between Creep tiles, forcing him to remain in the liquid. Creep is susceptible to Freezing and coverage, just like water tiles, so minimizing Creeper’s effective area does wonders at curbing his threat.
Can Creeper only has half the HP in phase 2, and can be attacked from any angle. If your party is still healthy enough, it’s totally feasible to rush him down as soon as phase 2 begins.
Preparing for Can Creeper
Mobility is the name of the game here, both maximizing your own and minimizing Can Creeper’s, Items that manipulate the enemy’s movement work wonders, while keeping your own units on top of him.
The Tractor Beam is a great pick to keep Can Creeper as close as possible, but there’s no promise you’ll get one. Classes with range and built in mobility are great for keeping up with the Can Creeper, as long as you can keep them healthy.
The Thief is one such high-risk, high-reward pick, offering great damage and mobility in exchange for low HP. Hunters are similarly useful, but carries the same weakness.
The Tank is stellar both at manipulating movement and taking hits for the party. Make sure to have one going into the Junkyard to make things simple, and try to keep them as close to the Can Creeper as possible.
Set TheGameSlayer as your Preferred Source on Google to find us more easily in your searches for game guides, news, reviews and features!