


There are tons of boss encounters to find while exploring the world of Mandragora, but some of them can be a bit of a pain to locate. If you are out looking for Darkfire Demons to unlock the It Was Hot achievement, there are three of them to find within the game. Sometimes, these locations are easy to miss, so this guide will give you the rundown on where to locate all Darkfire Demons in Mandragora.
Mandragora Darkfire Demon Locations
There are three Darkfire Demons to find, and you can locate them while exploring certain sections of the game. We have included where to locate them all below.
Darkfire Demon Location #1 – Drakkeden Citadel
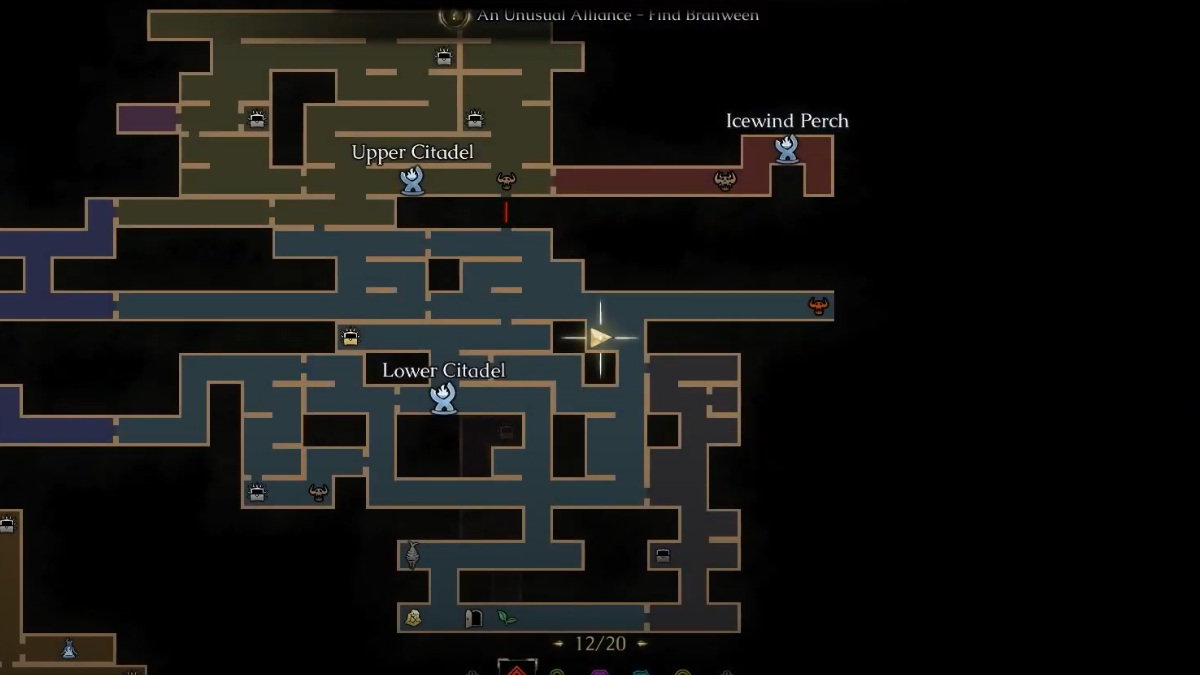
Once you make your way to the eastern section of the map, you can explore the upper and lower citadel. Make your way down to the lower citadel’s upper floor and head east. You will find the first Darkfire Demon at the end of the passage of Drakkeden Citadel.
Rewards: Avatar of Fire Relic Skill – Increases fire and non-fire damage output by 15% while also reducing fire damage intake by 50%
Darkfire Demon Location #2 – Forsaken Mines

You have to head into the area between West Wickham Sewers and Wickham Sewers in the western section of the map. There is a brown corridor on the map that leads to the Forsaken Mines. Just keep heading down the eastern corridor to find the second Darkfire Demon.
Darkfire Demon Location #3 – Crimson City
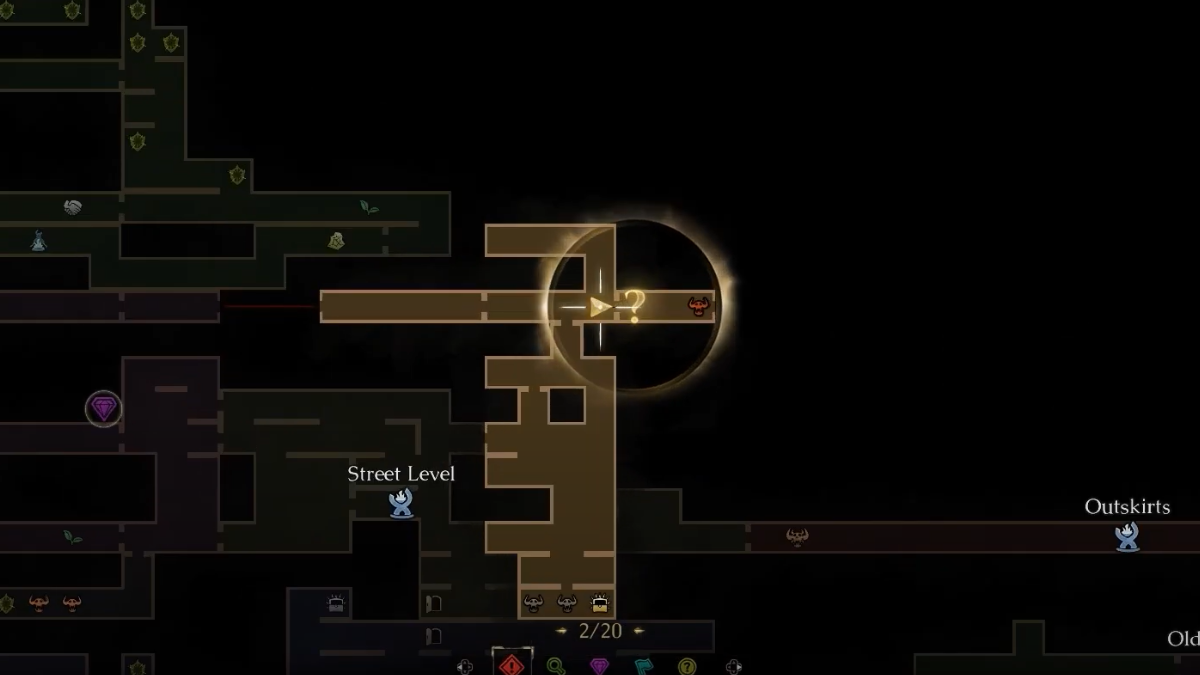
You will get to Crimson City as part of the game’s questline. While heading towards the throne room in the east, you will spot the final Darkfire Demon blocking your path.
How to Beat Darkfire Demon
The Darkfire Demon’s moveset is pretty predictable. You just need to pay attention to which part of the Darkfire Demon’s body alights with fire.
- Most of the attacks by this enemy are fire based, so plan your attacks accordingly.
- If you notice its tail light up, then the demon will do a 180 tail spin.
- You can avoid this by running away in any direction.
- If you notice its entire body light up, then it will slam headfirst into the direction it is facing.
- Quickly run under the demon to avoid this fate.
- If both claws light up, then the Darkfire Demon will do a hand sweep, so run under it and hit it from behind.
- The demon will also light up just one hand and raise it, which will create a portal of fire.
- Then, it will either create another portal of fire and teleport to your nearby location, or ram into you headfirst, leaving behind a trail of fire.
- The best time to attack is while it is temporarily stunned after ramming into the boulders on either side of the arena.
- If you have any ranged weapons, then you can have an upper hand at the fight.
- Try to stay behind the enemy and hit it anytime you can to quickly lower its health and win the fight.
If you are looking for more Mandragora guides, you can check out our guides on the Thief Quest Guide, All 7 Assassination Skill Locations, and Relic Hunters Quest Guide.