


The cast of Inside Out has finally stepped foot within Disney Dreamlight Valley, starting with Joy and Sadness. Both of these characters have interlocking questlines in helping Riley overcome her stage fright. Unlocking Sadness is a pretty long process that requires completing a few different quests. This guide will explain how to unlock Sadness in Disney Dreamlight Valley.
Unlocking Sadness in Disney Dreamlight Valley
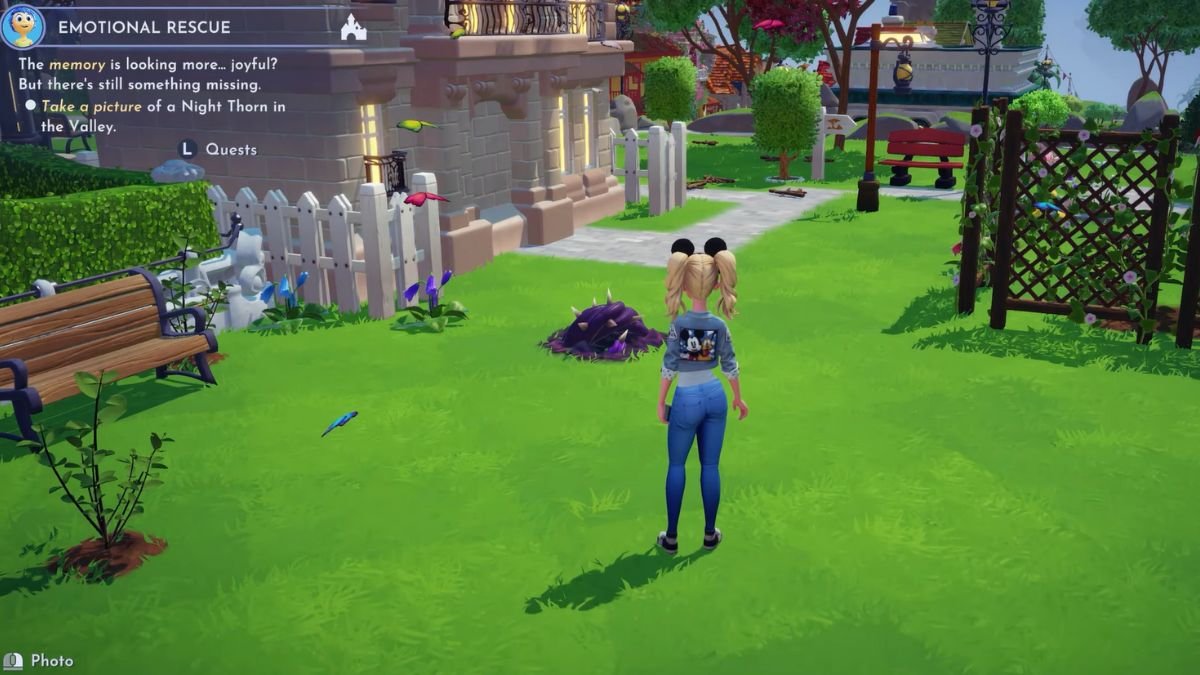
After heading all the way up in Dream Castle and interacting with the incomplete memory after unlocking the Inside Out Realm portal, you will be tasked with taking a photo of any Night Thorn around the Valley. This completes the Sadness memory after completing the objective for Joy as well.
Return to Merlin to hand it over and get the first of Joy’s questline, which is the Emotional Rescue quest. Completing that quest will immediately start the Out of the Blue quest, where you need to find Sadness trapped within the Long Term Memory. Below are the steps to complete this questline as well as the following quests for Sadness.
Out of the Blue Quest Guide
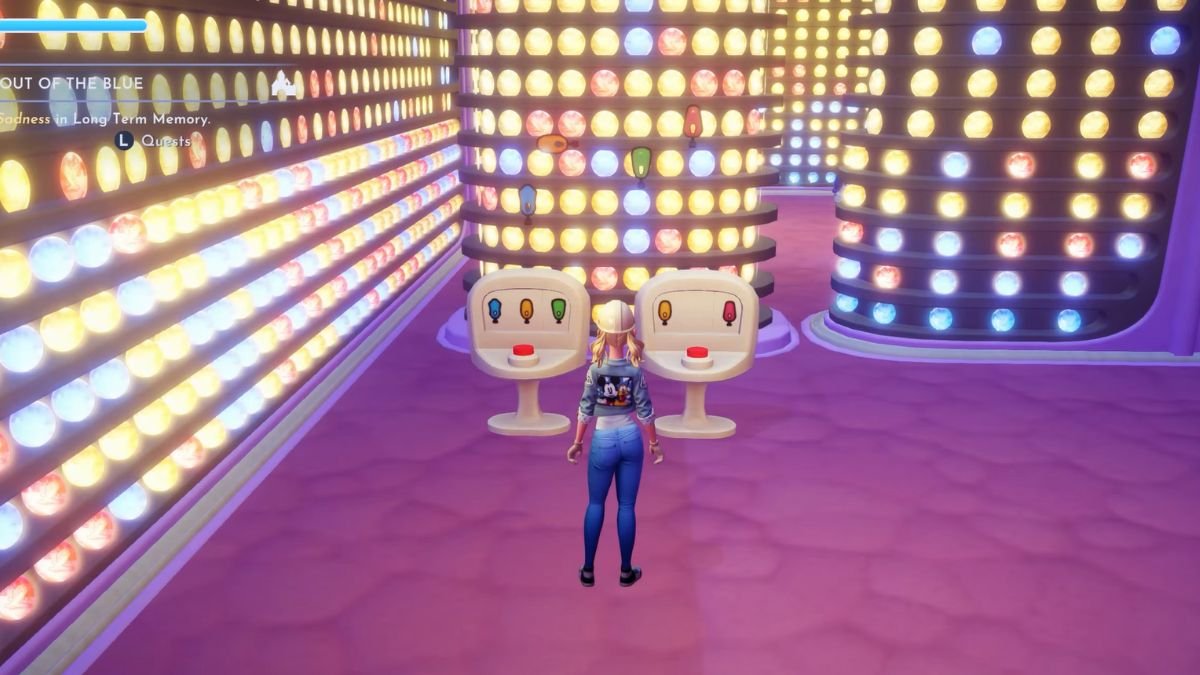
To unlock the Long Term Memory section, solve the next routing control puzzle by switching the flippers horizontally. Since there are three controls instead of two, it can be a bit tricky to solve. But, the answer is pretty simple; ignore the middle control and press the left side button first, followed by the button on the right.
Once you have access to the inside of the Long Term Memory storage, you need to solve another routing control puzzle to reach Sadness. There are several of these puzzles scattered around, but only one requires solving to reach her. To find the control puzzle, keep heading left around every turn till you find a dual console having four different colored flippers; blue, orange, green, and red.
Just press the right side button first, followed by the left, which unlocks the area ahead where Sadness is. After speaking to her, she will tell you that she is looking for Piano Lesson memories to help Riley out, and you need to walk around the area and locate 4 different memories containing music notes to collect them for her. Below are the locations you need to check to find all the piano lesson memories.
| Piano Lesson Memory | Location |
| Memory 1 | Check the wall behind Sadness to find the first memory. |
| Memory 2 | Exit the room where Sadness is and go left and down the path, then go left again. To solve this routing console puzzle, press the left button first followed by the middle button. Check the bottom shelf within the new room to get the second memory. |
| Memory 3 | Return to the Long Term Memory entrance and turn left. Investigate the bottom shelf on the left just beyond the cart of memories. |
| Memory 4 | Head back to the entrance and go right this time. To solve the routing puzzle, press the middle button first followed by the button on the left. Check the bottom shelf on the right side inside the new room to get the final memory. |
Return to Sadness to get the next objective, which is to interact with the recall tub, place all 4 piano lesson memories inside, and send them to HQ. Once that is done, speak to Sadness again and return to the HQ with her and speak to Joy after to get the Dream On quest. While Joy does move into your Valley after the quest ends, Sadness isn’t done yet, leading you to her next quest.
Get Up and Glow Quest Guide
Since the Dream Production was a total bust, your next task is to help Sadness locate all the Pop Concert Memories within the Long Term Memories storage. Return to the area where you met Sadness for the first time and solve a couple more routing console puzzles. But, the storage is in disarray from Riley’s outburst, so use your royal pickaxe to clear the path towards the memory shelves and locate all the Pop Concert memories.
| Pop Concert Memory | Location |
| Memory 1 | After talking to Sadness, exit the room, go right, then left, then right again. Clear the rubble here to find the first memory behind the rocks. |
| Memory 2 | Head straight from the first memory and break the rubble ahead to find a routing console puzzle. To solve this one, press the middle button first then the right side button, enter the room and investigate the shelf at the bottom left corner. Also pick up the Lost Control Switch by breaking down all the rubble in this room. |
| Memory 3 | Exit the room and go right to find another console puzzle just past the cart of memories. Press the rightmost button first followed by the leftmost button, then place the Lost Control Switch in the middle and press that one. This memory is located in the bottom right corner shelf. |
| Memory 4 | Leave the room and go straight down till you reach the two carts filled with memories. Check past the carts to find the memory on the bottom shelf on the right. |
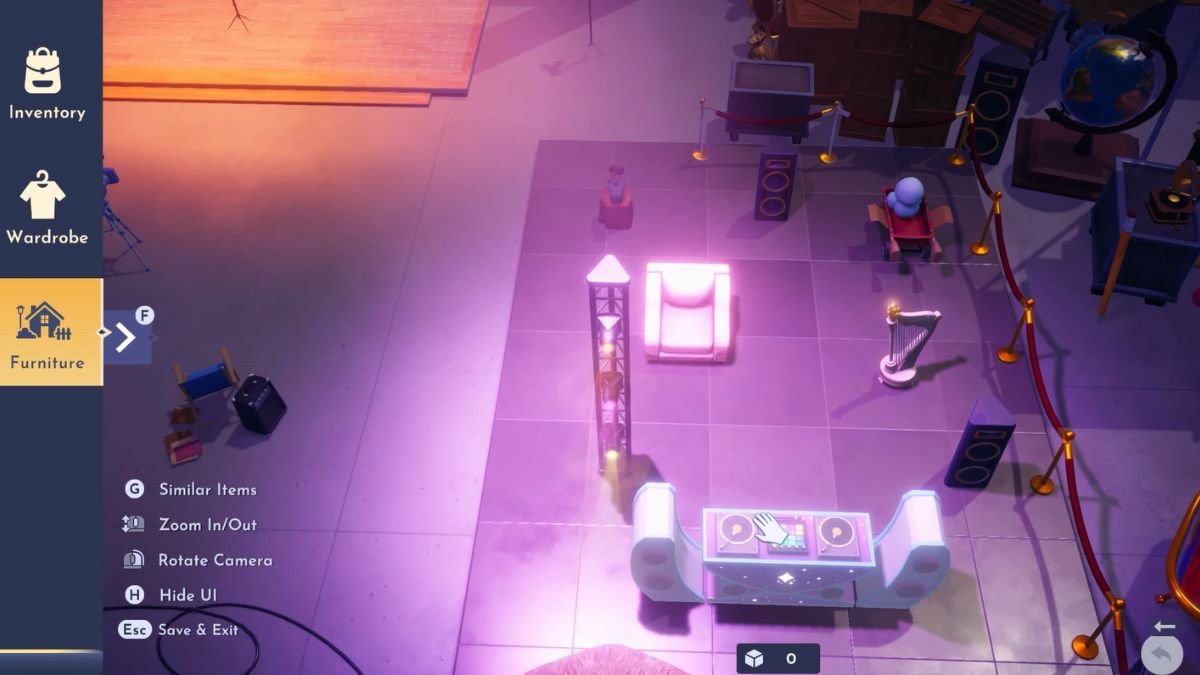
Speak to Sadness after obtaining all the Pop Concert Memories and send them all to HQ via the recall tube. You then need to meet her at Dream Productions North, where you need to redecorate the stage and dress up for another production. Head into Furniture Mode and select and move the following items from the right side of the room and get it onto the stage.
- 2x stage lights
- 2x speakers
- DJ booth
- Confetti cannon
Dress up in your best Bold outfits by heading into your Wardrobe and selecting outfits with the Bold tag. Once you are ready, hand over the Go Go Glow Stick to Sadness and head up the stage. Interact with the microphone to start the dream, then watch the rest of the cutscene unfold.
Talk to Sadness at the HQ, and she will tell you that she’s ready to move into the Valley with you. If you have purchased their Emotions’ HQ for Joy earlier, then Sadness will already be allocated a slot here. You are now free to interact with Sadness here and receive the Go Go Glow Light Stick Accessory.
Besides this, you also get to pick up unique friendship quests in Disney Dreamlight Valley for both Sadness and Joy now. For more guides on the game, check out our Disney Dreamlight Valley guides on A Ship of Gold Quest Guide, The Music’s On The Walls Quest Guide, and Shadows on the Wall Quest Guide.