


Survivor gameplay is very tricky and requires a lot of hours to get better at the overall system. Since the entire game is about survival, when you are taking the role of a survivor, you will easily make a lot of mistakes. Here we have prepared an in-depth guide to get you caught up on all the valuable tips and tricks to help you learn how to play as a survivor in Dead by Daylight.
Complete Guide To Playing As A Survivor in Dead by Daylight?
You must pick the perfect character and get used to all of the game’s systems to play the role of survivor. The survivor gameplay has many tiny mechanics, all interconnected; knowing them is the only way to make it out alive. Here is the list of topics we will cover in this guide:
- Picking a Perfect Survivor
- Make Use of Third-Person Camera
- Finding the Generators in the Area
- Nailing Skill Checks
- HUD Signs and Their Importance
- Tips for a Safe Chase
- What to do When the Killer Catches the Survivor?
- When to Open the Exit Door?
Picking a Perfect Survivor
Each character comes with three unique sets of perks. The first step of picking a character is to understand the survivor and their personal perk details, and how it will influence the gameplay. The game has 47 survivors in total, all of whom are playable. Here is the list of fan-favorites with the details about the personal perks:
- Meg Thomas: Quick and Quiet, Sprint Burst, and Adrenaline. (Highly Recommended)
- Nea Karlsson: Balanced Landing, Urban Evasion, and Streetwise.
- Kate Denson: Dance with Me, Windows of Opportunity, and Boil Over.
- Feng Min: Technician, Lithe, and Alert
You need to level the prestige of a character to unlock the personal perks. Since you have access to all 47 characters, you need to choose particular characters with appealing perks. When it comes to Bloodweb perks, set your eye on: Deja-Vu, We’ll Make it, and Kindred. Since the Bloodweb is randomized, you might not get the best every time, so always keep an eye out for the beginner-friendly node mentioned above.
The speed and hitboxes of all 47 survivors will stay the same. While some survivors may appear bigger than others, the hitbox will stay the same, and they will run at the same speed as everyone else. Starting off, you will have access to only 5 survivors. Completing the tutorial unlocks a new one, bringing the amount to 6.
Make Use of Third-Person Camera
One of the technical advantages Survivor has over Killer is the type of camera control. Every survivor will have third-person camera control, so you will easily be able to see your survivor and the area around them. Which will allow you to:
- Look over objects
- Peek over at the corners without stepping out.
- Checking the area behind your survivor.
You must press the direction key with the mouse control to look at the angle of the survivor. If you want to look behind your survivor, press the backward key “S” and then hover the mouse behind the survivor to see the area.
Finding the Generators in the Area
The survivor’s objective is to repair five generators (out of seven) and power them to open the final gate. Each generator will have a small white light on the top of it; this will be the cue to hunt them in the area. The slow blinking white light is an indicator of the generator. Generator placements are random in the map, and killers are always going to be around them.
Active and Inactive Generators
Remember, an inactive generator will have one blinking light. If the generator is in operable condition, then it will have four white lights working at once. Some rooms will also have electric signs; if they are flickering, then the generator in the area is in an inactive status. If the signs are glowing continuously, then the generator is active. If the signs are off with no electricity, then the room doesn’t have a generator.
When you are repairing a generator, make sure you do it in a team of two instead of heading solo.
- Repairing with one player will take 90 seconds.
- Repairing with two players will take 53 seconds.
- Three players on a generator will take 43 seconds.
A pair of two is the perfect amount to work on a generator. The difference between two-player and three-player is not as significant as solo vs duo. When you are repairing a generator, it will easily catch the attention of the killer, so having two people working on it will make a good distraction.
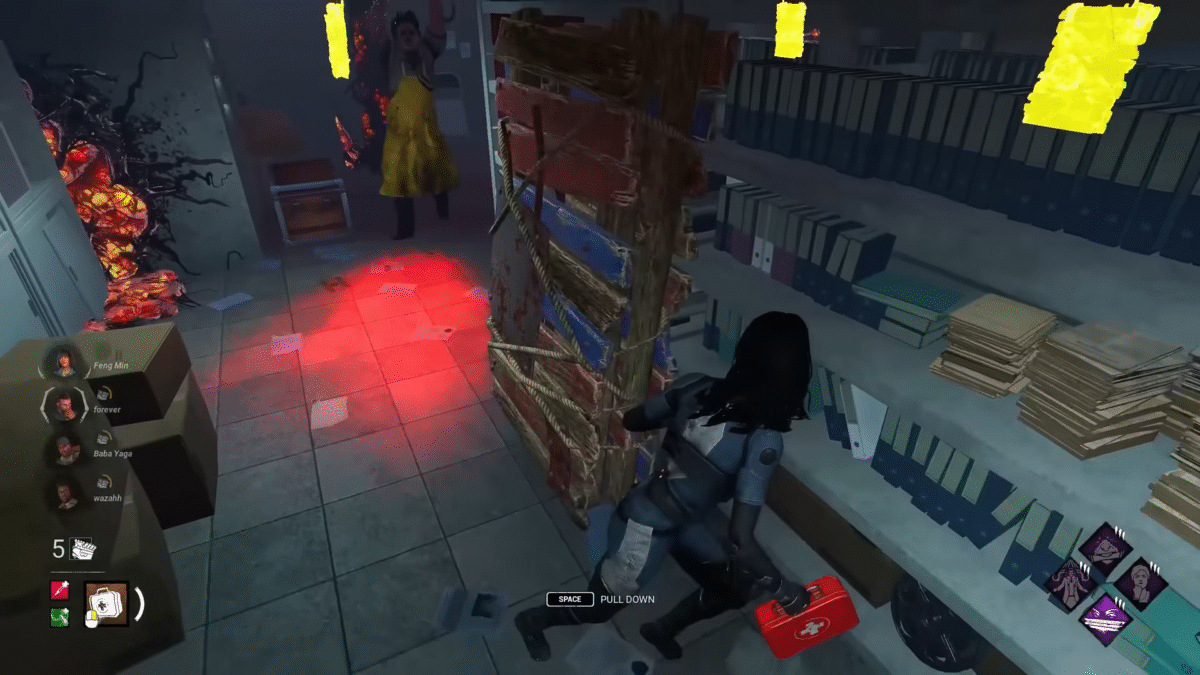
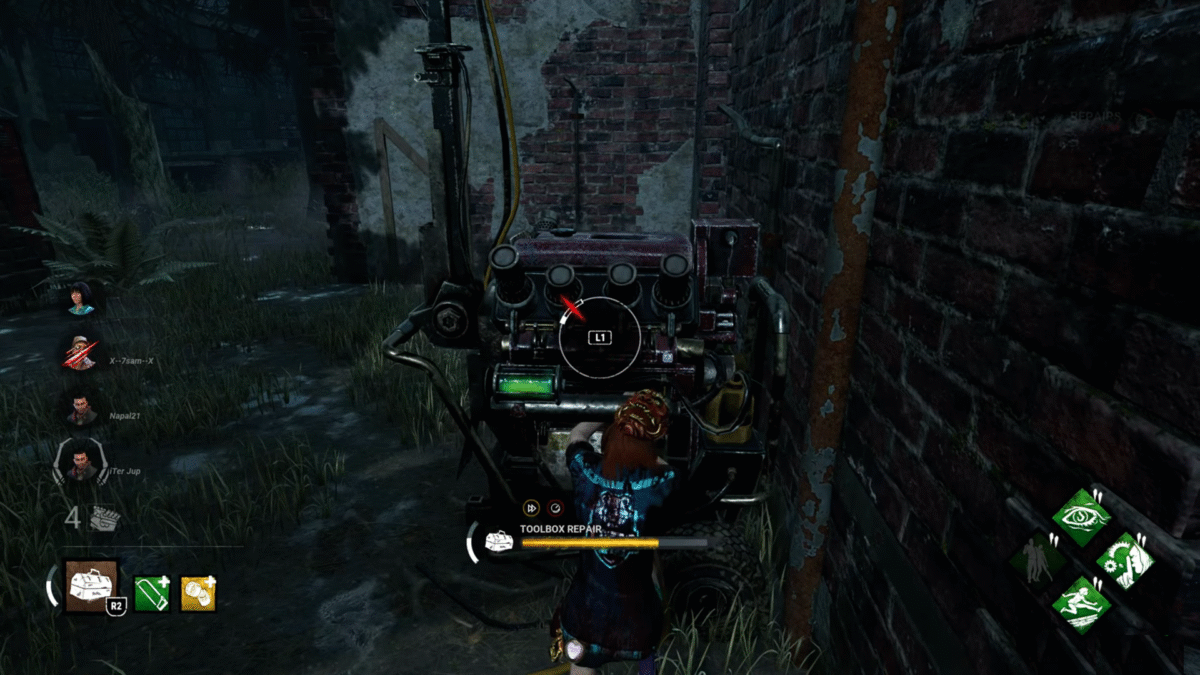
Nailing Skill Checks
Skill checks are QTEs you must perform to get a bonus and avoid a penalty. You see the skill checks when you’re working with the generators to be carried by the killer to the hook spot. A successful skill check will grant 50 Bloodpoints. Landing a perfect skill check will result in gaining 300 Bloodpoints and 1% progression bonus for repair and 150 Blood points and 3% progression bonus for healing.
Now, if you do manage to fail a skill check, this will pause the interaction for 3 seconds and add a negative 10% progression penalty for all actions.
HUD Signs and Their Importance
If you check the bottom-left of the screen, you will see the details of all four survivors and the icons around them. Each icon represents a different meaning, tied to the action currently being performed for or by the survivor.
- Small Claw Mark: This symbol around the survivor’s icon means the survivor is currently being chased by the killer.
- Closed Claw: Seeing two large claws around the survivor’s icon means the survivor is the killer’s obsession.
- Generator Icon: This icon tells the survivors that they are now repairing the generator. The progress bar around the generator icon shows the repair progress of the generator.
- Totem Icon: The totem icon tells the survivor they are now cleansing a totem.
- Healing Icon: This icon could mean the survivor is healing themselves or others.
- Hook Icon: If the survivor’s icon is covered with a giant hook, it means they are dangling off a hook.
All these icons play a crucial role in strategizing your gameplay. If you see one of your teammates is on a hook and the other one is being chased by the Killer, it will give you the perfect time to head over to the hooked survivor and unhook them. If a single survivor is working on a generator, you can get over to the spot to help them out.
Tips for a Safe Chase
Since you are playing the role of a survivor, it is better to prepare for a lot of chases. Chases help other teammates to work on the generators, but here you also need to survive and delay the time as much as possible. Here are the tips to survive a chase.
- Split up at the Beginning: At the start of each match, the killer spawns far away from the survivors. Use it to your advantage and split up to find the generators. The last thing you want to be is close to another survivor, as this will make the killer easy to spot and kill all of them. Don’t ever rush into the problem; always strategize your approach when you are planning to meet another survivor.
- Maintain Safe Distance: When you are running away from the killer, the priority is to maintain a safe distance from the killer.
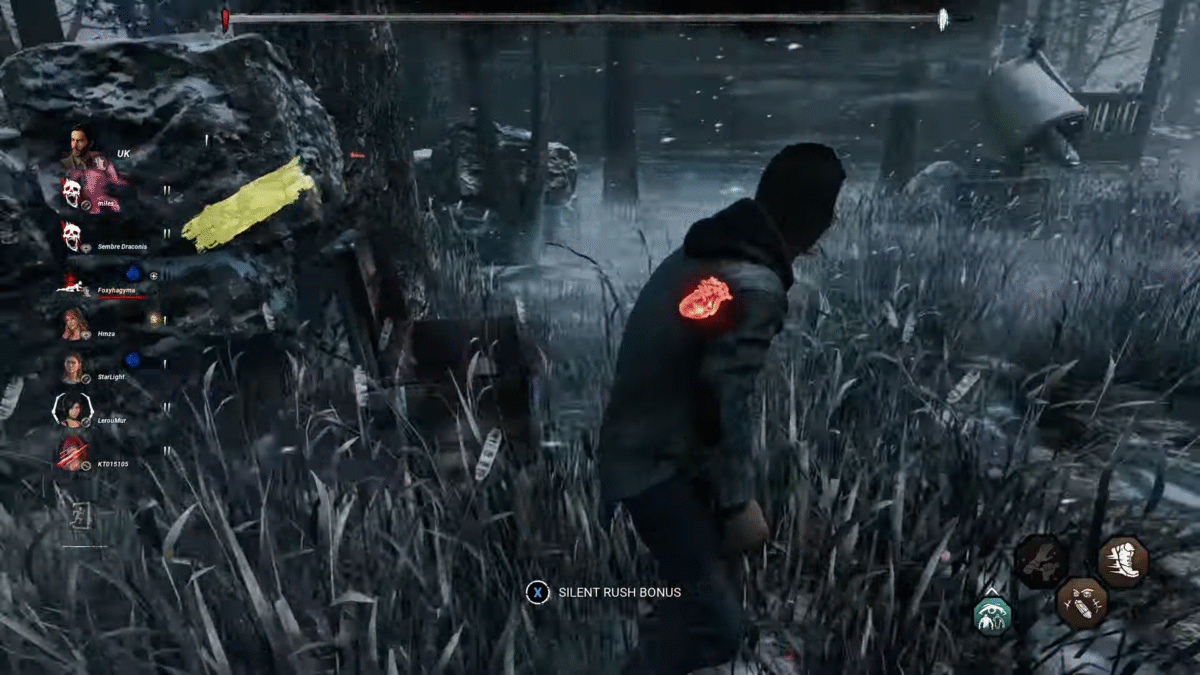
- Look at Your Heartbeat: Pay attention to the glowing heart inside the survivor. It will start beating at a faster rate once the killer gets into proximity. Once the killer gets close, the visual effect of the heart and the sound will change. If you don’t see your heartbeat glowing, then you need to turn on the mechanics via the Accessibility option.
- Use hitboxes to your advantage: It’s easier for the survivor to move around than the killer because of the hitboxes. Survivors have smaller hitboxes, allowing them to loop around objects quickly than the killers.
- Set up pallets for the killer: Use pallets to block the path of the killer. Don’t worry, you can always vault over them. Once you block the path of the killer with the pallet, look for another pallet to put distance between the killer. The best place to get some good pallets would be abandoned buildings in the area. They have windows and pallets to create a good blockade around the killer.
- Always use Windows: Unlike pallets, killers can’t destroy windows. Meanwhile, survivors can vault over windows to get to the other side. This will buy you a good amount of time to think of the next move.
- Slow Vault: If you perform a slow vault, it will not create any sound, perfect for a stealth gameplay scene. Here, you have to let go of the sprint key while vaulting to eliminate the speed from the vault.
- Medium Vault: Vaulting over a steep angle will result in a medium vault.
- Fast Vault: Here, you need to build up momentum, running towards the window and then pressing the button to vault over it.
Fast and Medium vaults will alert the killer. But when you are being chased, it’s best to resort to a fast vault to put distance between you and the killer.
Note: It would take 1:45 seconds for the killer to vault over the window. Fast vault takes around 0.44 seconds, while the Medium vault takes 1:09 seconds.
- Haste Boost: When you do get hit, you will get a temporary increase to speed and distance. Use this boost properly to get out of harm’s way. If you see your team is running low on health packs or survivability, you can take the hit and use the boost to run.
What to do When the Killer Catches the Survivor?
Once you get caught by the killer, he will take you to the hook spot. Here, perform the skill checks while being carried by the killer to earn some bloodpoints. Once the killer puts you on the hooks, you will see all of your teammates and all the interactable objects in the surroundings.
Survivors have three hook stages:
- First stage: When the survivor is the hook, they can try to unhook themselves. But it should be treated as a last resort. It is highly recommended that you wait for your teammates before trying to unhook yourself. There is a 4% chance that unhooking might become successful. Save it for dire situations with no teammate in sight.
- Second Stage: When the survivor gets hooked for the second time, they will receive skill checks just to survive.
- Third Stage: If the survivor gets hooked for the third time without any teammates to save them, then it is an instant game over.
If you managed to get hit after getting unhooked by the teammates. You will see a mending bar under the name of the survivor at the bottom left of the screen. Here, you need to keep running to maintain the mending bar.
When to Open the Exit Door?
Once all five generators are active, you can head towards the exit door and hold down the button to open it. Once the exit door opens, it will kick-start the endgame collapse timer at the top. If any of the survivors fail to make it through the exit door, they will immediately die. So it is pretty important to know when to open the exit door to help all of your survivors make it out alive.
Check the HUD to see the status of each survivor on the bottom left of the window. If a survivor is on the hook or being chased by the killer, you just open the exit door at 99. Make sure to help everyone out before opening the exit door.
If all the survivors managed to die, then you can get out of the area by using a hatch. If you are the only survivor left on the map, the game will randomly spawn a hatch in any of the locations. Listen to the audio cues to spot the hatch to get out.
Dead by Daylight is not an easy game to master; people have spent countless hours getting good at the game. The tips mentioned above will help you stay on your toes and avoid quick kills and newbie mistakes in the game.