


With each quest you pick up in Dune Awakening, you have to locate different items while exploring the regions. Some quests won’t directly tell you where to go, so you need to do a bit of hunting to check out various areas to get what you are looking for. During the Echoes of the Past quest, you need to locate a Moisture Sealed Cave. If you are having a hard time trying to locate it, this guide will show you where to look in Dune Awakening.
Moisture Sealed Cave Locations in Dune Awakening
The Echoes of the Past quest is part of A New Beginning questline, and you have to speak to Zantara in Hagga Basin South to start the quest. Then, you will be tasked with completing The First Trial of Aql, check out our guide on that to know how to do it. Upon finishing that, you will start the objective to “Gather Fremen Components From Moisture-Sealed Caves”.
You need to locate 6x Micro Sandwich Fiber and 1x EMF Generator to complete the objective. You can find these items within the Moisture Sealed Caves listed below.
Moisture Cave Location #1 – Vents of Eifrit
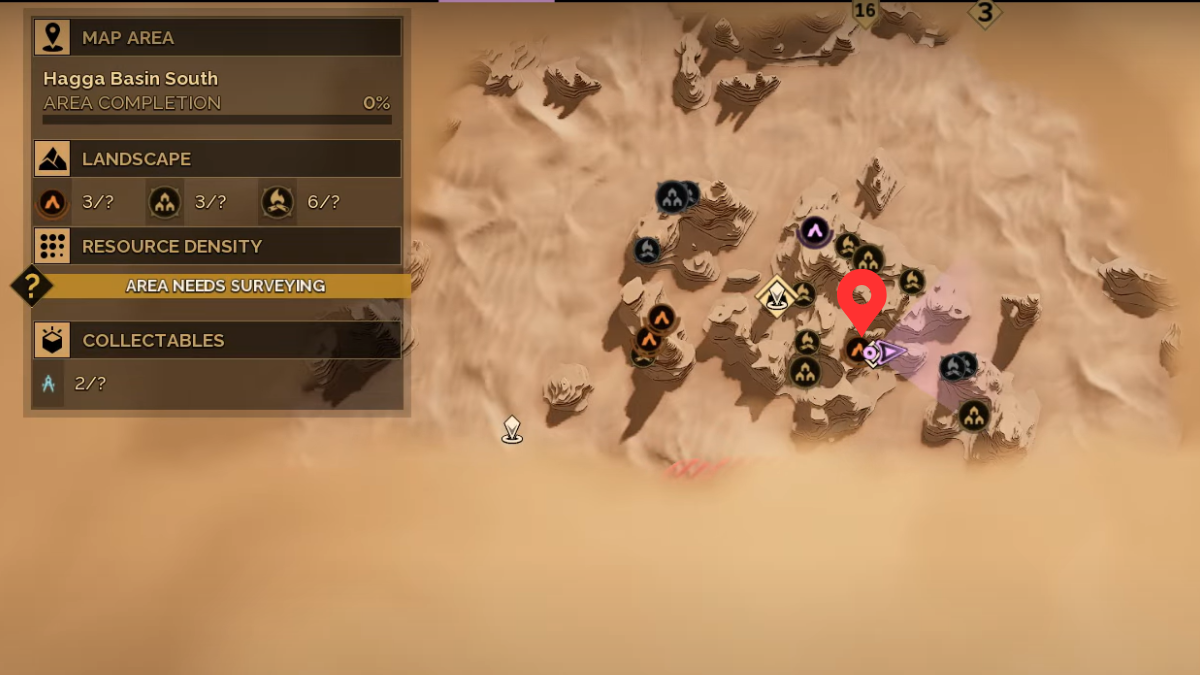
Head south of the trail location to find the Vents of Eifrit. You can hover you mouse over the brown cave icons on the map to know where to find it, or check our map above for the location. Check to the east of the cave icon to find the entrance. You will spot a unique bubble-like cover blocking the way. Use any weapon to tear open the entrance and get inside, and you can claim 1x Micro Sandwich Fabric upon doing so.
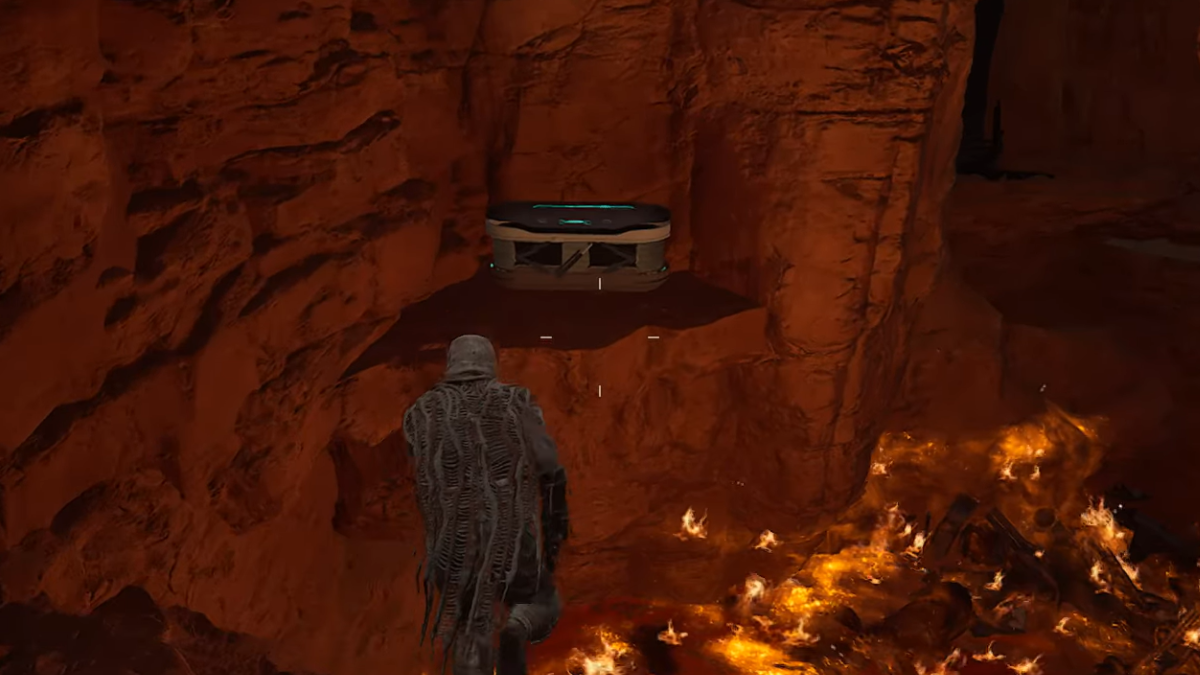
Head up the slope and walk across the fire, or grapple your way across if you have the Shigawire Claw. Keep going to find an entrance to the left, then head inside to drink from the water canister. Next, exit the room and climb across the wall above the fire pit to find more canisters on top. You can get 1x Healkit here, then turn around and jump across to the platform with another chest to get 113x Solari, 1x Literjon, 3x EMF Generators, and 4x Micro Sandwich Fabric.
Moisture Cave Location #2 – Southwatch Shelter
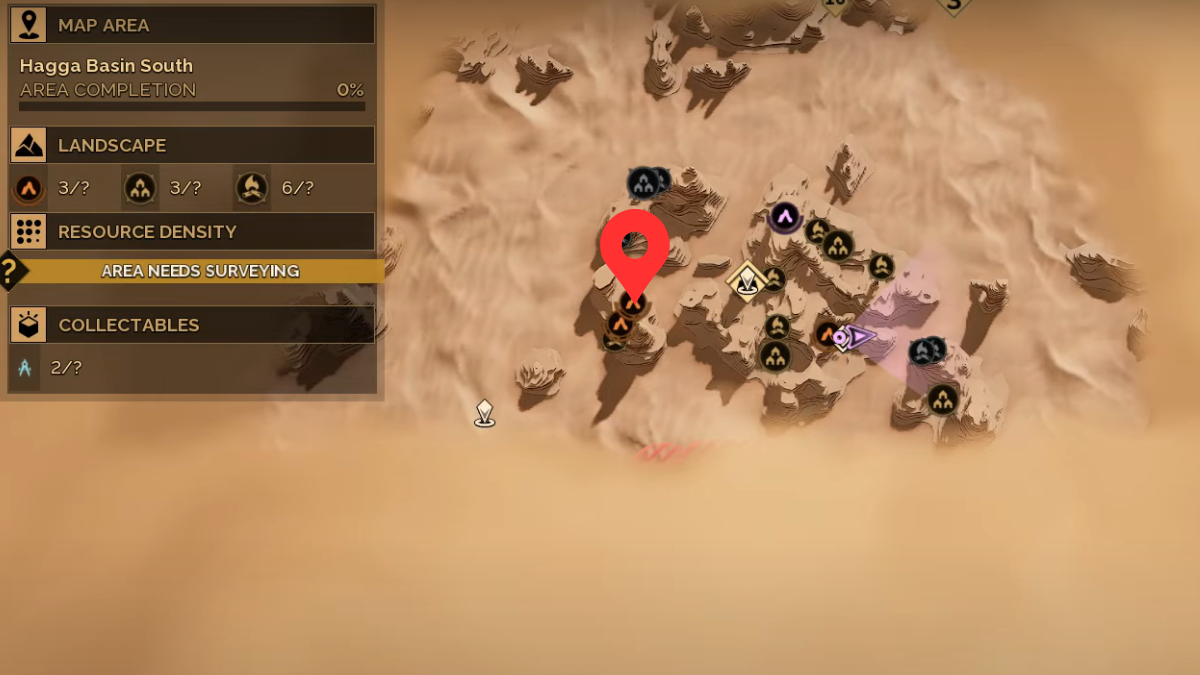
Head southwest from the trail location to find another Moisture Cave. It is hidden between the cliffs, so explore the area to find the entrance. After breaking open the entrance, you can get 1x Micro Sandwich Fabric. The inside of the cave doesn’t hold many surprises, as most of the chests that you need to loot is right at the entrance.
Defeat the bandits inside and loot their corpses to get mineral resources, then check around for a chest containing 3x Salvaged Metal, 5x EMF Generators, 3x Micro Sandwich Fabric, and 55x Solari. There is another exit point straight ahead that is blocked by the bubble, so tear it down to get another Micro Sandwich Fabric.
Moisture Cave Location #3 – Aren’s Refuge
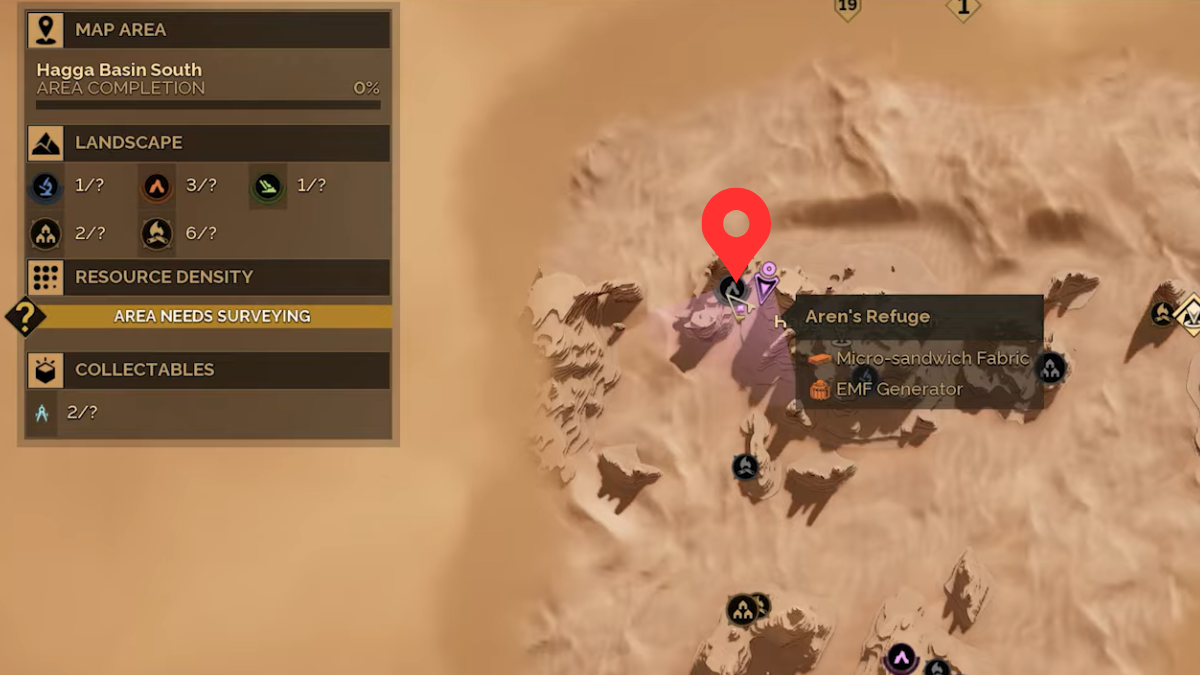
This cave can be found north of the trail cave. The exact location is marked above, and the cave entrance can be found right at the cliffside, you can’t miss it. Break open the bubble seal to get 1x Micro Sandwich Fabric, then defeat the bandits inside. Check the left side of the room to find a chest containing 58x Solari, 3x Micro Sandwich Fabric, 5x EMF Generators, and 3x Salvaged Metal.
There is another chest right behind the table where you found the first chest. Unlocking it will give you the same amount of the same items, namely, 59x Solari, 3x Micro Sandwich Fabric, 5x EMF Generators, and 3x Salvaged Metal. Fortunately, there is another exit point if you make your way through the narrow passage at the back of the cave. The exit is blocked by another bubble structure, so tear it down to get 1x Micro Sandwich Fabric.
For more guides on Dune Awakening, check out the ones on Complete Base Building Guide, Should You Unlock The Research Menu Early, and Complete Guide To All Class Trainer Locations to know more.