


As you progress through Dragon Quest VII Reimagined, you’ll start on the isolated Estard Island. Of the areas on the Island, the Shrine of Mystery is the most important. You and Prince Kiefer visit it and learn you’ll need to find three pieces of a four-part relic.
Each will take you to a different part of the island, two of which end in small puzzles. We’ll be going over the quickest way to secure the fragments and start your journey properly!
Starting Your Journey

Once you meet Prince Kiefer at the castle, he’ll run off to the Shrine of Mysteries on the East of the island. Once you meet him there, he’ll start your first quest, finding the other three yellow fragments.
Two of the fragments can be found by the town towards the southwest. For the quickest fragment, enter the staircase heading downwards to the left of the church.
The Second Fragment
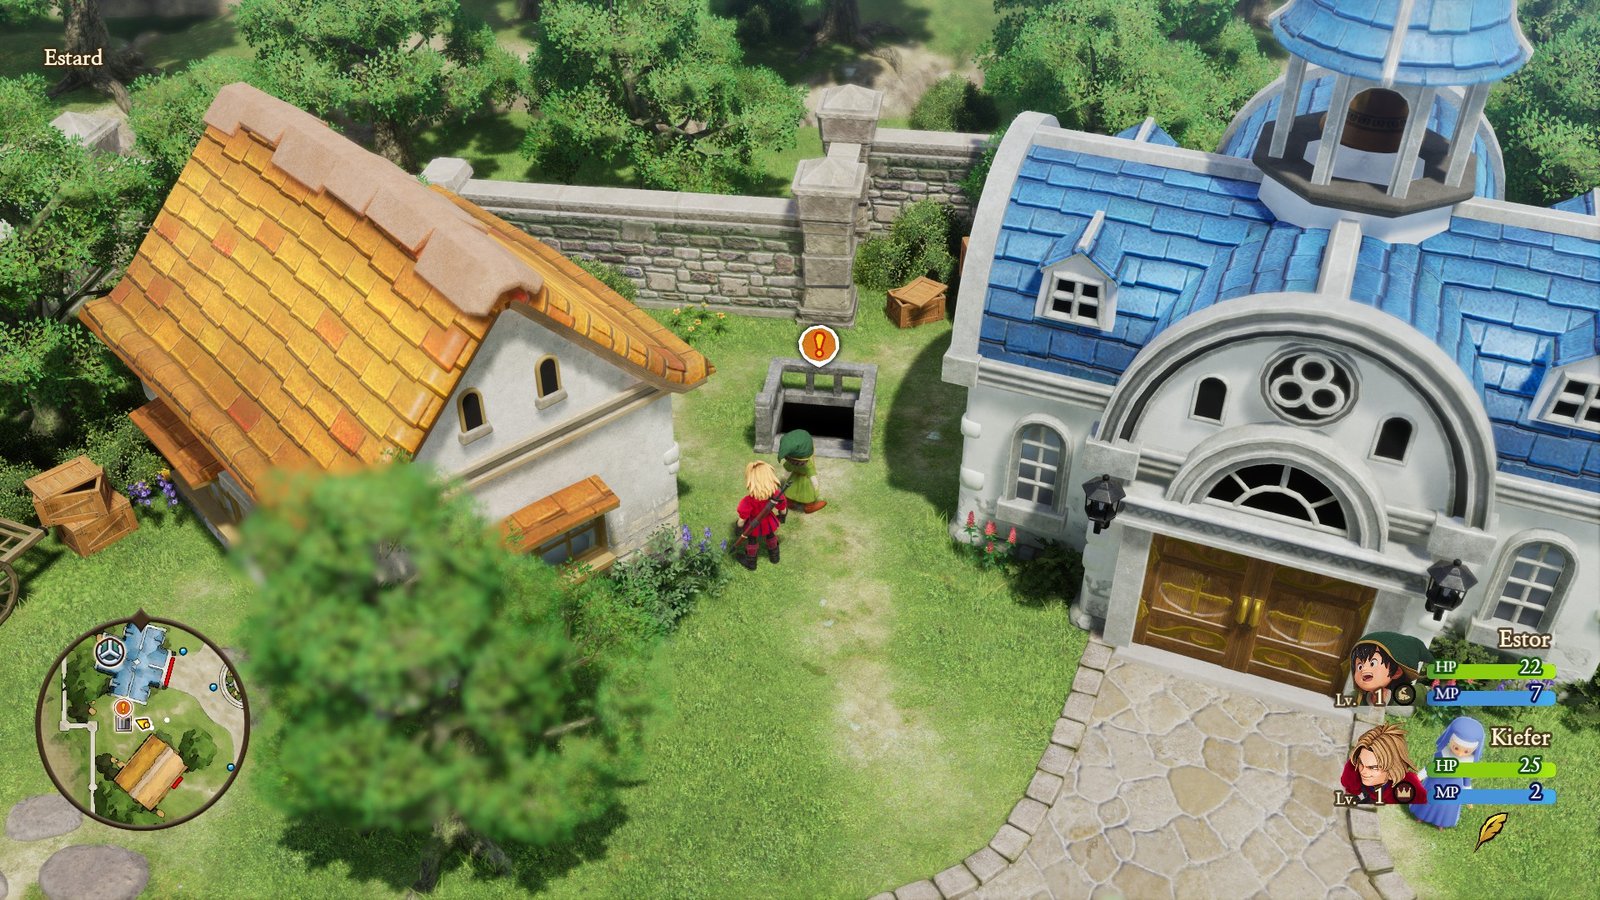
Pass the locked door and continue heading down until you come out on a cliff-side home . In the small home’s basement sits an old man, who will attempt to talk the two young heroes off their quest before handing them the key to a trial.
Return to the locked door, which you can now open, to find a small lighting puzzle, asking you to match the shape on the back wall.
That shape, of course, is Dragon Quest’s iconic Slime, which you can create by pushing the two stone statues into the spaces below. Set the right statue on the second row, sixth column, and the left statue on the fifth row, fifth column.
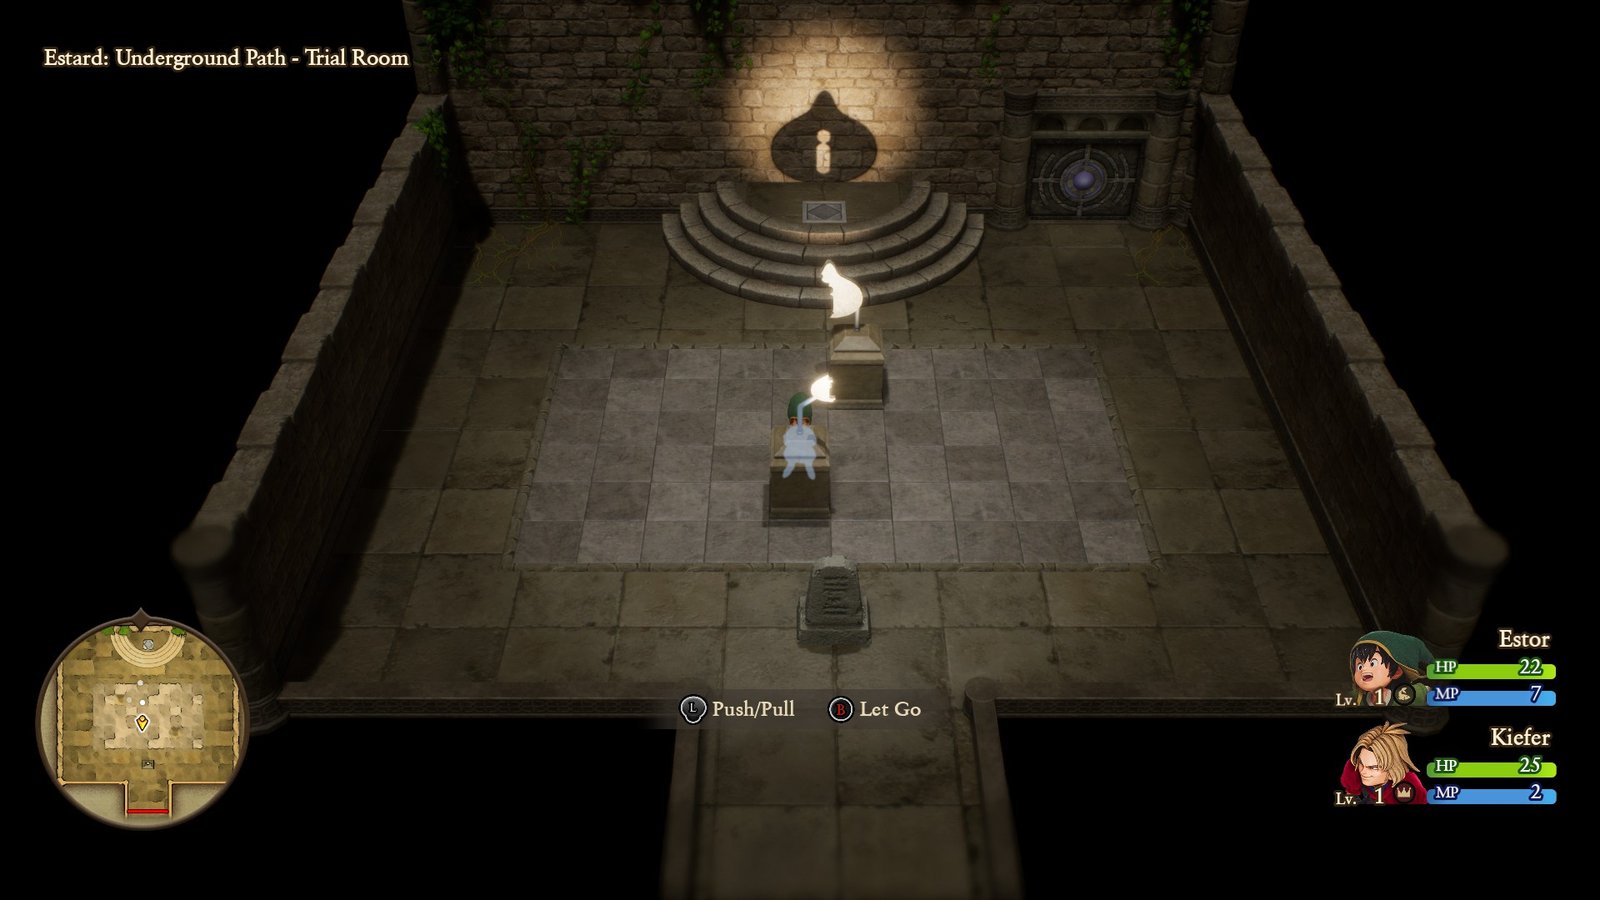
Finish the opening by standing on the small grey slab before the shadow, and the door will open. One last challenge stands between the two heroes and their goal, their very first combat encounter!
The Tribulators aren’t much of a threat, but risk putting a party member down if they focus fire. You start with a stock of healing items, so use them on the Hero’s turn if need be, as Kiefer does much more damage at current.
- You can change tactics to alternate between manual control and general orders.
- Unlike most RPGs, the Hero starts as much more of a support for the other party members, coming with a heal on level up.
- Don’t be afraid to use items, as plenty are useful for ensuring the team’s performance and debuffing the enemy.
Best the two spectral foes, and you’ve acquired the second Yellow Fragment. Return the way you came, back to the town, to start hunting for the third.
The Third Fragment

Enter the house to the northeast of the town to find the Hero’s uncle, Pike. Pike is… in a rough state. He’s late on rent and desperately needs the Hero’s help. In exchange, he’ll hand over the strange Yellow Fragment he found.
He asks the Hero to grab empty bottles around town and meet him in the Rainbow Cove. You only need three, though more than that appear all throughout town. Keep an eye out for gold shining marks along the ground, notably between houses in the corners of the town.
- One bottle can be found right outside Pike’s home.
- A second can be found to the south of the town, between two buildings.
- A third can be found by the entrance to the dungeon that housed the first Yellow Fragment.
Once you have the three bottles, head to the Northeast of the island and meet Pike in the Rainbow Cove. He’ll ask you to fill the bottles up with water from the cove so he can sell it as fake holy water.
Once he has the water, Pike will show the Hero to a crack in the wall of the Cove, leading to a small cave and another puzzle.
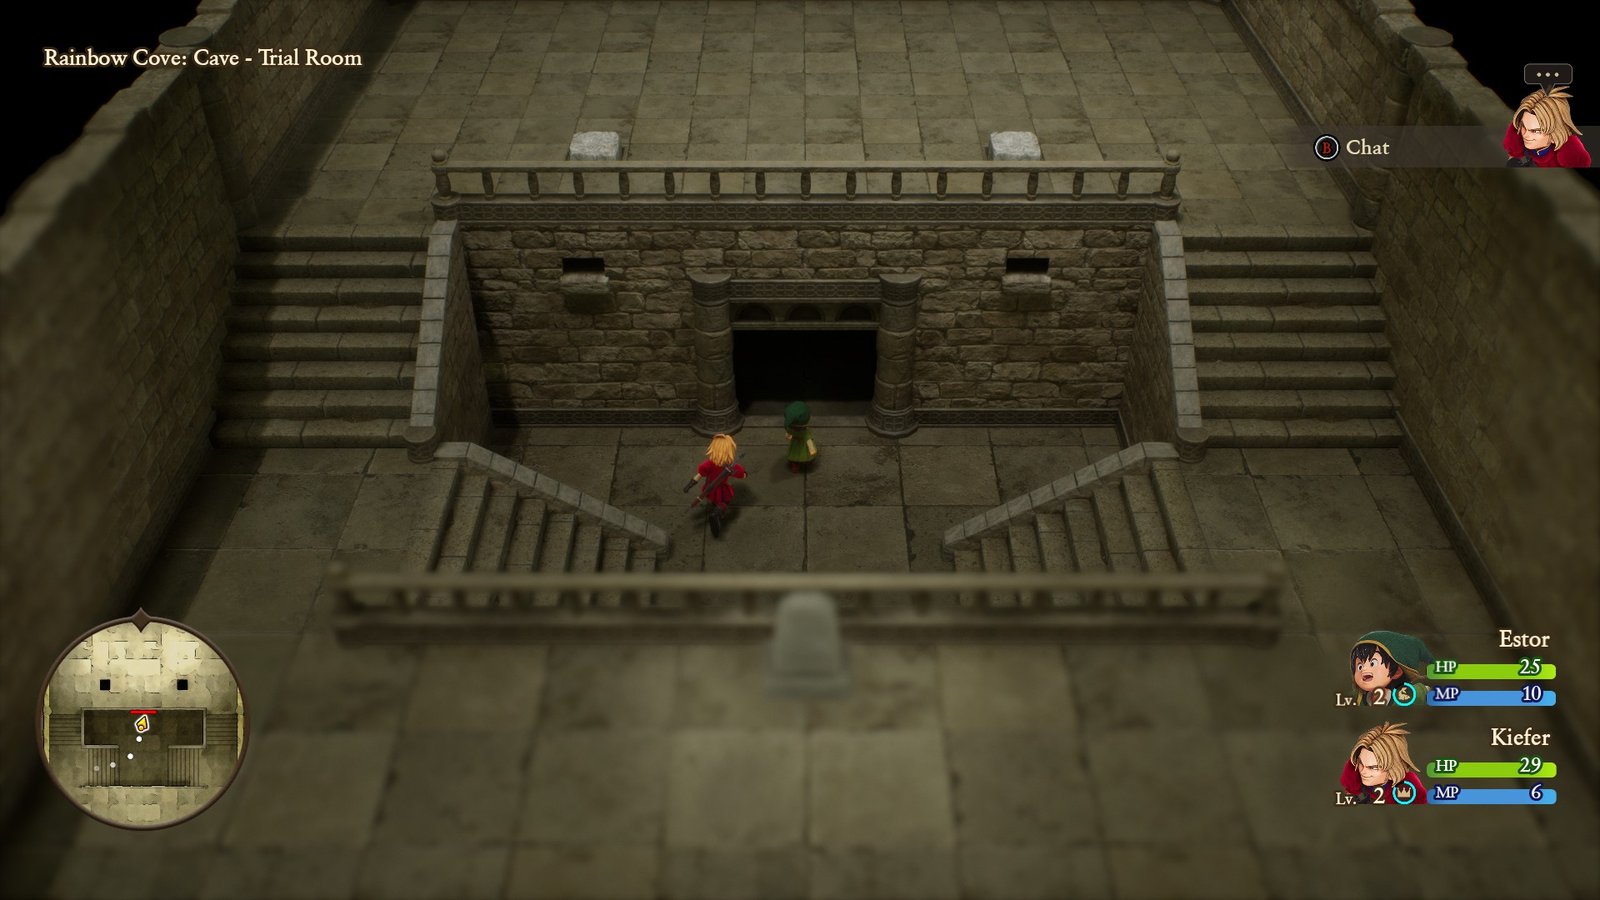
This one is much less of a puzzle than the previous, simply tasking you with pushing two stones into open holes to drain the water blocking the door. Behind that door lies the third Yellow Fragment, leaving only one left to find.
The Final Fragment
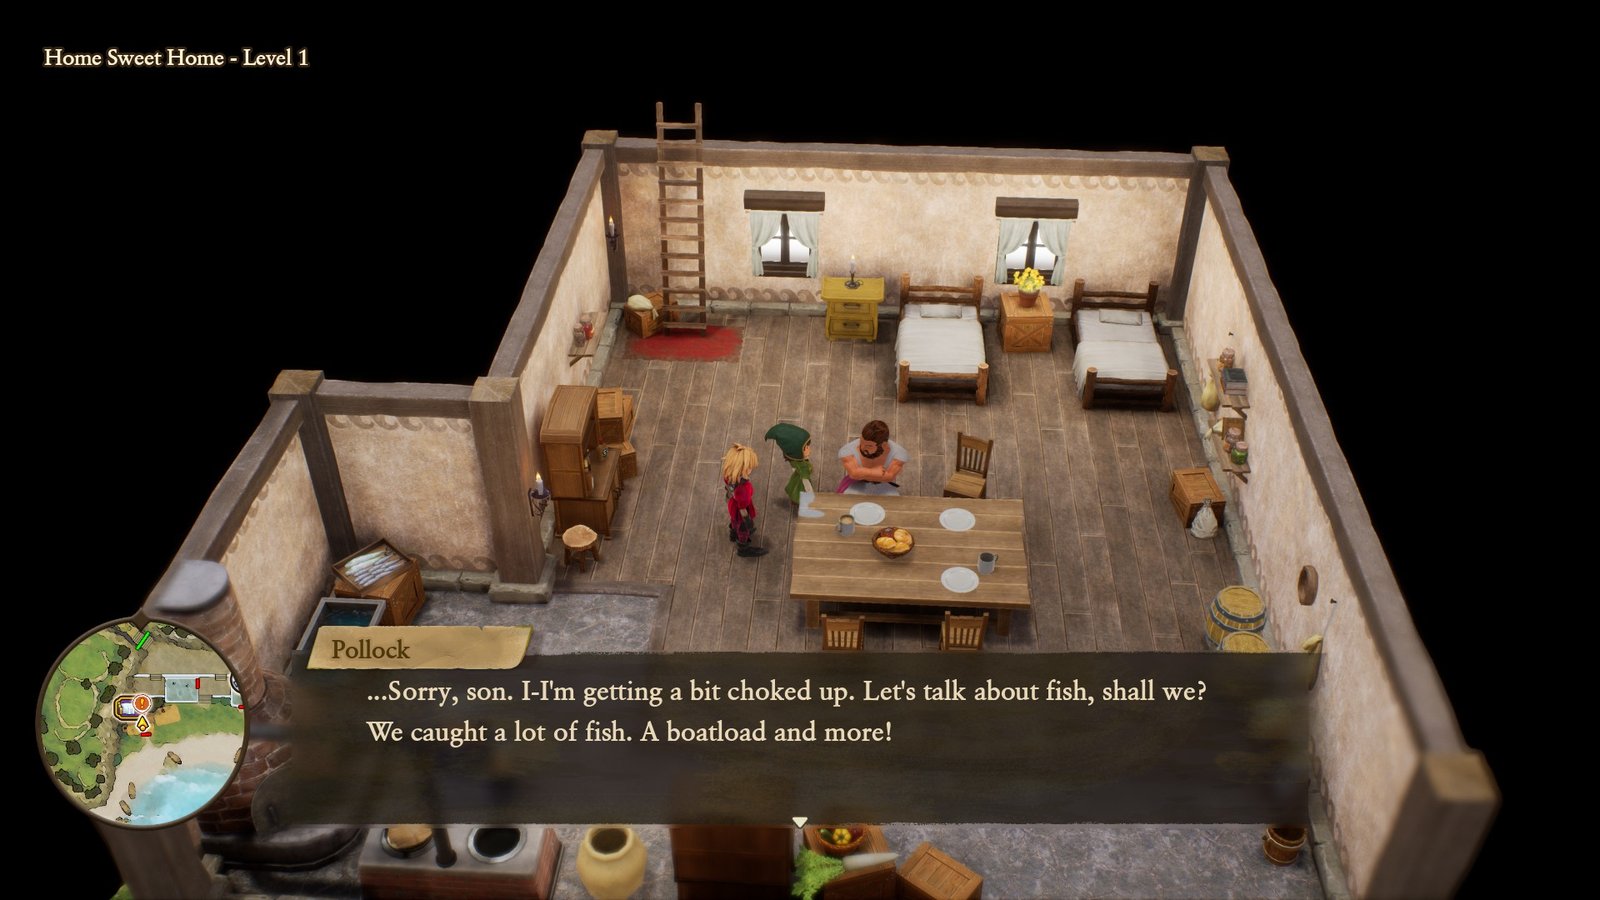
If you’ve been using the chat system, you may notice Kiefer mention that the Hero’s father is back from a fishing trip. Return to the small village where the Hero lives in the south of the island, where his father is happily waiting in their home.
He’s overjoyed to report that not only did the trip go well, but they found a small, strange stone alongside their haul. With the Prince by the Hero’s side, he hands it over, finalizing the hunt for the Yellow Fragments!
Return to the Shrine of Mysteries

With the Fragments found, return to the Shrine of Mysteries to open the path, securing your third party member and starting your journey properly!
You’ll become very familiar with the Shrine of Mysteries, so make sure you treat it well, frogs and all.