


As far as deadly bosses go, MIO doesn’t have a smorgasbord of bosses that will make you tear your hair out in frustration. However, the ones that do meet that criteria are some of the toughest in Metroidvania history. One of which being the duo bosses, Sol and Vin.
This boss was actually included as a secret boss within the game’s demo. However, the way you get to this boss has been altered slightly, meaning you’ll need to wait a little longer to reach them.
That said, you’ll appreciate the prep time, as this is easily one of the hardest bosses in the game. Here is how you should go about taking down this deadly duo.

Bookmark:
Where To Find Sol & Vin
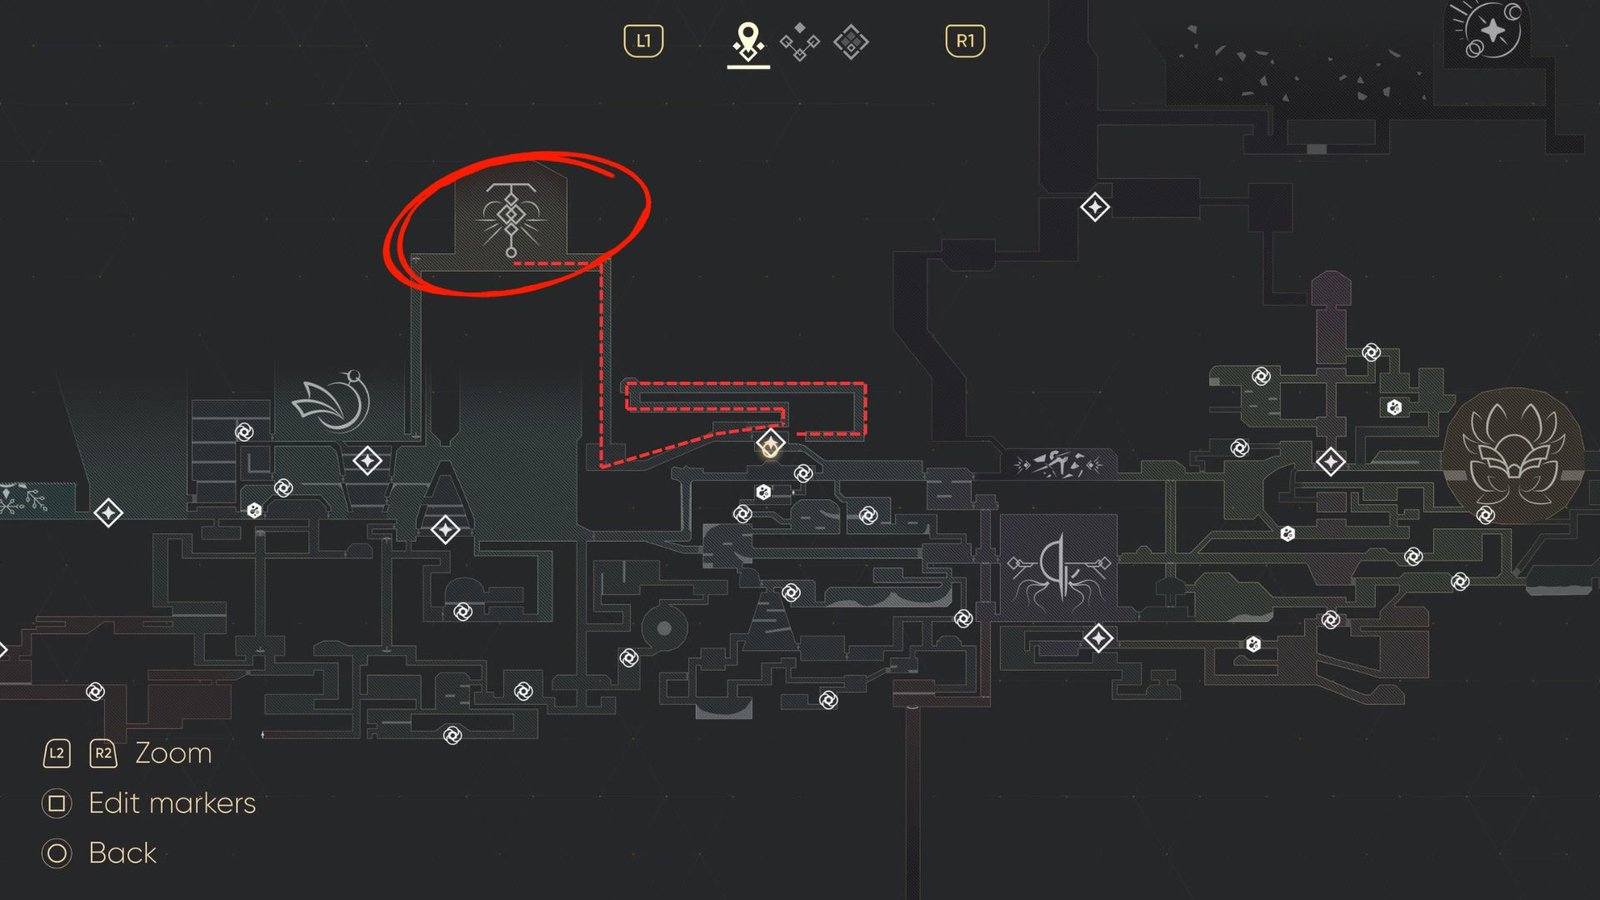
To access Sol and Vin’s boss area, you will need to be able to access the Metropolis City Hall. Here, you’ll find an area will a locked door, and above this, a crack in the roof just begging to be explored.
That said, you will need to have got the Striders ability, so don’t bother trying to find these guys until you have this skill.
From here, navigate the slippy and perilous path and you’ll eventually find yourself at the other side of the aforementioned locked door, making for a short run back to the boss.
From here, take the elevator up to the Embedding Palace, and up top, you’ll step into the arena with this pair of assassins.
How To Prepare
Seeing as this is meant to be an end-game boss that tests your skills to the limit, I would encourage players to have as many tools in their arsenal as possible.
Firstly, I would suggest that players have at least 3x Coating Component upgrades and 3x Modifier extensions as a minimum.
Second, I would suggest that players gather at least two Keeper Tendrils upgrades for a permanent damage boost. One can be found early on in Dwellings, and another can be found within the Promenade.
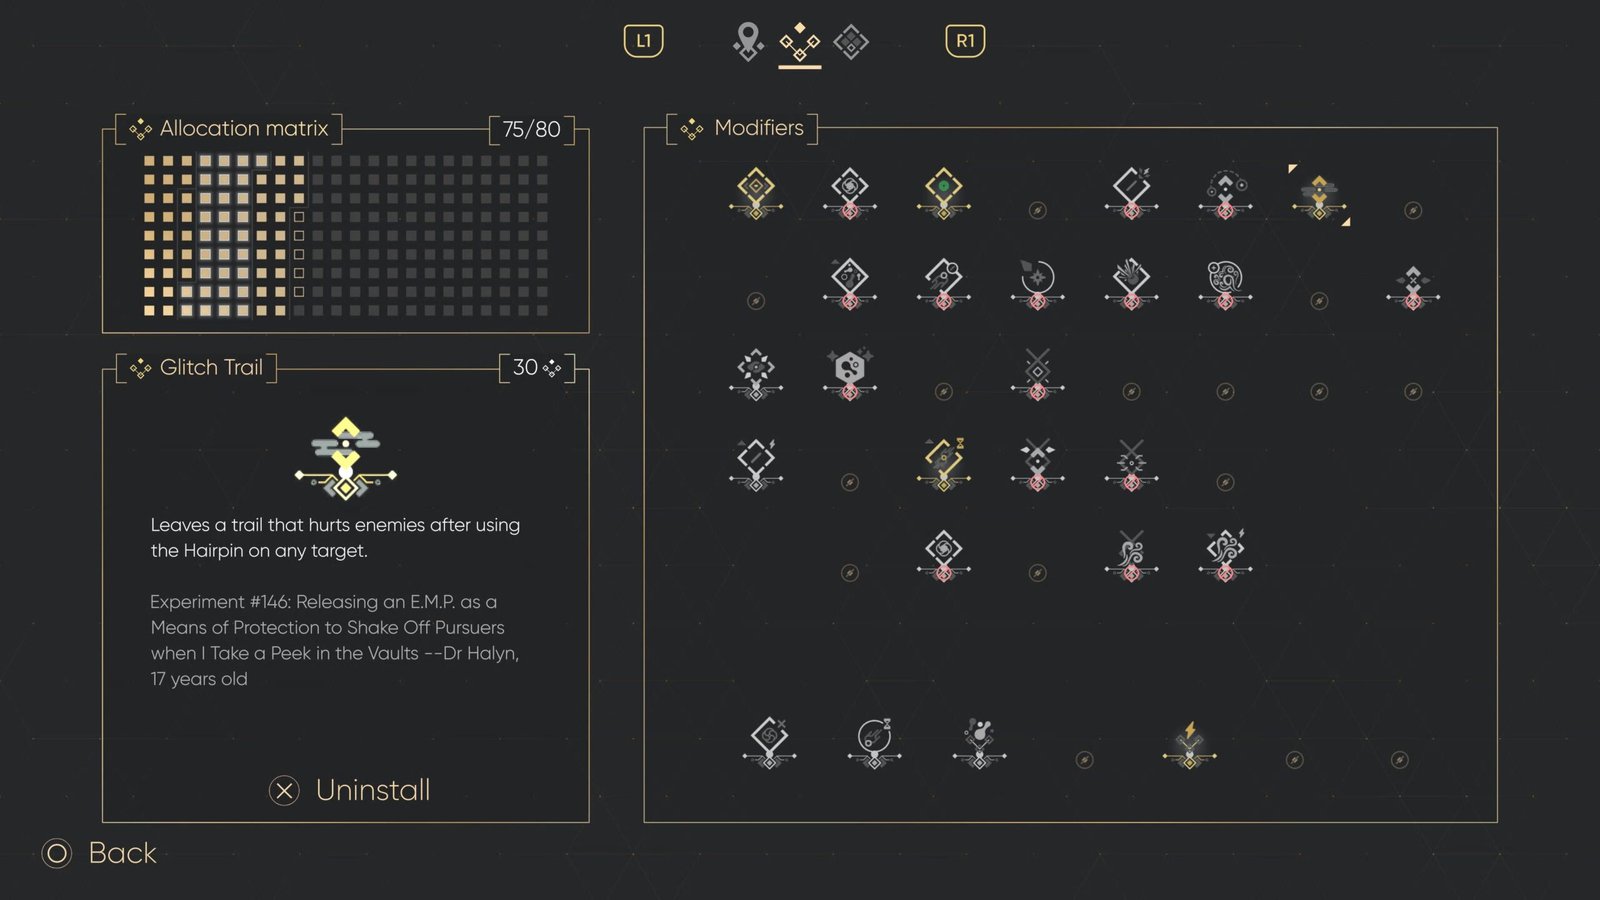
Then thirdly, you’ll want to set up modifiers that make the most of your Hairpin, as this skill is vital in this fight. Here are the mods I would suggest based on players having around 80 allocation matrix points:
- Kinetic Thrust
- Wild Cat
- Pain Conversion
- Glitch Trail
- Sharpened Hairpin
I would suggest mixing and matching with these until you come up with a setup that suits your approach. Kinetic Thrust and Wild Cat are purely to deal more damage per opportunity, but the others have more involved purposes.
Glitch Trail allows you to deal damage while remaining on the defensive and Sharpened Pin allows you to deal damage as you counter. There pair together excellently.
Then, as a cheap addition at 5 points, Pain conversion could be a lifesaver in the last knockings of the fight, as this will refill your energy when the floor is gone and give you a chance to reset.
How To Beat Sol & Vin
Sol & Vin have three distinct stages of their fight, occurring roughly changing at 66% and 33% health. Allow us to break down each stage of the fight.
Phase One:
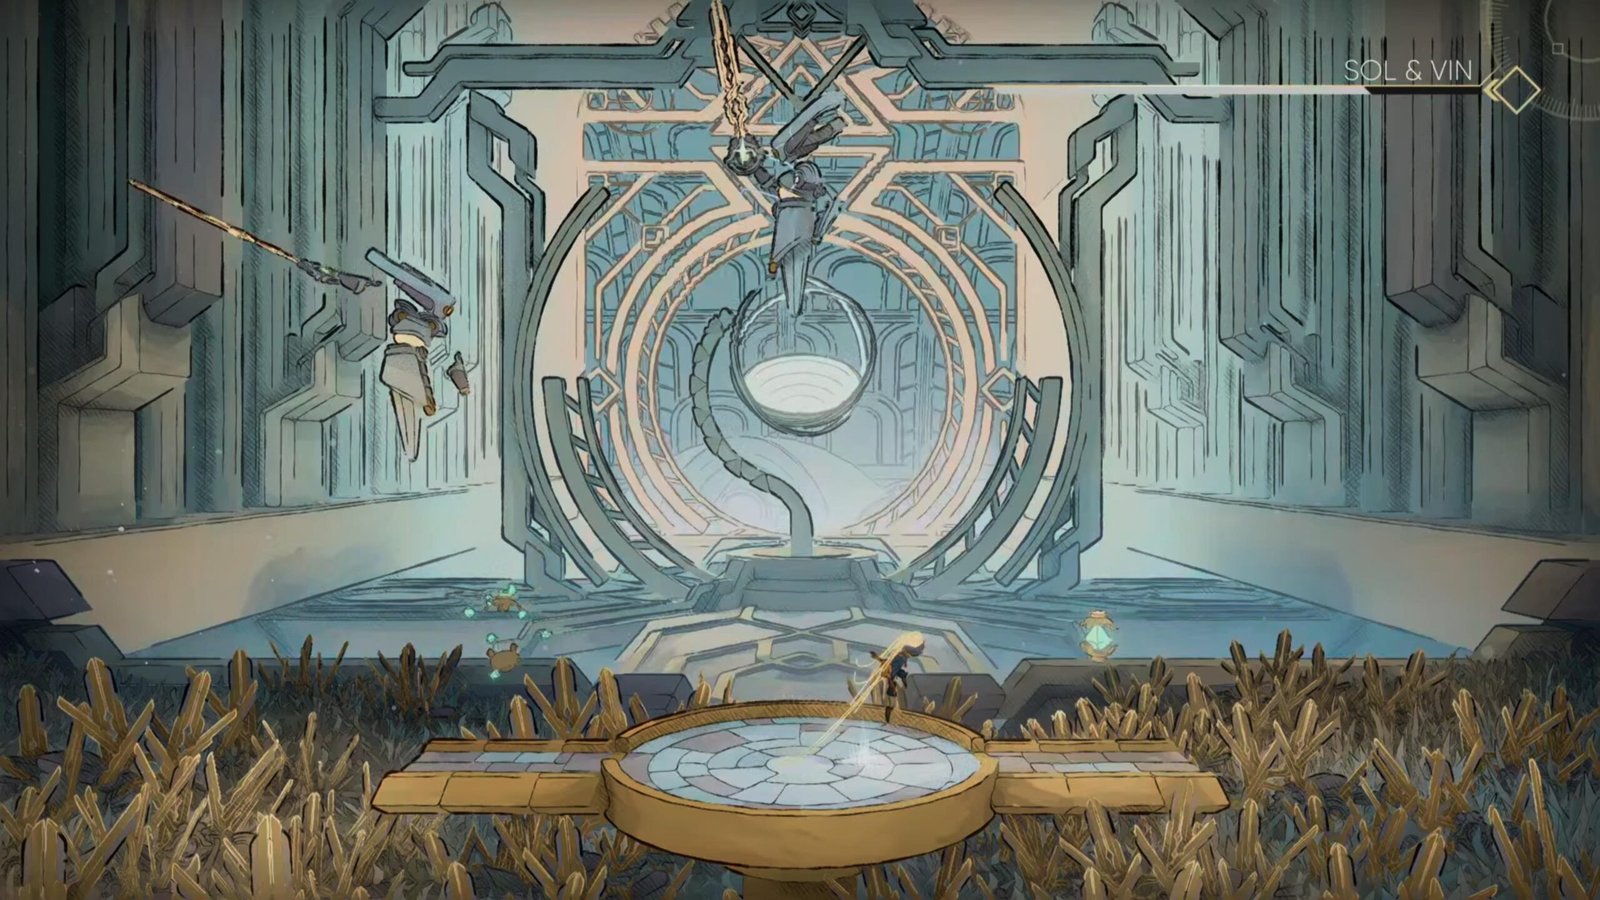
During this phase, you can expect the following moves from this boss:
- Airborne Cross: Each boss will rise high left and right, and then perform an intersecting slash in the middle of the arena. Best way to avoid here is to time a dodge at the point of intersection. Watch for the white glimmer to time your dodge.
- Ground Cross: Similar to above but bosses will move low instead of a sweeping motion. Best counter is to jump above and sail, then land either left or right enough to get a counter strike in.
- Back To Back: This attack will see the bosses rise high in the middle of the arena and slam down on the two protruding Platforms outside the centre circle. This is a great opportunity to get some attacks in, as the attack will never hit the center of the arena. Stand here and mount a counteroffensive.
- Throw And Slash: One boss will hover while the other will aim and throw their weapon to the ground. Then, they will get their weapon and perform another slash. Best counter is to Hairpin to the floating boss, and then hover while the second slash happens.
The key to getting through this phase is to not get greedy and wait for the back to back strike, as well as the opportunities to strike when both enemies stand at either side of the platform and taunt the player.
Phase Two
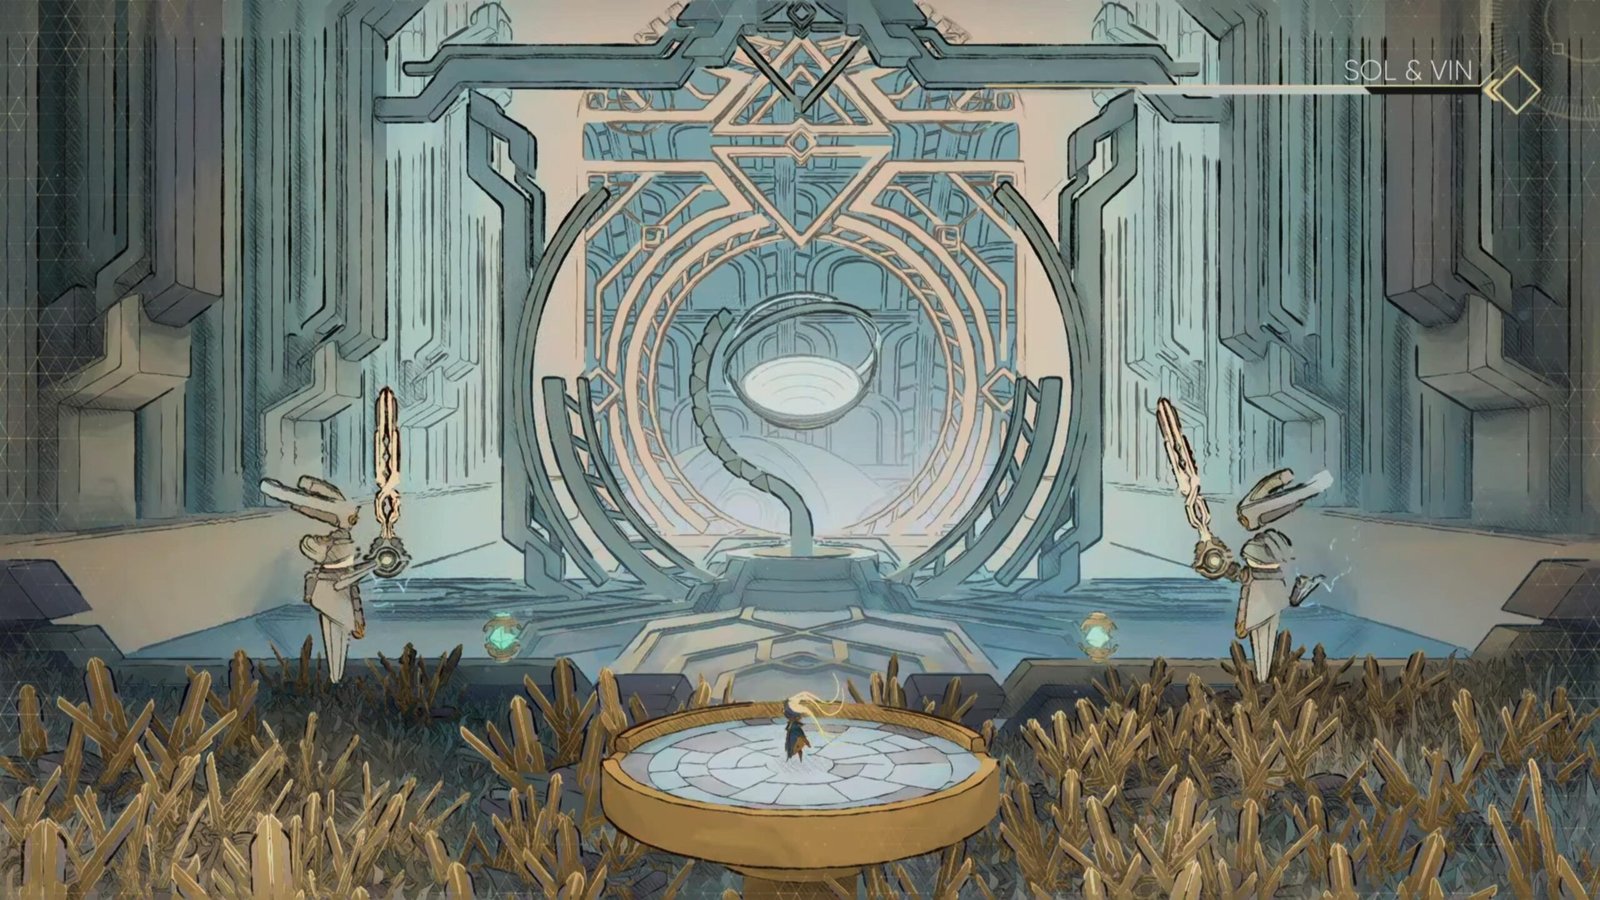
The second phase will begin with Sol and Vin decide to get rid of the two protruding platforms either side of the central circle, making your safe zone even smaller. Here are the new moves that you can expect throughout this portion of the fight.
- Fake Out: This will see the two bosses appear and disappear rapidly above head, before doing a sweeping attack one after the other. The key here is to watch patiently and wait for them to stop faking out. As soon as you spot one of them hovering for more than a split second, Hairpin to them and hover while the rest of the move takes place. This fake-out can happen anywhere from 3 to 5 times.
- Fake Out Slam: Same as above but enemies will perform a central slam instead of a sweeping attack.
- Fake Out Throw & Slash: Same as phase one move, but with the initial 3-5 time fake out as preamble.
The key to getting through this section is not reacting hastily to their fake out trick. Wait for the opportune moment to Hairpin and be aware of your positioning, because if you are too far away to hairpin, you’ll need to adapt on the fly, and trust me, that rarely goes well.
Phase Three
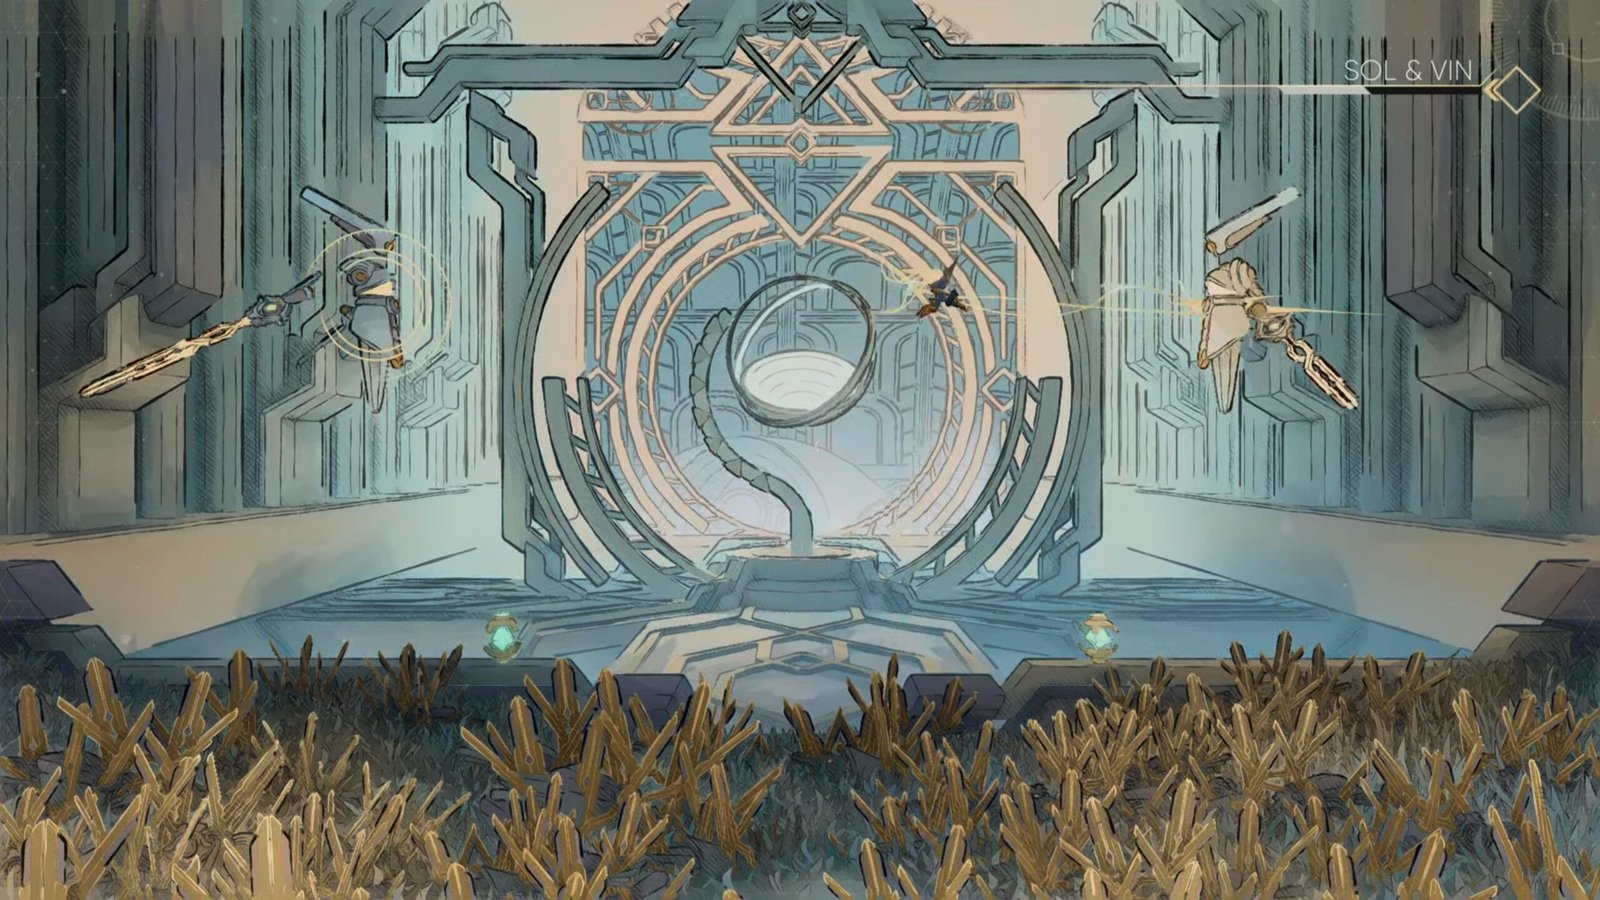
This is the phase that separates the casuals from the veterans. In this final phase, the floor is completely removed from the battlefield and you’ll need to use either the bosses, or the two Hairpin nodes to refill energy and Hairpin to safety.
During this phase the moveset remains more or less the same, with the added caveat that there is no safe zone to rest.
Basically, this is like Hollow Knight’s infamous Trial of Fools, and you’ll need to be composed and pick your moments as you frantically try to remain airborne.
The only tip I can offer in this section is to try to always drop below your Hairpin target so you can slingshot yourself upwards, as you don’t want to be inches off the ground with no room for error.
If you can survive this last portion, you’ll have more than earned your victory.
Rewards for Defeating Sol & Vin
The reward for Defeating Sol & Vin is twofold. Firstly, you’ll gain access to a container just beyond the boss room, where you’ll get hands on the Black Widow Mod.
Plus, if you use your striders to climb above the boss room, you’ll also access an area where you’ll find Lura’s Seal. A seal that will allow you to open a locked room in the Tuning Station.