


With Season 9 in full swing in Diablo 4, there is a whole new questline to complete in the game. Some of the quests have left players with a sense of confusion on how to complete it. Wisdom’s Chosen is one of those quests that seems to have players baffled at the quest objectives, so this guide will explain how to complete the Wisdom’s Chosen quest in Diablo 4.
Wisdom’s Chosen Quest Guide Diablo 4
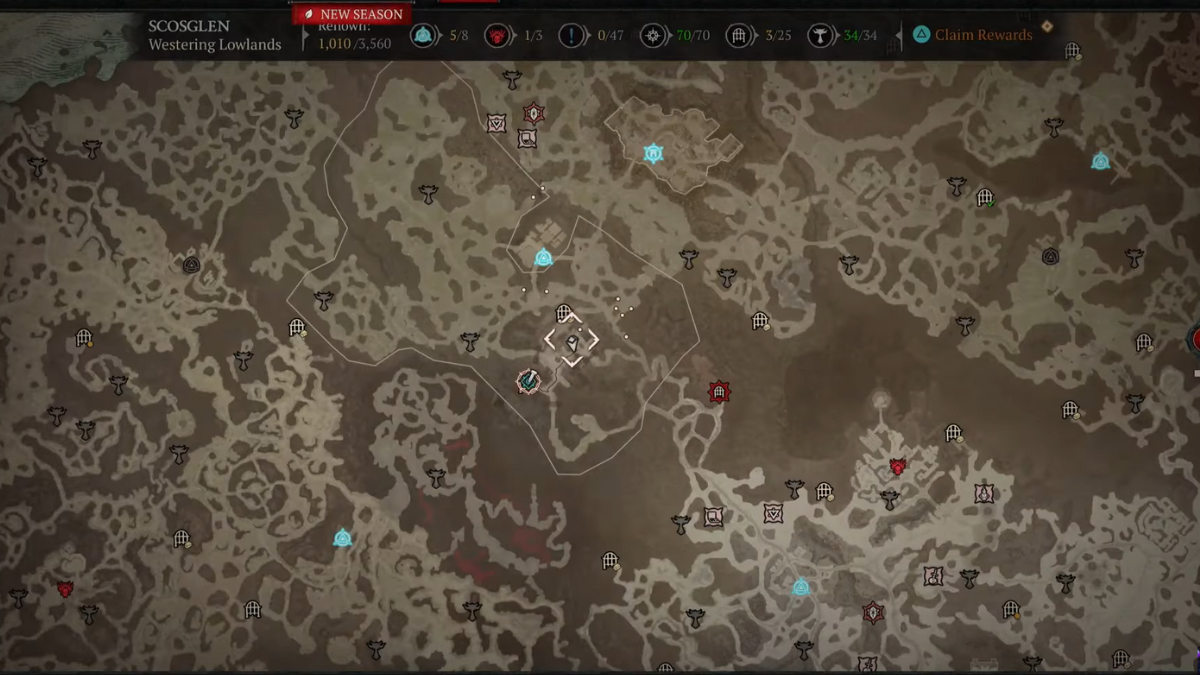
After speaking to Bryona in Firebreak Manor, you will automatically unlock the Wisdom’s Chosen main story quest. The first step of this quest is to Explore Eldhaime Keep, which is located just south of Firebreak Manor. Once you are inside, explore the rooms to find the Note on Dohan’s Hand quest item on the table. After reading the note, the quest objective will change again.
Find The Relic Within Broken Bulwark
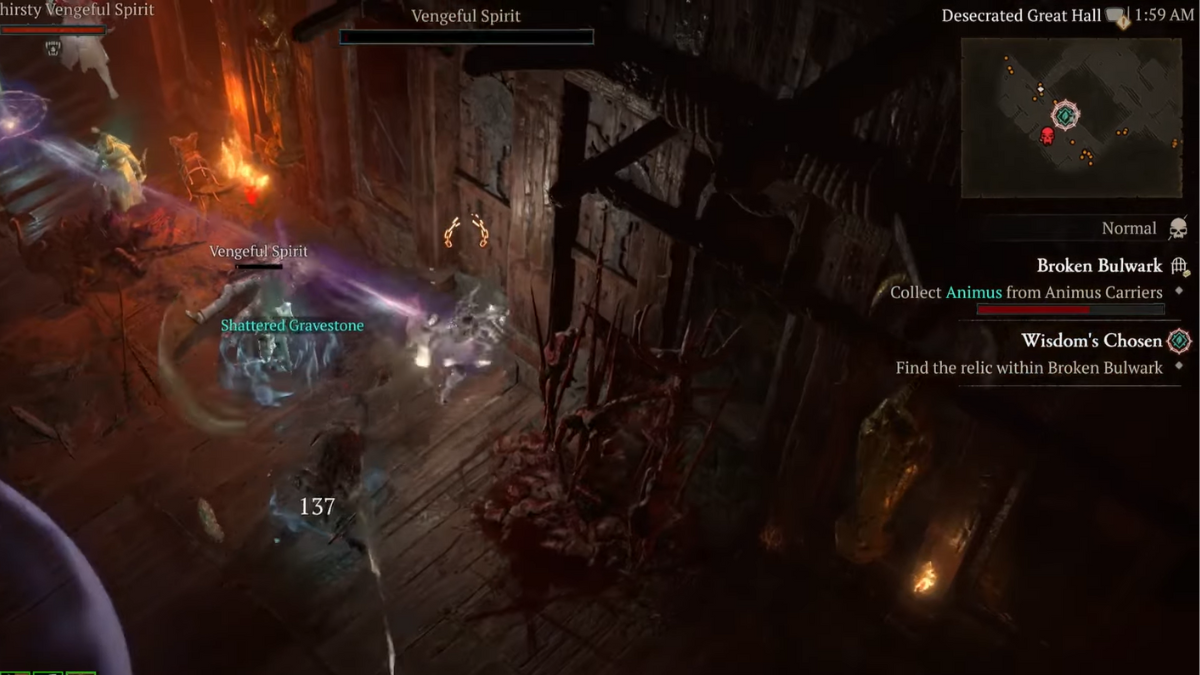
The Broken Bulwark is found further south of Eldhaime Keep. This is a dungeon with high-level enemies, so do come prepared for the worst. Inside the dungeon, you need to keep exploring all the rooms till you are able to unlock the Desecrated Great Hall.
The path beyond that will ultimately lead to the boss room, but just before that, explore the rooms south of the boss room to find the corpse of a Slain Knight holding the Shattered Gravestone quest item.
Speak with Bryona
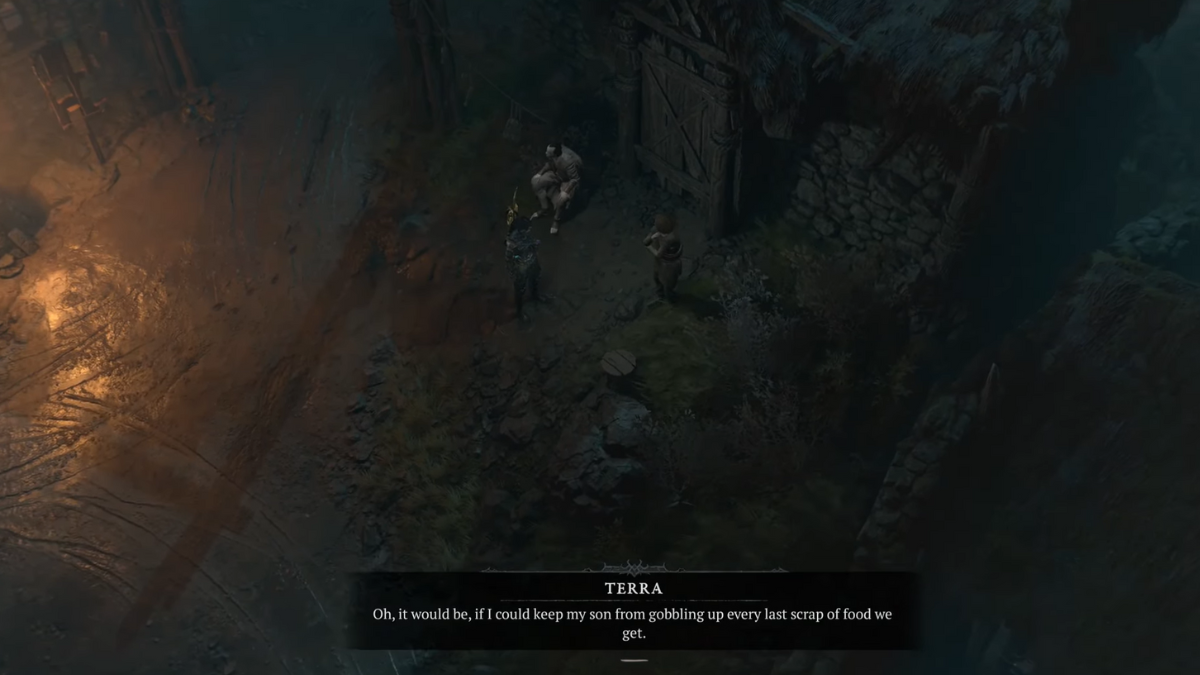
Exit the dungeon after acquiring the item and head over to Cerrigar to speak to Bryona. Place the relic behind her on the table, then find and speak to Terra the Villager located northeast from where you are. You need to head down the stairs after exiting the building to find Terra on the left beside the large wooden door. Many players seem to not find the villager here, and an easy fix for that is to walk up to the area with the vendors to find her.
Find The Secrets Within Calibel’s Mine

Your next task is to locate two new Relics; the Remnants of Tal Rasha’s Tomb hidden within Calibel’s Mine, and the Horadric Shield in Kor Valar. Let’s start with finding the Remnants of Tal Rasha first, which is quite easy yet difficult to do.
You need to explore the Calibel’s Mine, which is north of Cerrigar, and head deep within till you reach the Ancient Burial. This is where the Resurrected Malice boss will spawn, and you need to defeat the boss to get the quest item.
Also Read: How To Get All Unique Class Items in Diablo 4 Season 9.
Explore Kor Valar
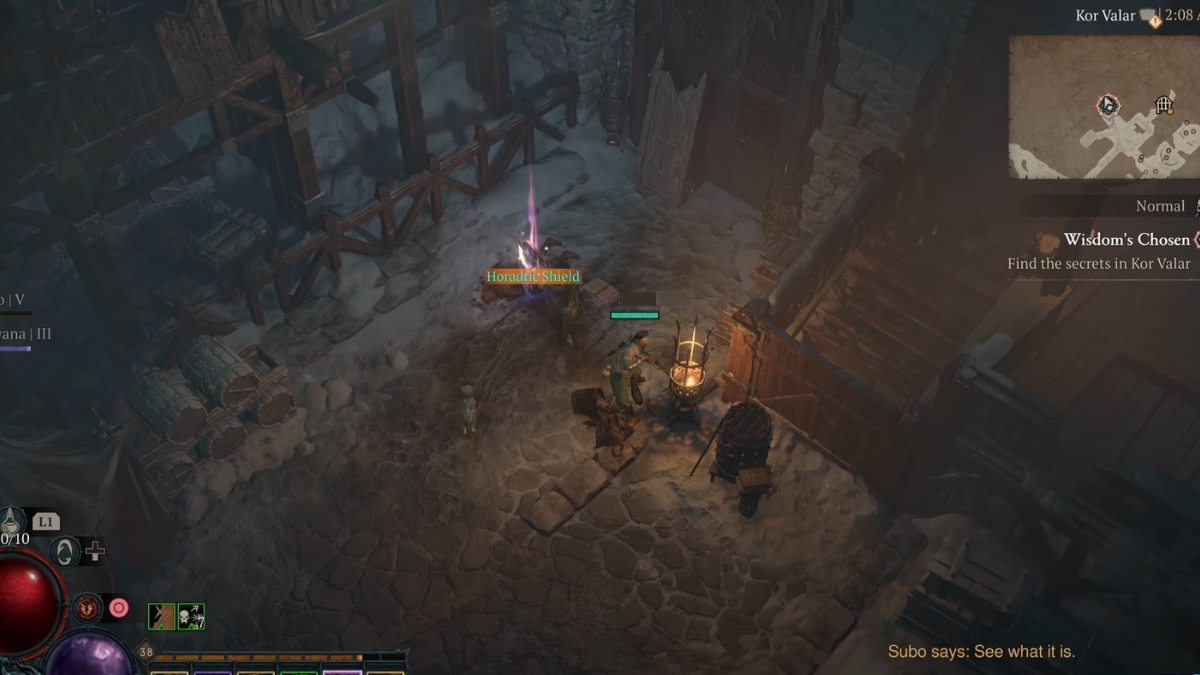
Your next task is to head north-east of the Bear Tribe Refuge to find Kor Valar. Once inside, head down the path northwest to find a Bandit’s Corpse. You don’t need to enter the Kor Valar Ramparts, the corpse can be found right at the main entrance. Pick up the Horadric Shield from the bandit corpse, then return to Cerrigar for the final part of the quest.
Place the Relics
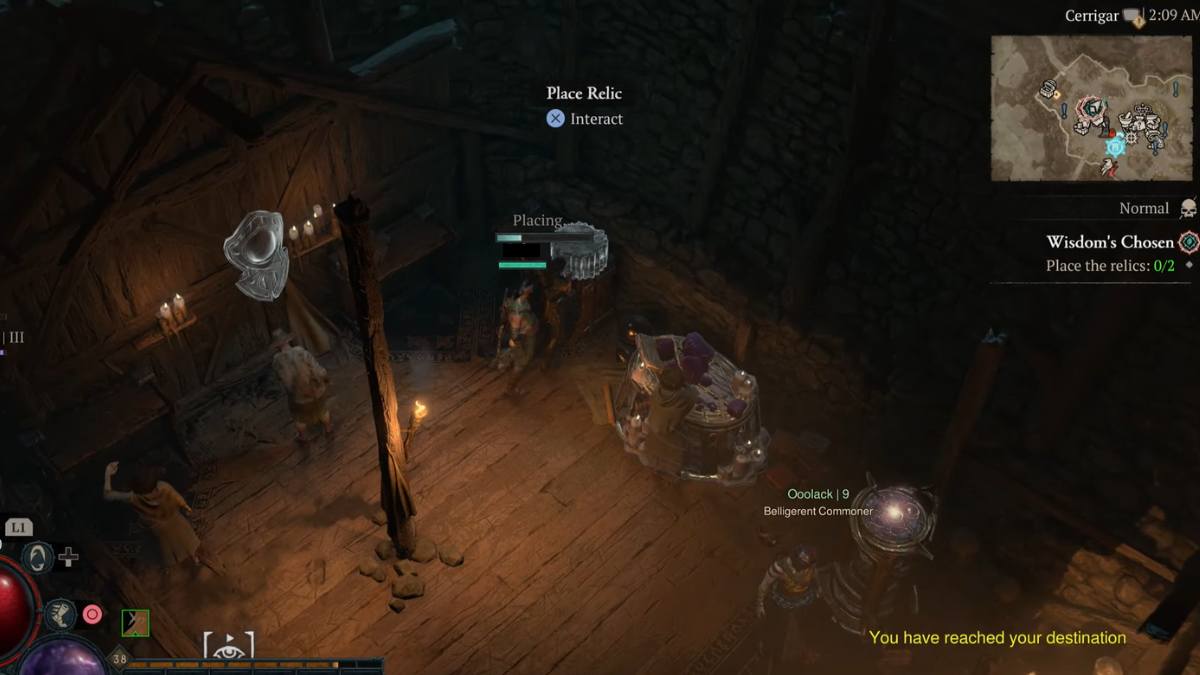
Back at Cerrigar, head back to the table where you placed the first Relic. Place the final two relics that you had recently obtained on either side of the table, which completes the Wisdom’s Choice quest.