


Blasphemous 2: The Third Sin DLC added many items and collectibles, skins, and more to the overall game. Like many collectibles, most of them are hidden out of the view of the player, while others are hidden in plain sight but require a bit of a leap of faith to find them. One thing is for sure: you will not be able to grab them easily.
Here, we will take a look at all four new prayers added in the new Blasphemous 2: The Third Sin DLC. The location of each prayer (Chant and Verse) varies, and so do their effects in gameplay. What you don’t want to do is to miss out on them, as these new prayers are powerful and can drastically change the way of your gameplay.
All New Prayer Locations In Blasphemous 2: The Third Sin
The Game Kitchen
There are four prayers added in the Third Sin DLC, each with its own unique effect and damage type. Here is a brief summary of all prayers, including their type, effect, and location details:
| Prayer Name | Prayer Type | Prayer Effects | Prayer Location |
| Jaleo of The Injured Dawn | Chant | Summon bolts lightning strikes, dealing AOE damage to all enemies | Castle of the Mist |
| Garrotin of The Forgotten Ones | Verse | Summons a powerful Hammer that falls in front of the player, dealing AOE damage with shockwave release (both directions) | Usurped Halls |
| Carcelera of Bitter Blood | Verse | Hold down the A button to release the knives continuously as long as the button is being held. | The Vibrating of the Organs |
| Vidalita of the Blind Eye | Chant | Summon Miasma orb that auto-targets enemies. They explode on impact and deal AOE damage. | Gemometry of Knowledge |
One of them can be picked from the floor like any common collectible, but the rest are hidden inside the golden treasure boxes, like those we have seen in the Altarpiece of Favour collectible.
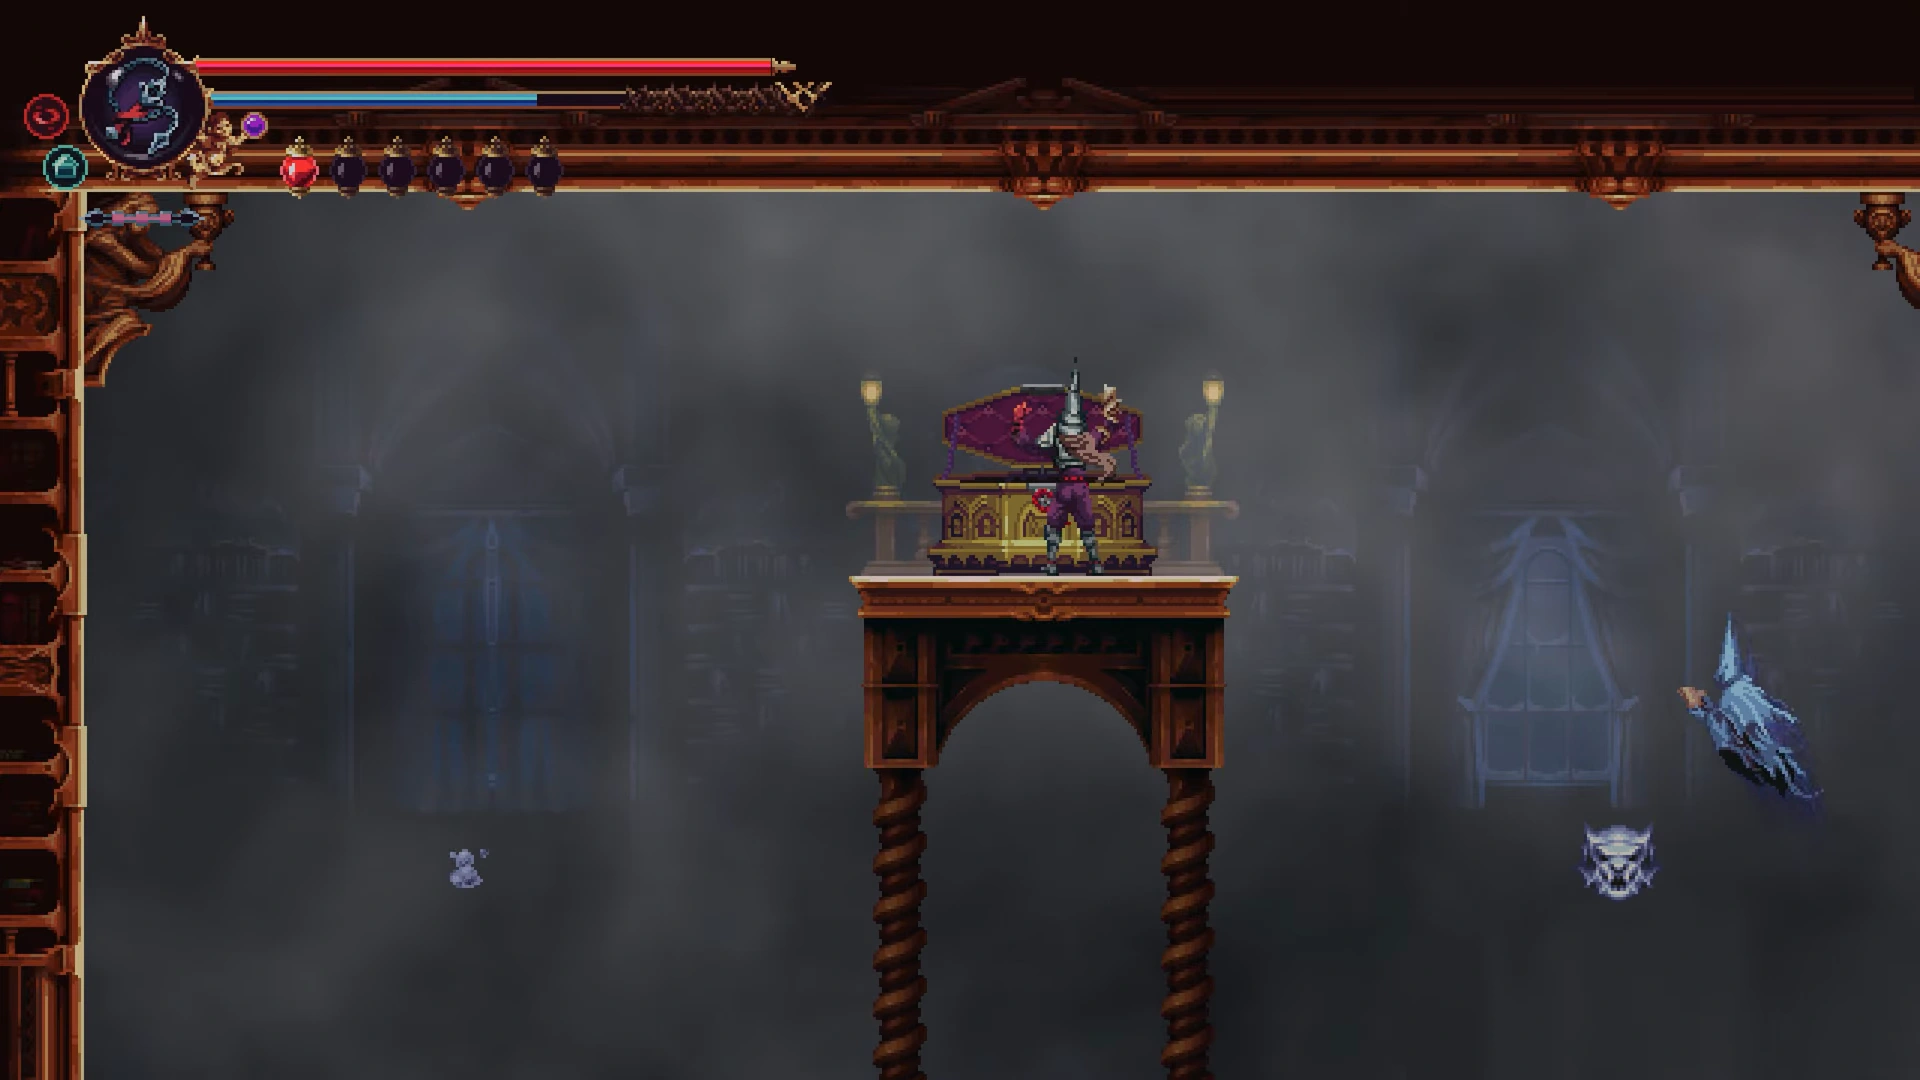
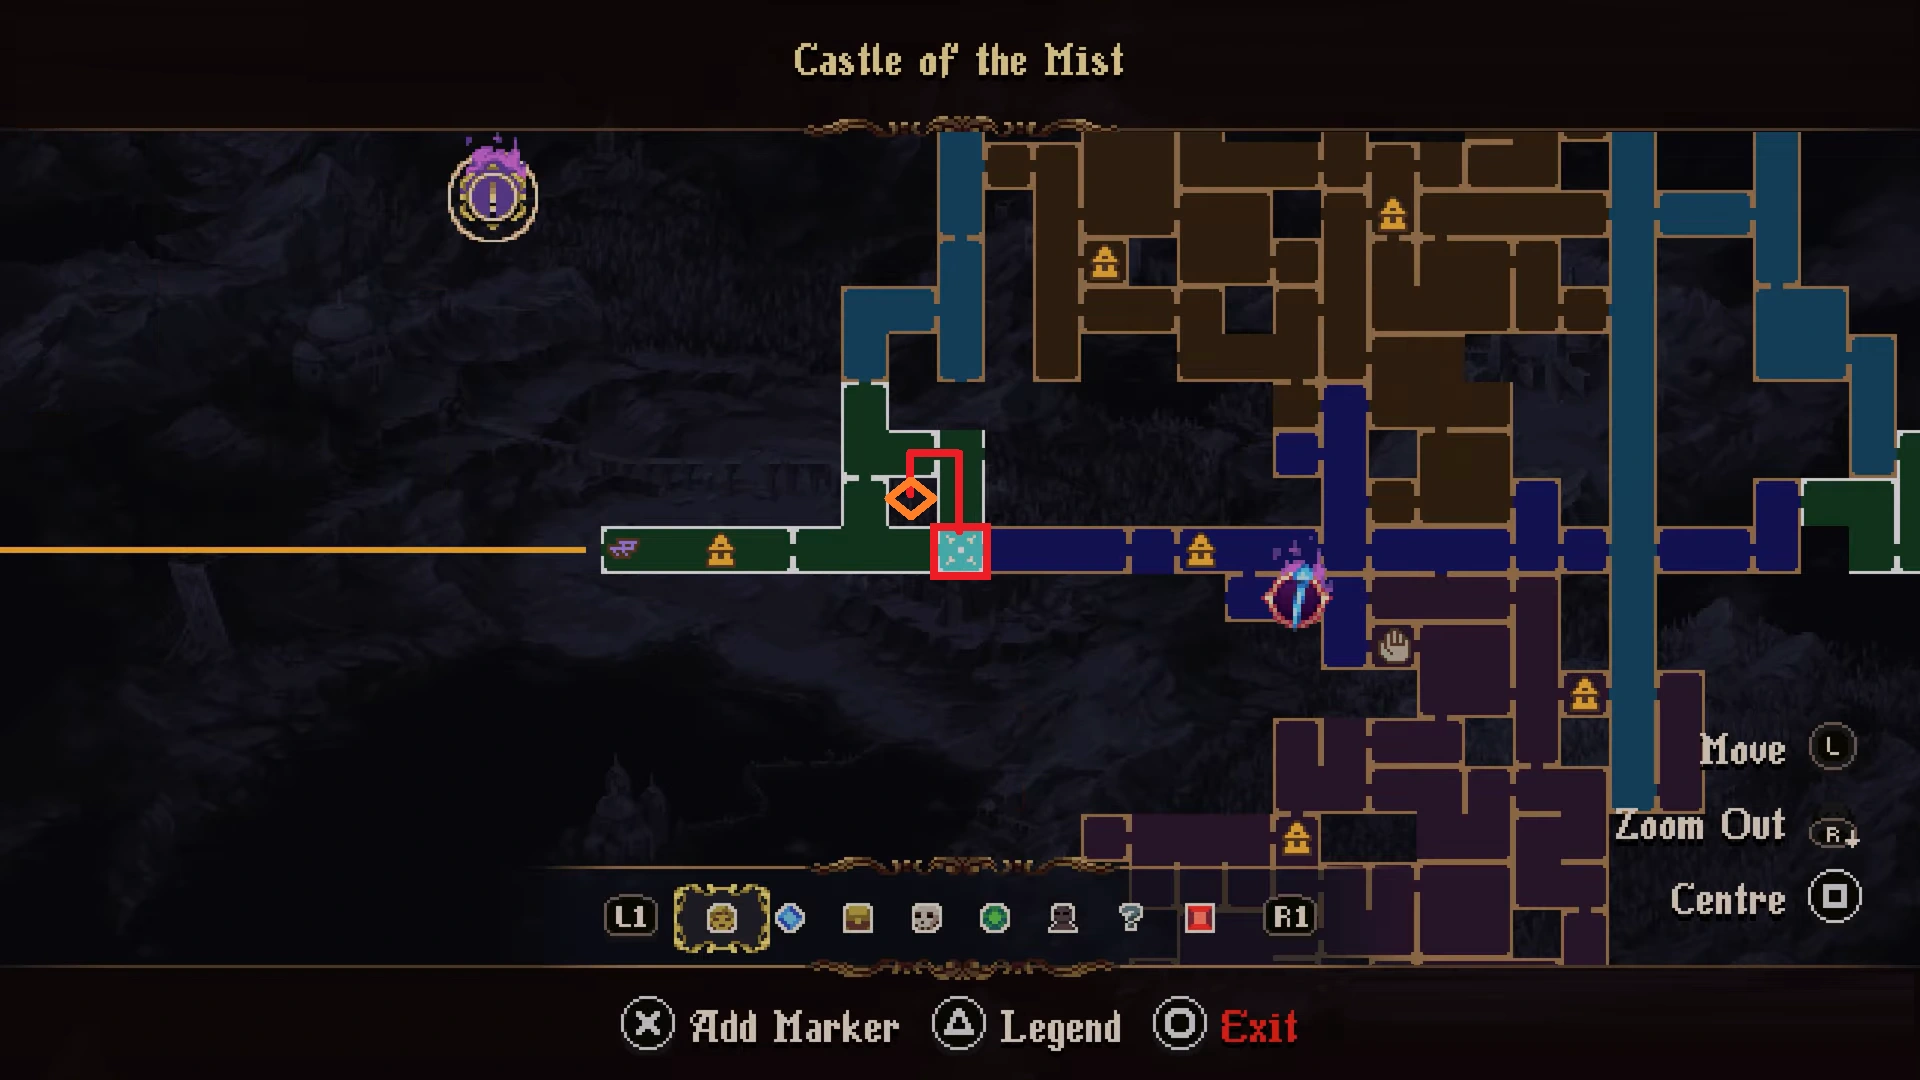
#1 | Jaleo of The Injured Dawn | Castle of the Mist
The Game Kitchen
Head to the southeast section of the Castle of the Mist and reach the spot marked on the map. Now use the grappling hook points floating above to move to the upper region. Soon, you will land on a platform. Here, take the route on the left to head to the new area.
The new section has many platforms hanging by chains. Jump on the platforms, and soon you will find a long chain without any platforms at the bottom. Don’t worry, there is a platform attached to the chains, just like all the chains before, but this one is in the next area at the bottom. So, jump on the chain, and you will land on a small platform, where you will find the Jaleo of the Injured Dawn.
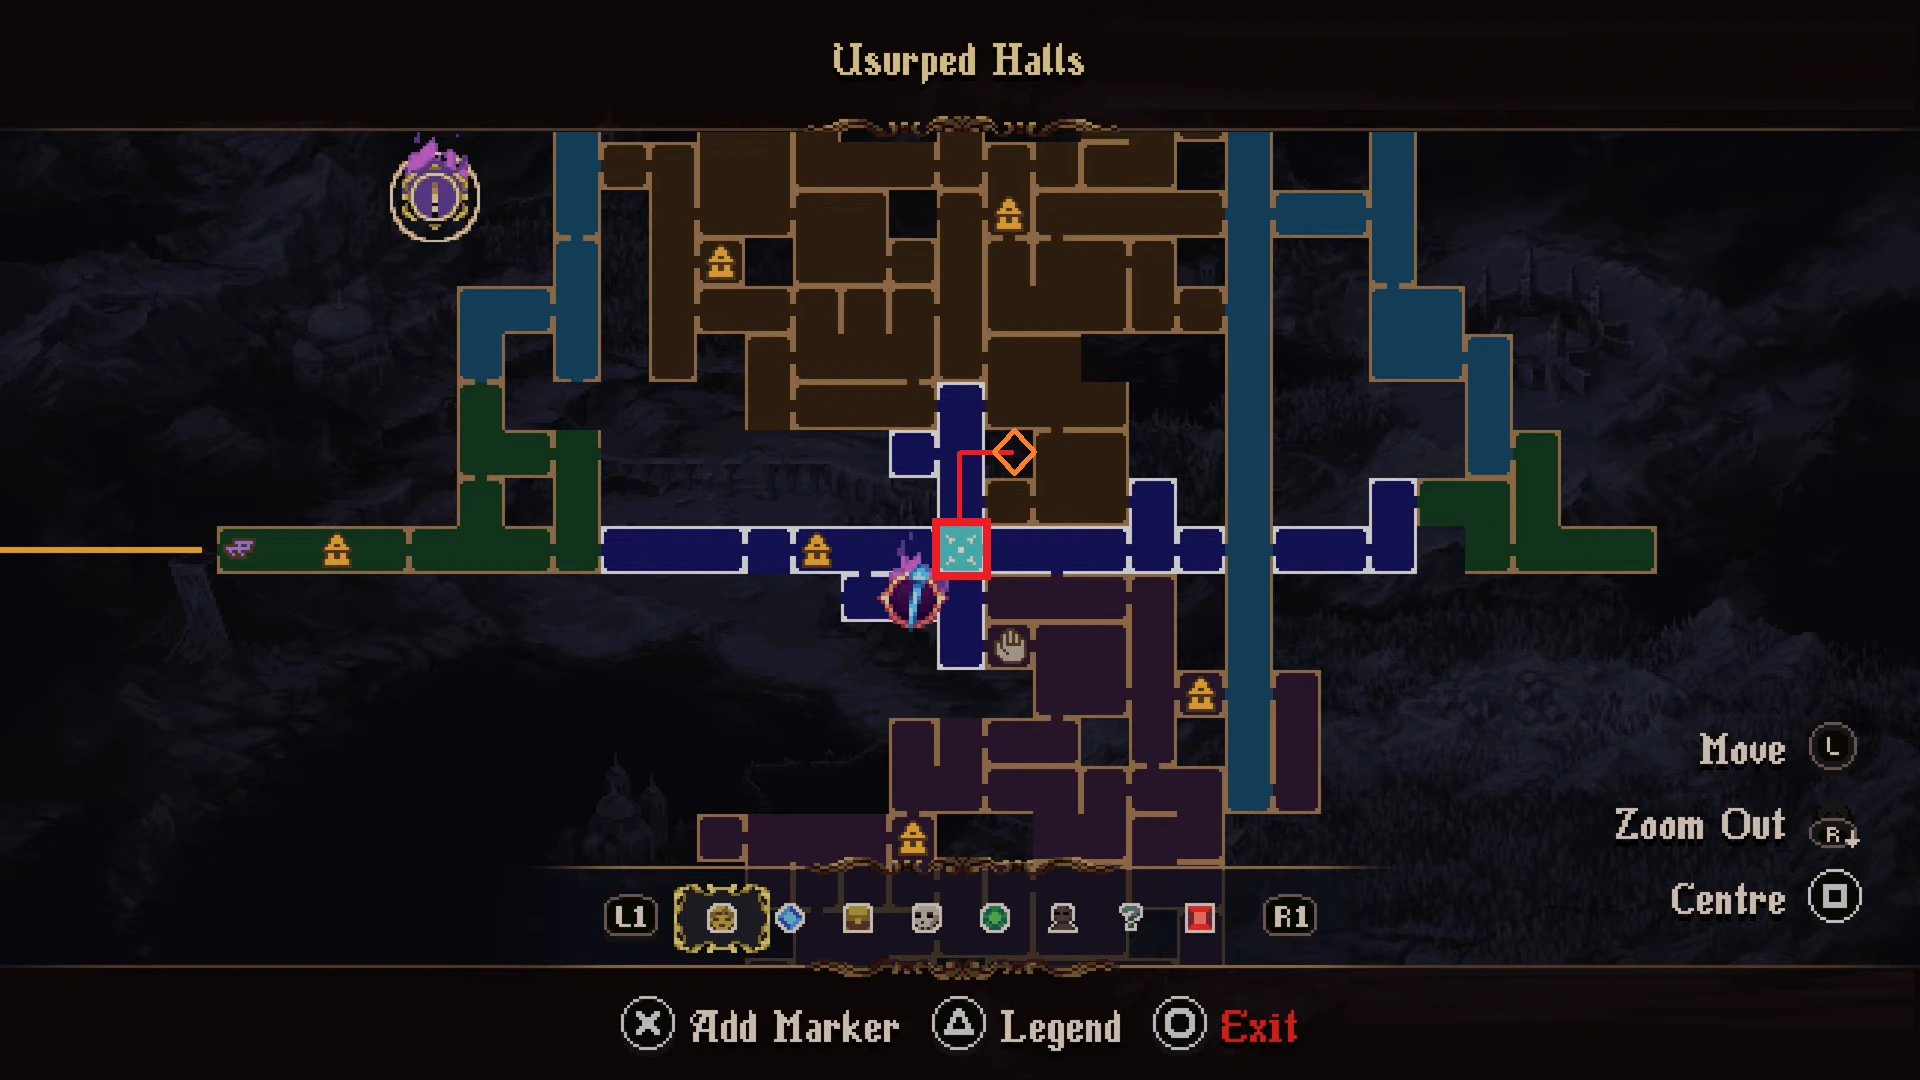
#2 | Garrotin of The Forgotten Ones | Usurped Halls
The Game Kitchen
Now we head to the middle or center of Usurped Halls, just right of the Castle of the Mist zone, where we retrieved the last one. Get to the spot marked on the map. Just jump on the chained platform hooked to the ceiling to land on the upper platform. Now take the path to the right to enter the library section.
The right path will put you in a messy library with large book piles sitting on the floor. Now you just have to hit the book pile with your weapon to reveal a golden chest. Inside the chest, you will find the Garrotin of the Forgotten Ones.
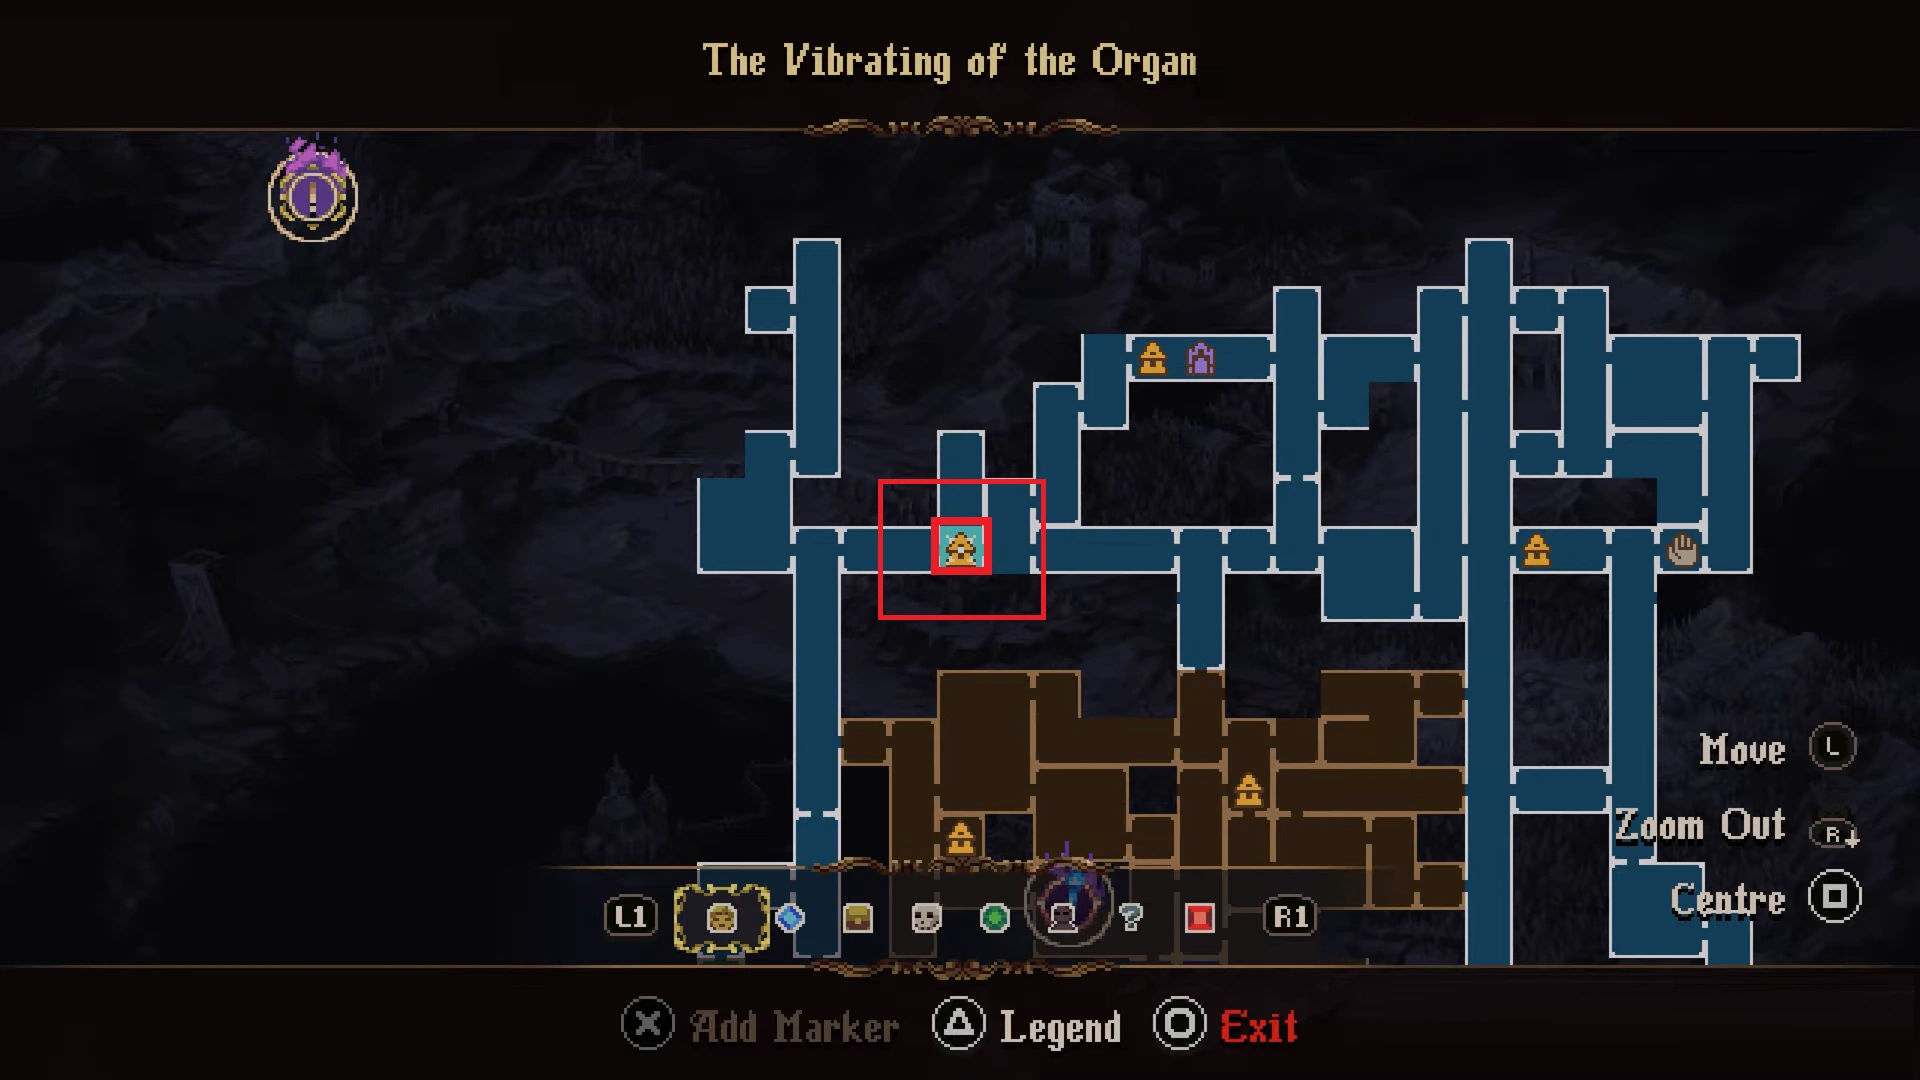
#3 | Carcelera of Bitter Blood | The Vibrating of the Organs
The Game Kitchen
The third one takes us to the west of the Vibrating of the Organs zone. Get to the marked spot, and jump on the chained hanging platform, left corner of the room, and you will gain access to the upper floor. Now move to the right, all the way to the end, and you will find the golden chest. Open the chest to grab the Carcelera of Bitter Blood.
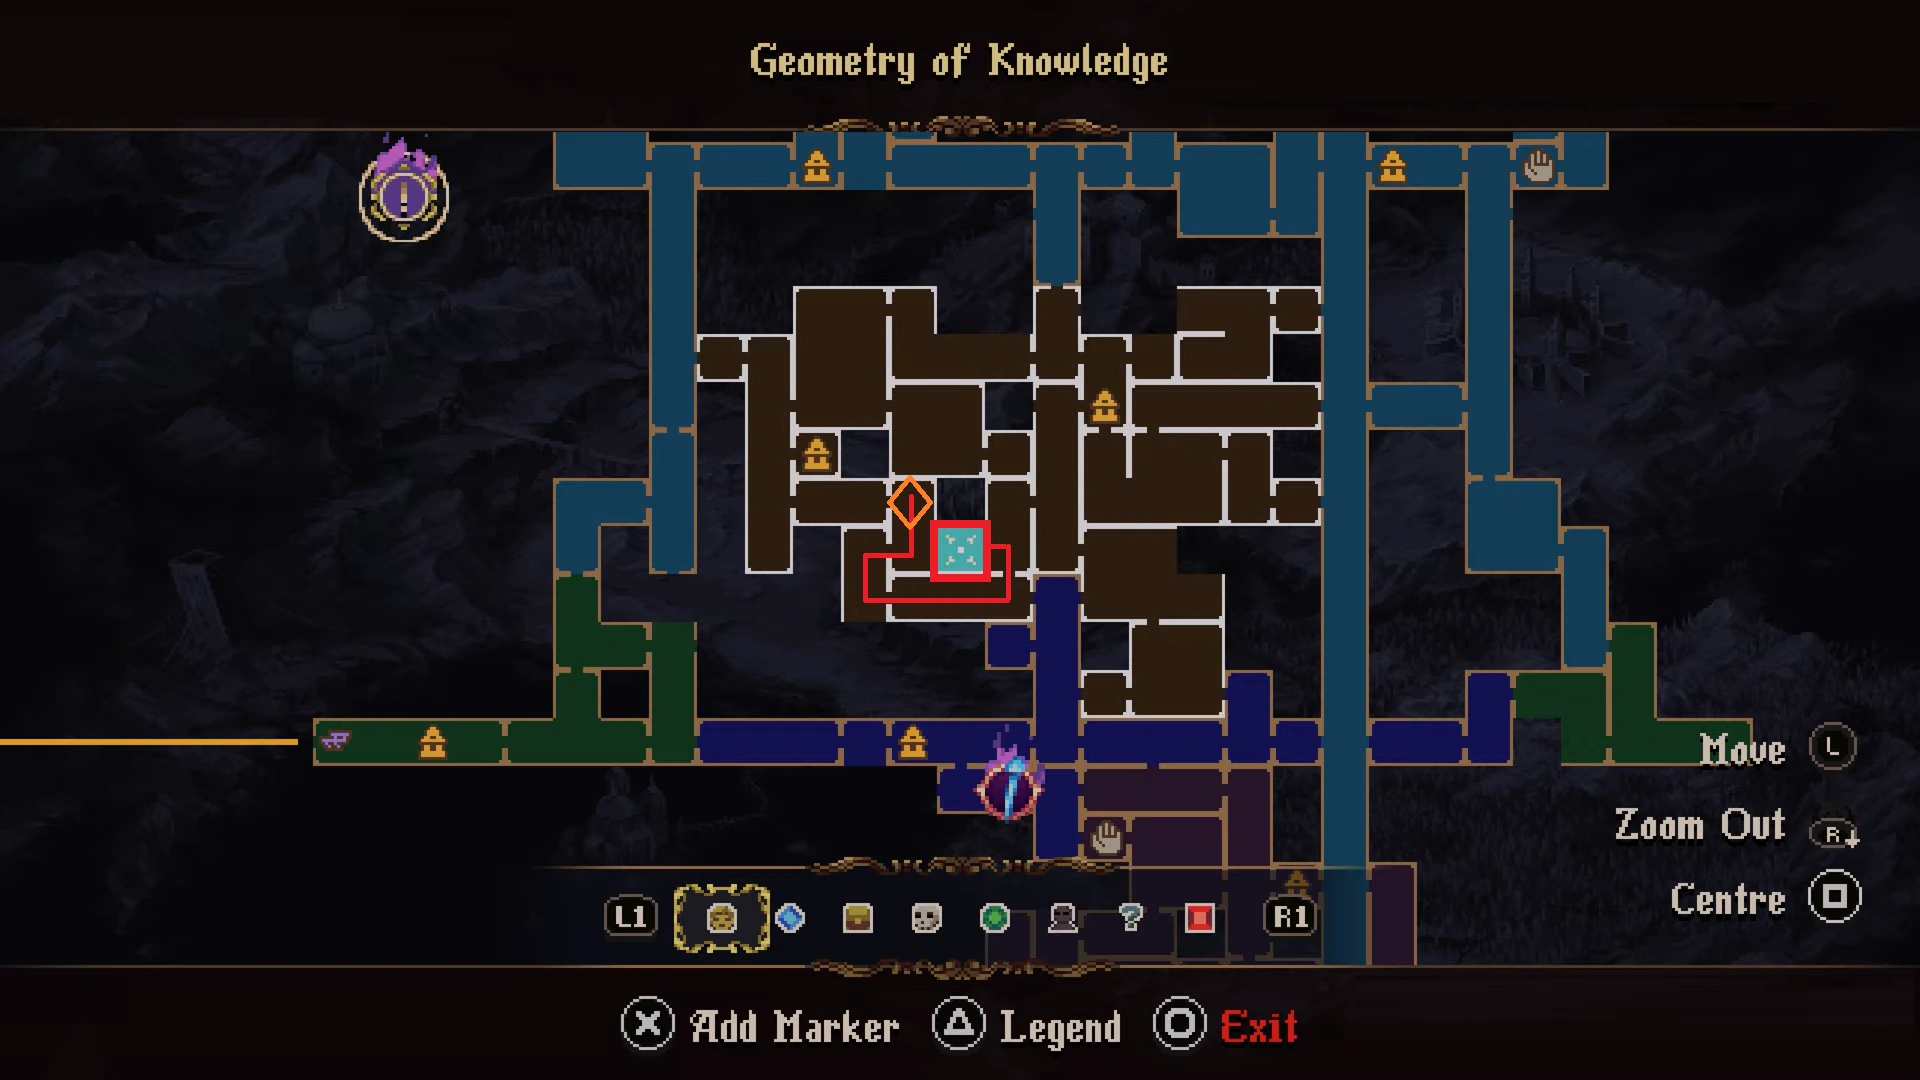
#4 | Vidalita of The Blind Eyes | Geometry of Knowledge
The Game Kitchen
The last item is located south of Geometry of Knowledge. Get to the spot marked on the map, move right, and jump down. Now, take the path on the left until you get to the next room. Here, jump on the small platforms to move up and land on the upper floor. Here, take the path to the right to enter the same room as before from a different side.
In the next room, you will find a bell above your head. Ring the bell to lift the steel barricade on your right. Now, next to the barricaded spot, you will spot a ladder attached to the bookshelf behind the scenery. Hit the ladder with your weapon to move its location. Move the ladder into the middle of the room, right next to the pillars.
Now climb the ladder; you will see grappling hook points. If you don’t see them, then go back to the bell spot, ring it, and come back to the ladder. Use the grappling hook points to reach the upper area, where you will find the golden treasure box sitting on a lone platform. Inside, you will find Vidalita of the Blind Eyes.
That’s it, now you have all four prayers in the new Blasphemous 2: The Third Sin DLC. Still got the hunger for more collectible hunting in the game? Then why not unlock all the new skins found in the DLC, your next target in the game?