


Baron’s Research Memo is one of the many collectibles in Dying Light: The Beast that explains the Baron’s experiments and research that he performed on humans and zombies. There are a total of nine Research Memos in the game, spread across Castor Woods. Here’s how you can find all 9 Baron’s Research Memos in Dying Light: The Beast.
Baron’s Research Memo #1
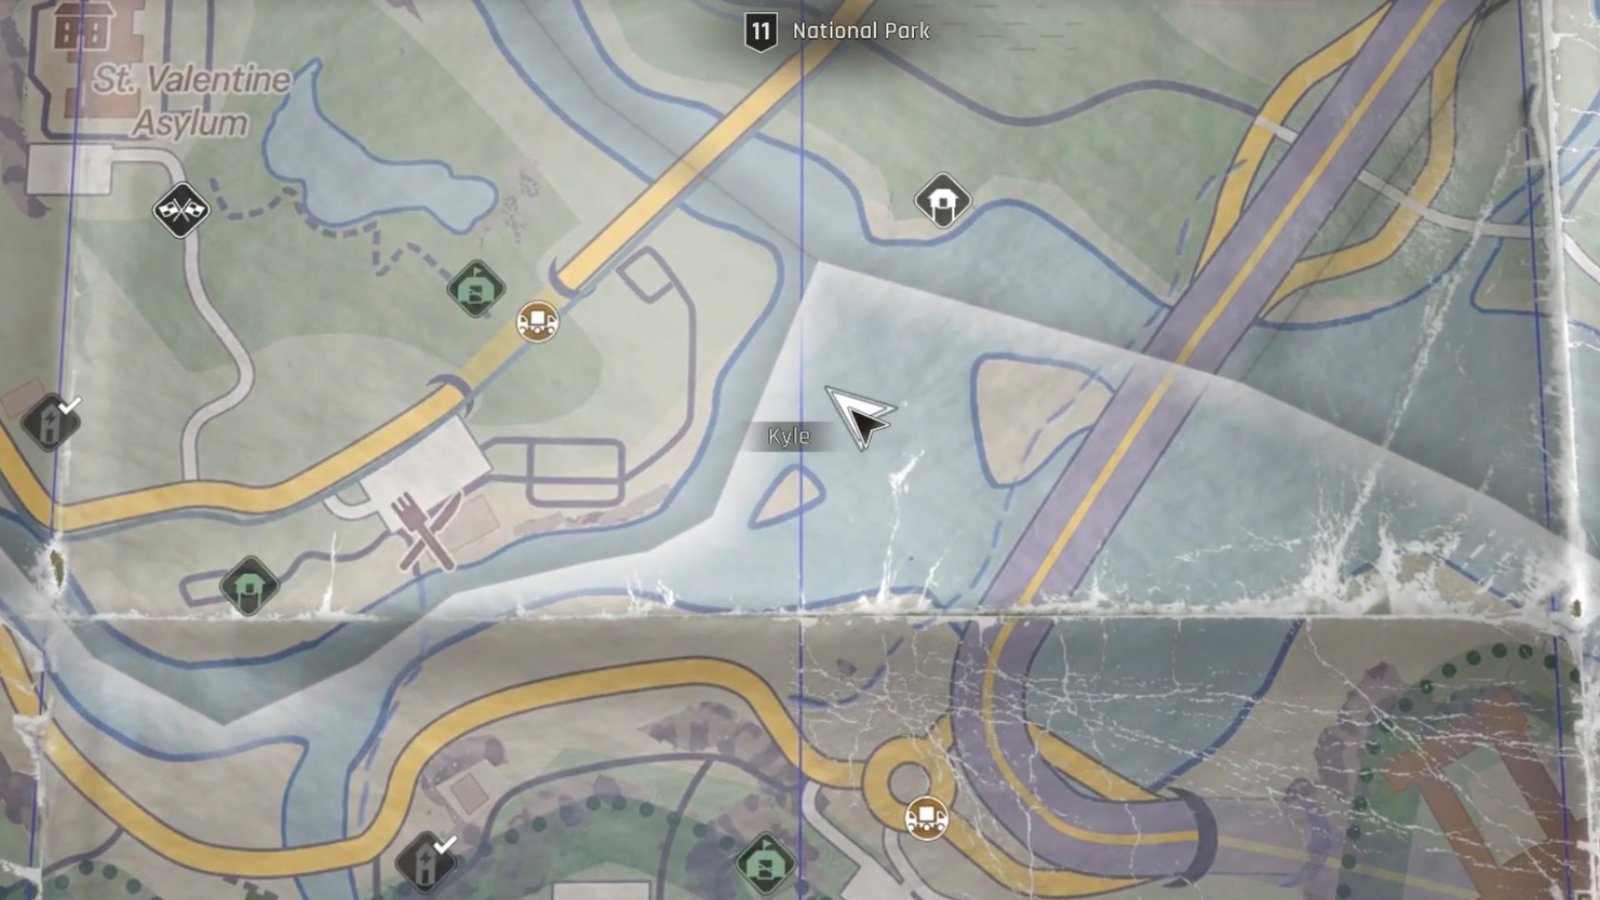
The first Memo is located at the National Park, to the southeast of the St. Valentine Asylum in Dying Light: The Beast. Head to the location as shown on the map above, then use your Survivor Instincts to locate a dead body wearing a white outfit. Just beside the corpse, you’ll find the first Memo in the game.
Baron’s Research Memo #2

The second Memo is located inside a building, accessed through a broken wall in the eastern part of Industrial Park, beside the “Industrial Park” marker. Head to the location as shown in the map above, and you’ll find the building with the broken wall. Enter through the wall, continue forward and follow the blue pipe up the second staircase on your right. You’ll come to a room on your right on the second floor, where you’ll find the second Memo on a bookshelf.
Baron’s Research Memo #3
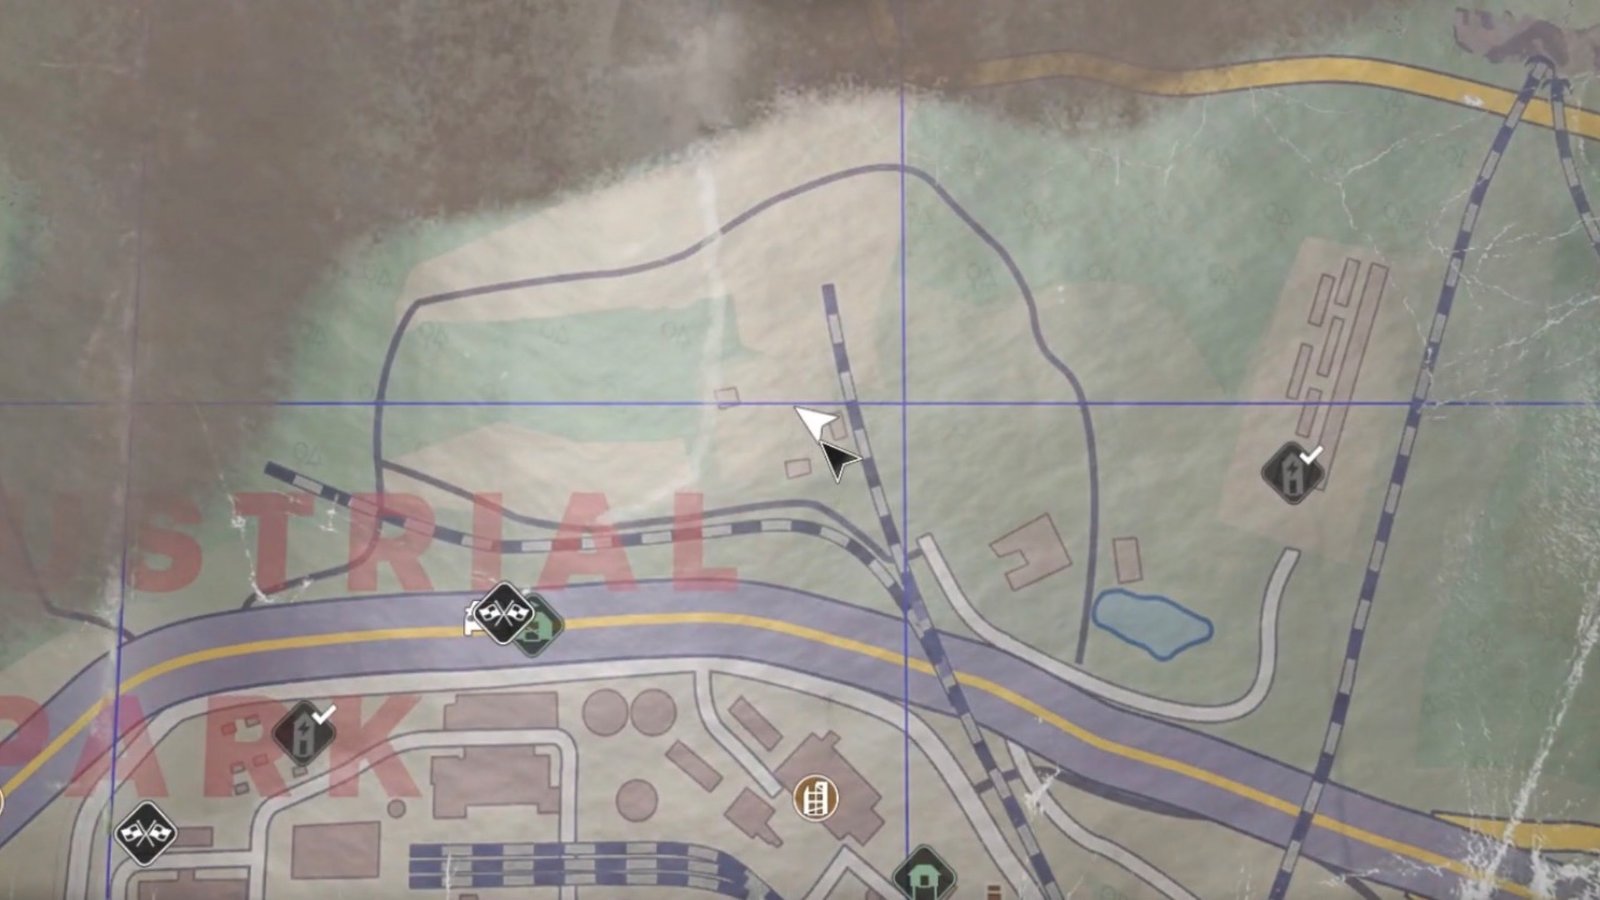
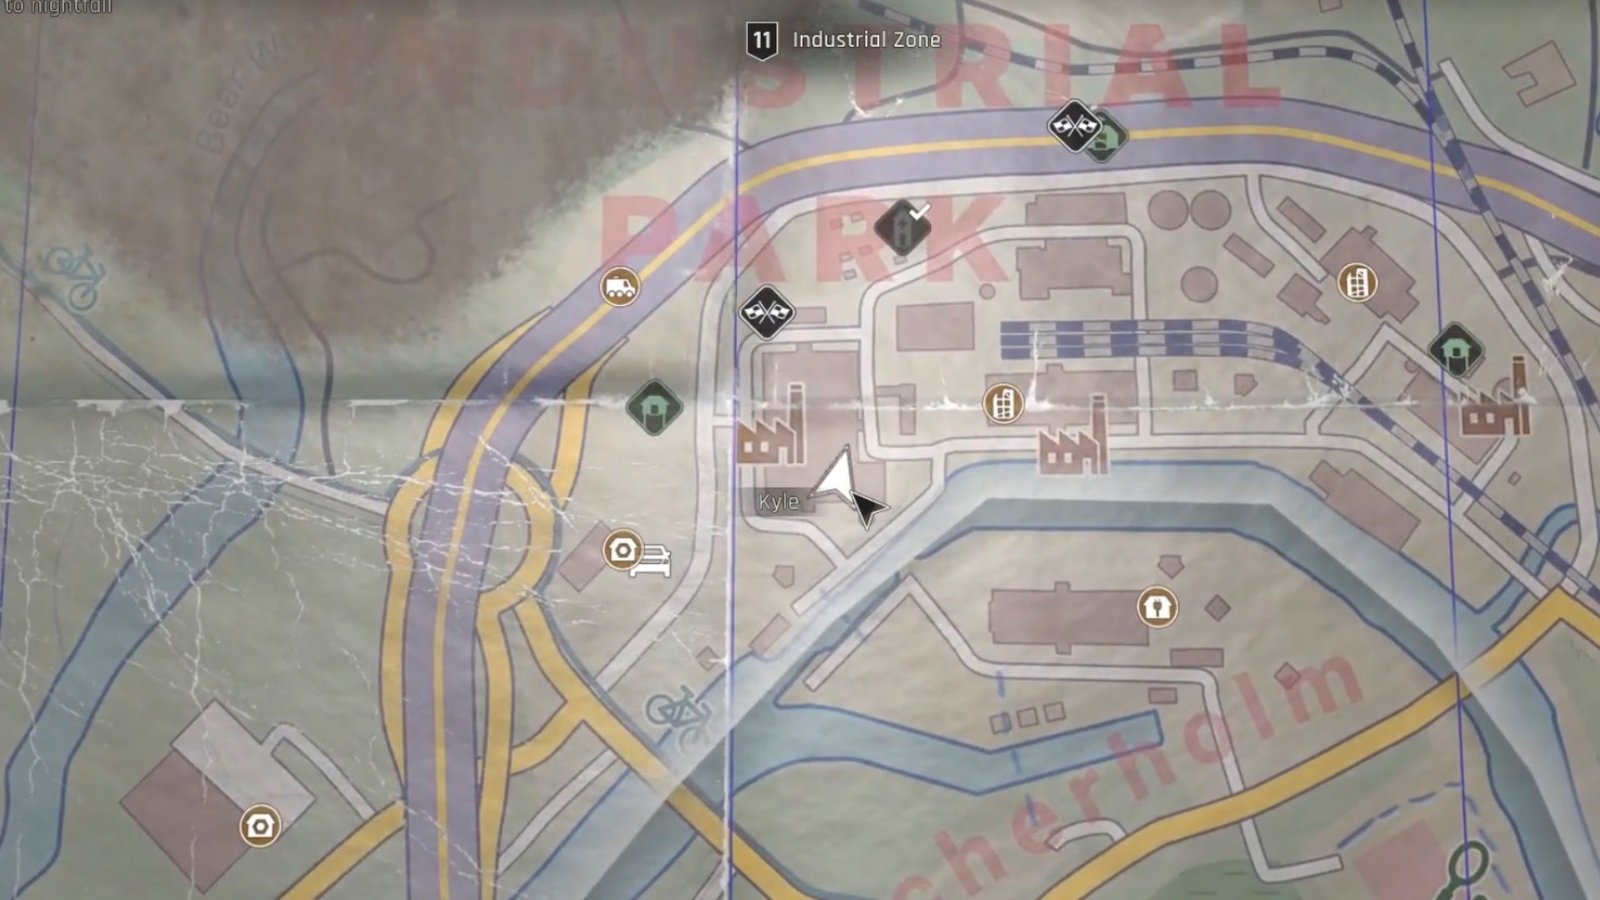
The third Memo is located inside the Industrial Zone above the “Industrial Park” marker. Head to the location as shown in the image above, and you’ll notice a large crane in front of you. Walk towards the crane, and you’ll find the third Memo on a table beside a canister.
Baron’s Research Memo #4
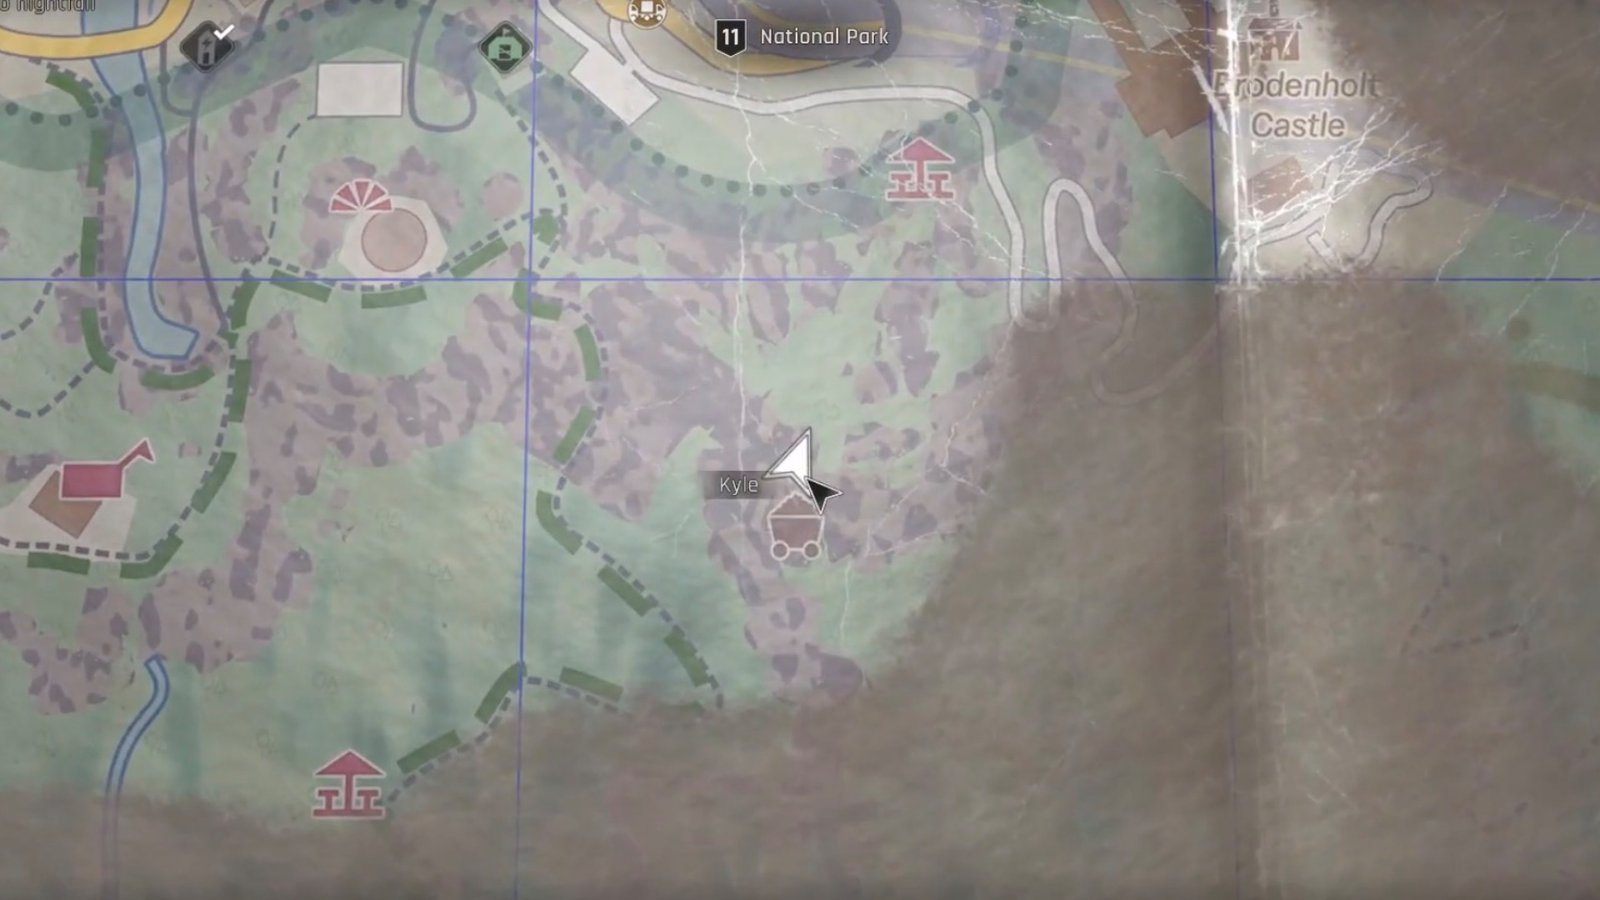
The fourth Memo is located to the south of the National Park, situated to the southwest of Brodenholt Castle in Dying Light: The Beast. Head to the location as shown in the map above, then find a group of crates stacked on each other out in the open near the back of a house. On these crates, you’ll find the fourth Memo.
Baron’s Research Memo #5

The fifth Memo is located in the southern part of the National Park in Dying Light: The Beast. Head to the location as shown in the image above, which isn’t far from the fourth Memo, and you’ll come across a circular area with lots of pillars. Here, you’ll find a canister on which you can locate the fifth Memo you need.
Baron’s Research Memo #6
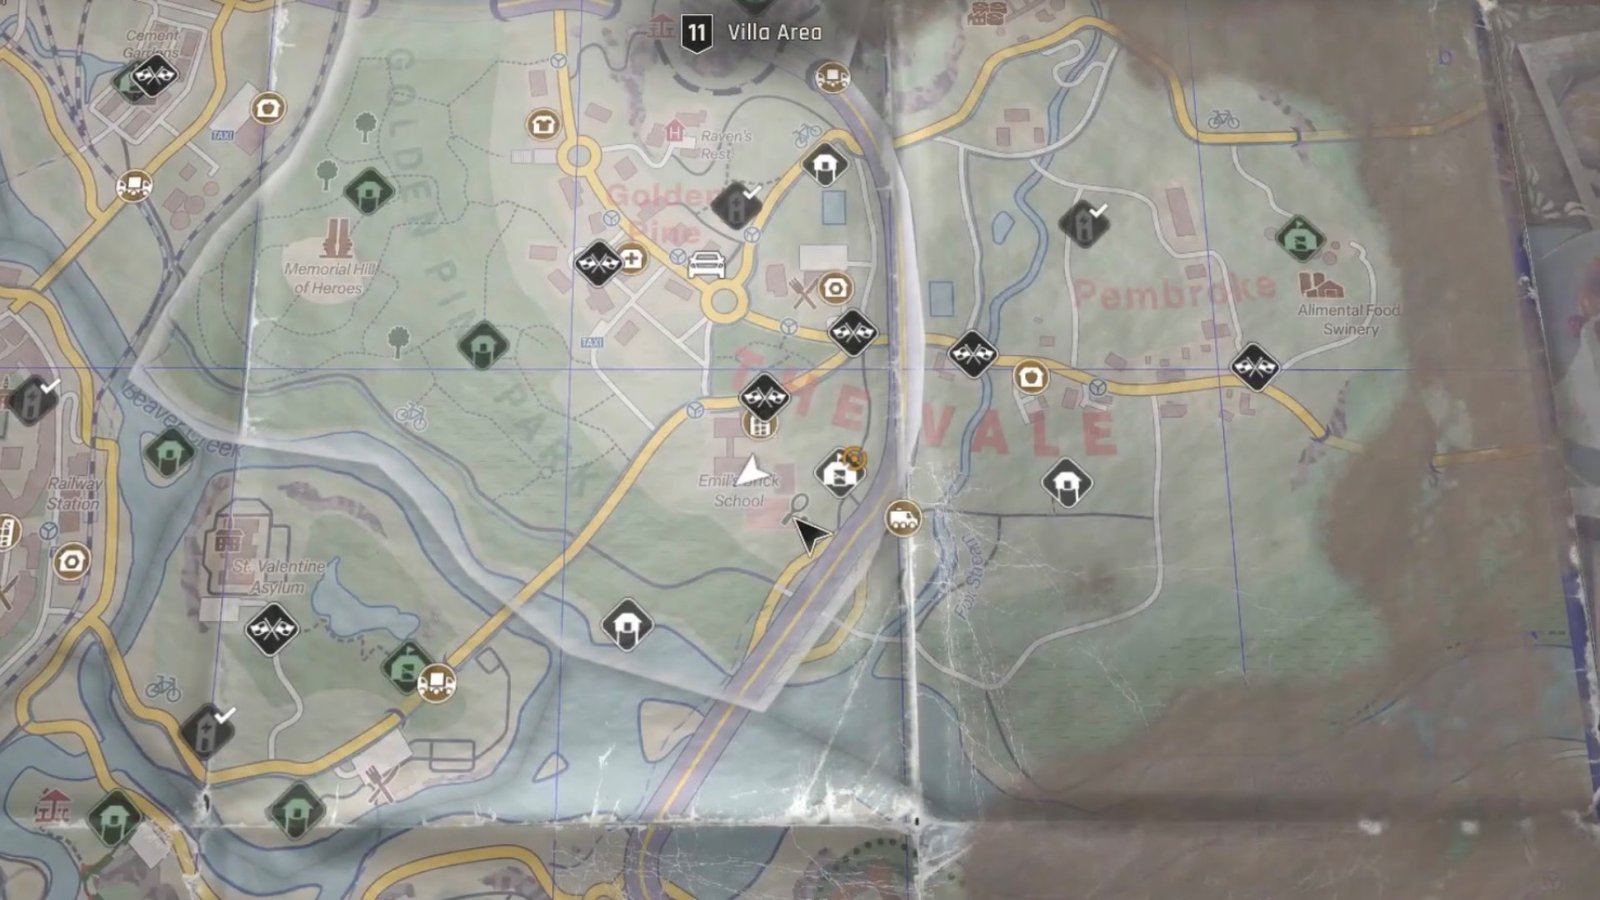
The sixth Memo is located inside Emil’s Brick School, inside the Villa Area, near the School Dark Zone in Dying Light: The Beast. Go to the area as shown in the image above, then enter Emil’s Brick School. Head to the northeastern part of the school, and you’ll find the Memo sitting on top of a table with a couple of monitors inside a large room.
Baron’s Research Memo #7
The seventh Memo is located inside a building with a broken-down overpass inside the Industrial Zone in the Industrial Park. Head to the area as shown in the map above, and use the broken overpass to head inside the building. You’ll find a white door in front of you. Open the door and pick up the Memo on the table beside the laptop.
Baron’s Research Memo #8
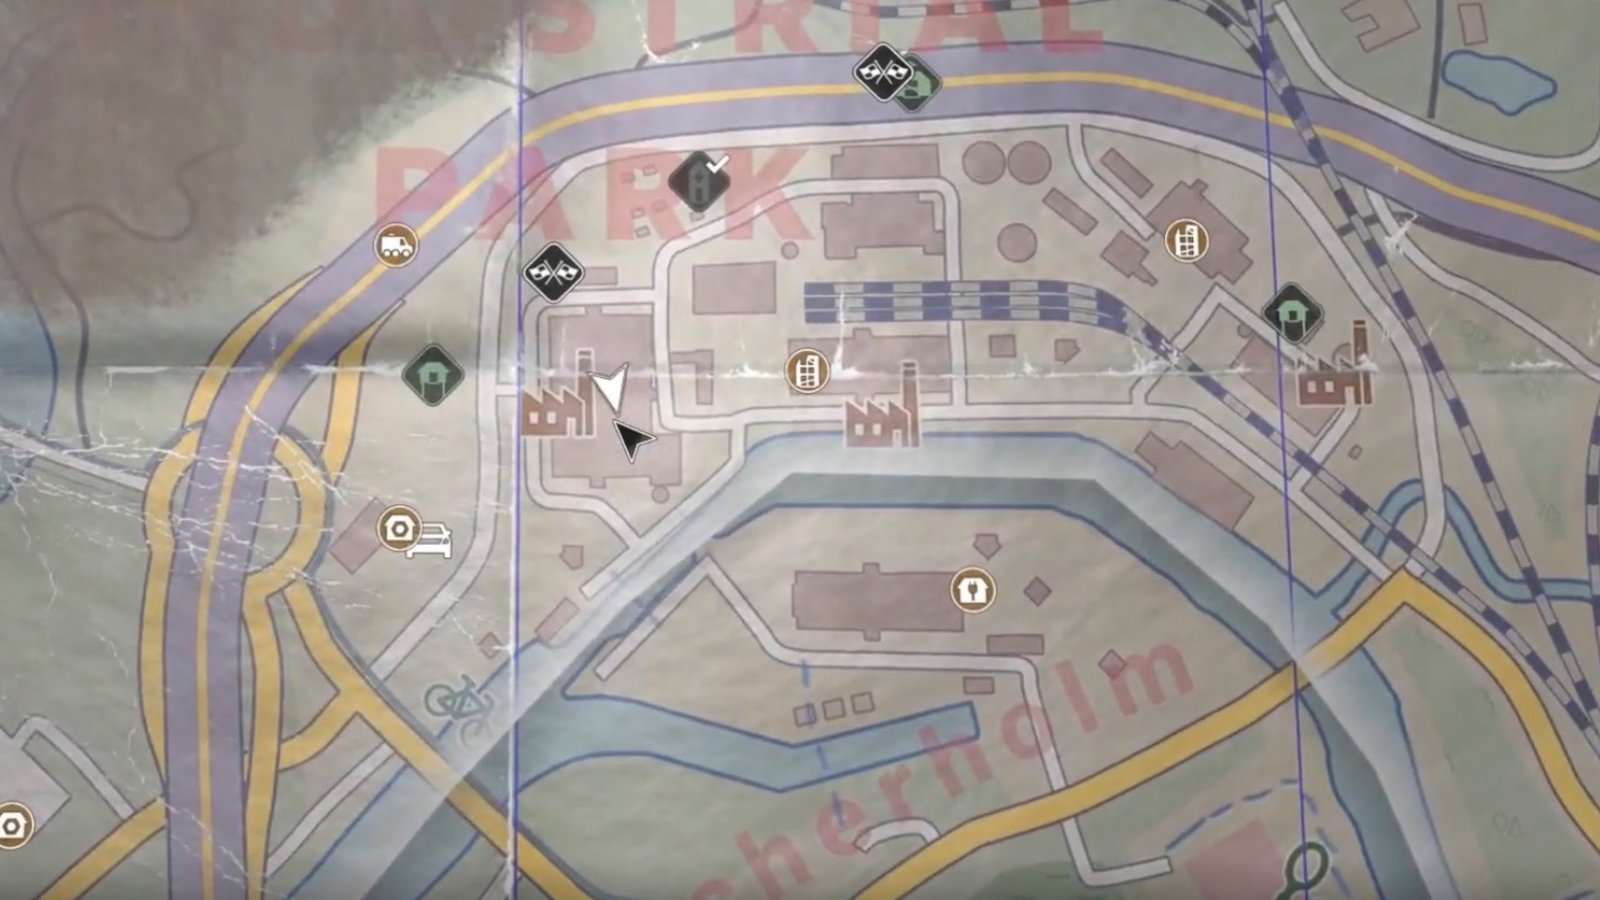
The eighth Memo is located near the seventh Memo location, inside the Industrial Zone in the Industrial Park in Dying Light: The Beast. Head to the same location, then use the same broken overpass for this one, but don’t go to the white door. Instead, turn left and use the stairs to go to the floor below. Then, head right to the end of the room to find another flight of stairs. Use it to access another white door, then walk straight ahead, and you’ll find the eighth Memo on a table beside a monitor.
Baron’s Research Memo #9
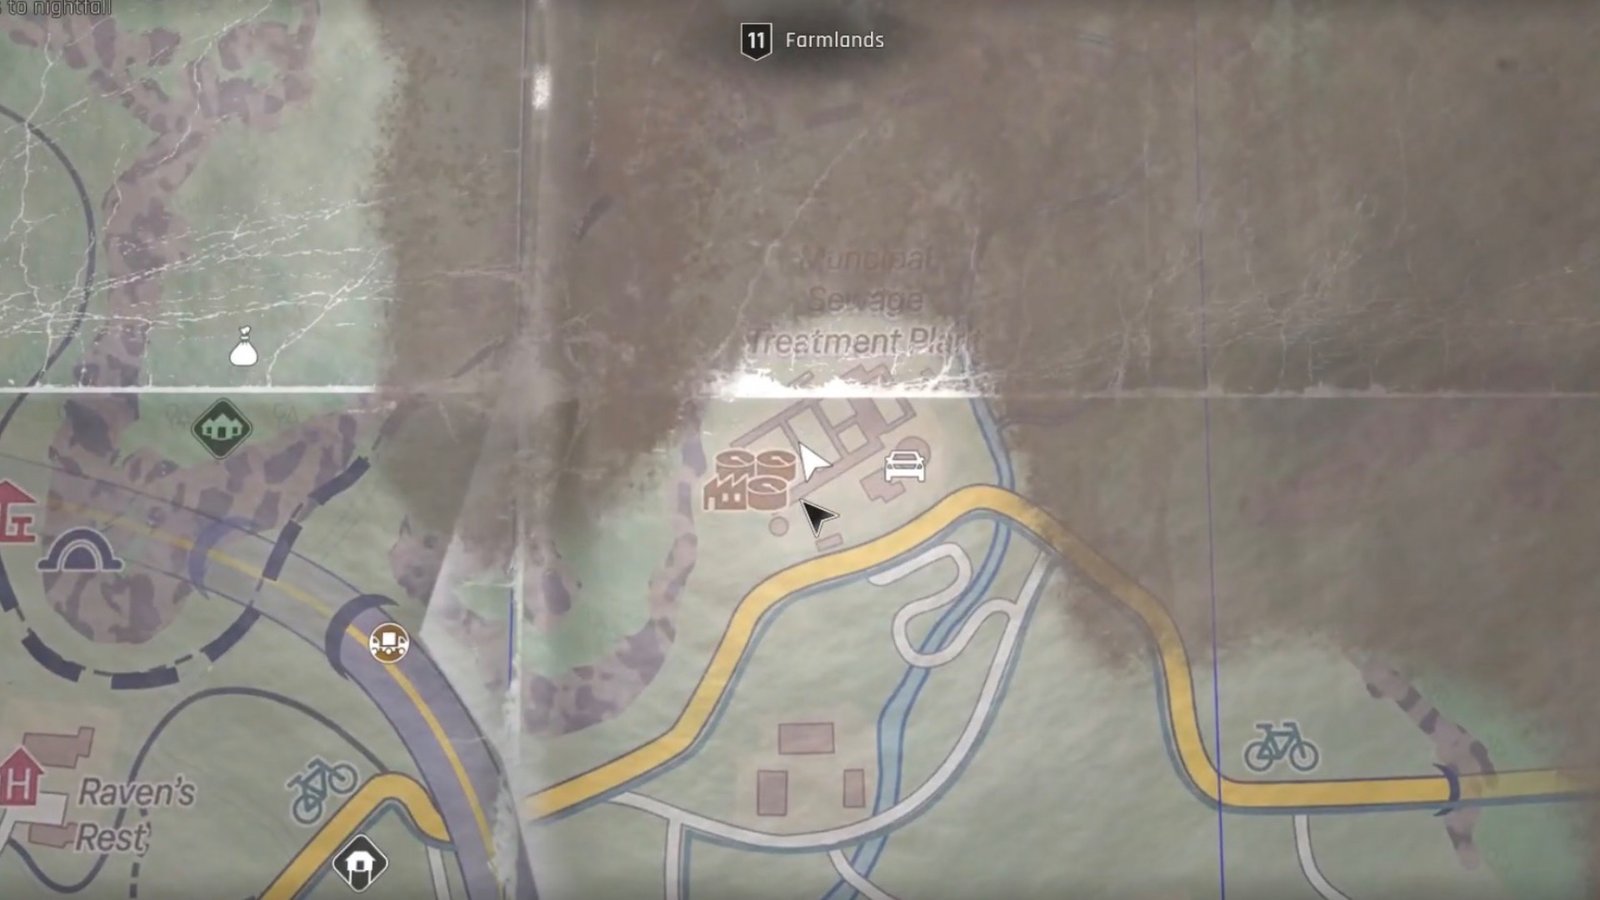
The final Memo is located at the south of the Municipal Sewage Treatment Plant in the Farmlands in Dying Light: The Beast. Head to the location as shown in the image above, then walk straight until you reach an area filled with vines. On the two generators in the middle of the area, you’ll find the final Memo required in the game.
That’s all you need to know about collecting all nine Baron’s Research Memos in Dying Light: The Beast. Now, it’s time to listen to these Memos and see what the Baron’s been up to. Not a fan of listening? Then, check out our guides on how to get the Grappling Hook and how to obtain the EXPcalibur to make your journey through Castor Woods more adventurous.
Set TheGameSlayer as your Preferred Source on Google to find us more easily when searching for game guides and news!