


Once you have obtained the Liberty Exoskeleton in Stalker 2: Heart of Chronobyl, you don’t have to look further. This suit is considered one of the best in the game, and managing to get your hands on it is a task on its own. But once you do, you have to work on upgrading the suit with the right blueprints and find a technician to help you upgrade it.
Some blueprints are located in different areas across the Stalker 2 map, and it is up to you to find them all and improve your suit. This guide will cover all 3 blueprint locations for the Liberty Exoskeleton in Stalker 2, as well the right technician to upgrade the Liberty Exoskeleton.
Stalker 2 Liberty Exoskeleton Blueprint Locations
There are 3 blueprints to collect for the Liberty Exoskeleton, and all of them are located around Prypiat. While this area opens up during end game, you can get to Prypiat early to get your hands on these blueprints. Let’s look at each of these 3 Liberty Exoskeleton Blueprints in detail, one by one.
Blueprint #1: Protective Coating
Effect: PSI Protection +10%
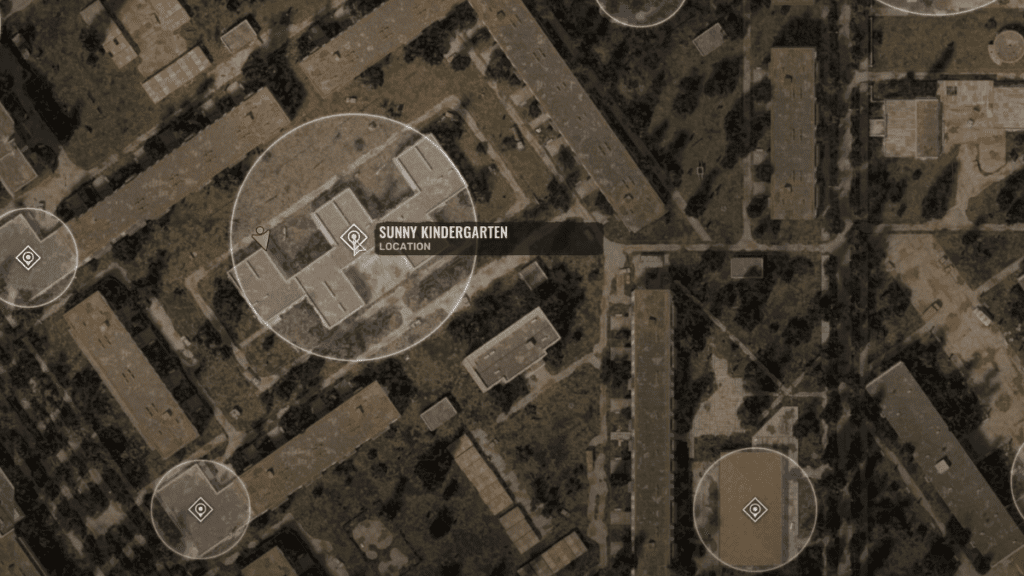
Get to Sunny’s Kindergarten in Prypiat, it is right in the middle of the city. Once you reach the kindergarten, head over to the building in the west. Be sure to have radiation protection on you at all times while navigating the school. Enter the building through the stairs on the lower floor, go through the corridor till you reach the end and enter the passage on the left.
After passing by the room with several bookshelves stacked against each other, enter the left side passage and go through the door on the right. There is another door after this one, and if you check the shelf inside the room, you can find a Stalker’s stash with the Protective Coating blueprint inside.
There is a second Protective Coating blueprint to collect, inside an abandoned building on the western part of the city. It is directly west of the Shopping Mall and southwest of Enerhetyk Palace of Culture. Enter the building through the front and look to your right to find a locked door. Shoot the lock to break it, then head inside and open the door to the right. Wait for the trap to go off, then enter the room and check the safe to collect the second Protective Coating blueprint.
Blueprint #2: All-Titanium Components
Effect:
- Physical Protection +15%
- Wear Resistance +20%
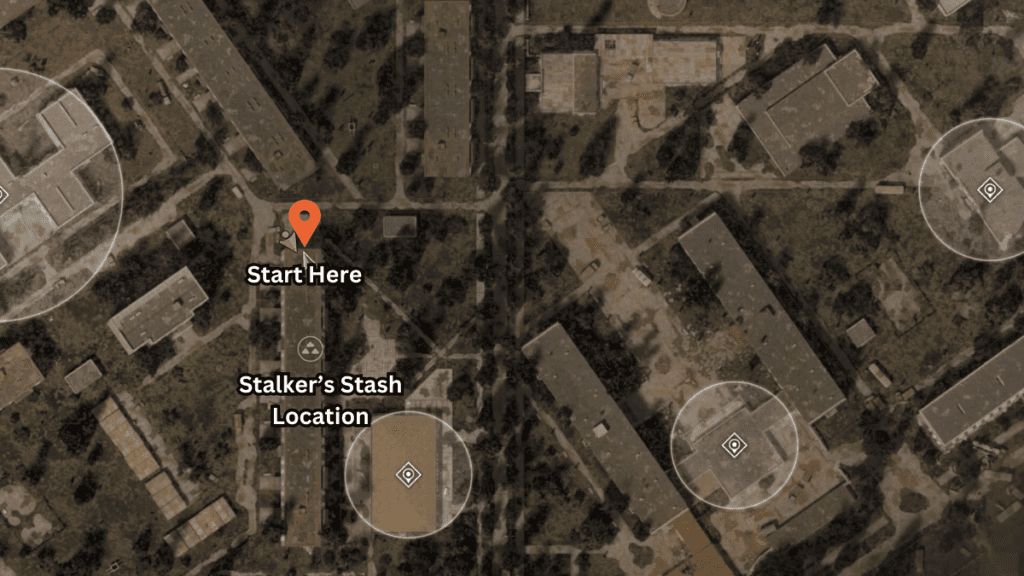
Head over to the Department Store on the southern part of Prypiat, there is a building to the west of it where you can find a Stalker’s Stash. You can enter the building through the large hole in the wall on the north side of the building, then keep going south on the ground floor. You will come across another hole in the wall, go through that and enter the passage on the left and go into the room on the right.
Go through the next hole in the wall and through the room on the right. Turn left and head into the room beside the bathroom. Crawl through another hole in the wall, go left, and enter the first room on the left where there are several wooden shelves. There is a kitchen on your left, go inside and you will find the Stalker’s Stash on top of the door inside the kitchen. Collect the All-Titanium Components blueprint from within.
Blueprint #3: Elimination System For Poisonous Substances
Effect:
- Thermal Protection +20%
- Chemical Protection +20%

Make your way west of Prypiat towards the shopping mall, then head into the underground bunker on the north side of the building. Once inside the bunker, collect a key from under the chair on the right side of the room. Head inside the corridor on the right side, just beside the chair, and take the left passage. Use the key on the first door on the right, then enter the door on the left. Check the table to collect the Key to the Old Padlock, then exit the bunker.
Use the key on the doors just beside the bunker’s main entrance and turn on the generator switch. Go back inside the bunker and again enter the corridor on the right side of the room. Make your way to the left side corridor and, this time, go a bit further and check for a double door on the right with a Ball Lightning anomaly inside. There is a safe in the middle of the room, navigate past the shelves and avoid the anomaly to get to it. Inside the safe is where you can collect the Elimination System for Poisonous Substances Blueprint.
Liberty Exoskeleton Technician Location
Since you are in Prypiat, it is best to visit Bolero within the Enerhetyk Palace of Culture. He can help you upgrade your Liberty Exoskeleton and apply all the necessary blueprints. You will also find some upgrades cannot be installed right now, so you have to wait for a patch update before you can purchase those.