


Lost Soul Aside will also have you exploring the different zones to get your hands on collectibles, apart from of course, slaying enemies. The Underground Laboratory zone holds 9 chests and 4 documents, and if you are looking to tick the 100% collectibles done box for the game, it is best to be sure that one of these does not get missed out in the rush to move ahead and progress in Lost Soul Aside
All Collectibles In the Underground Laboratory In Lost Soul Aside
We have put up the collectibles in the order that you will come across them while traversing the Underground Laboratory in Lost Soul Aside
Collectible #1: Chest (1/9)
This is an easy one, take out the blue crystal blocking the entrance to the room on your left, and you will get your first chest in the Underground Laboratory.
Collectible #2: Chest (2/9)
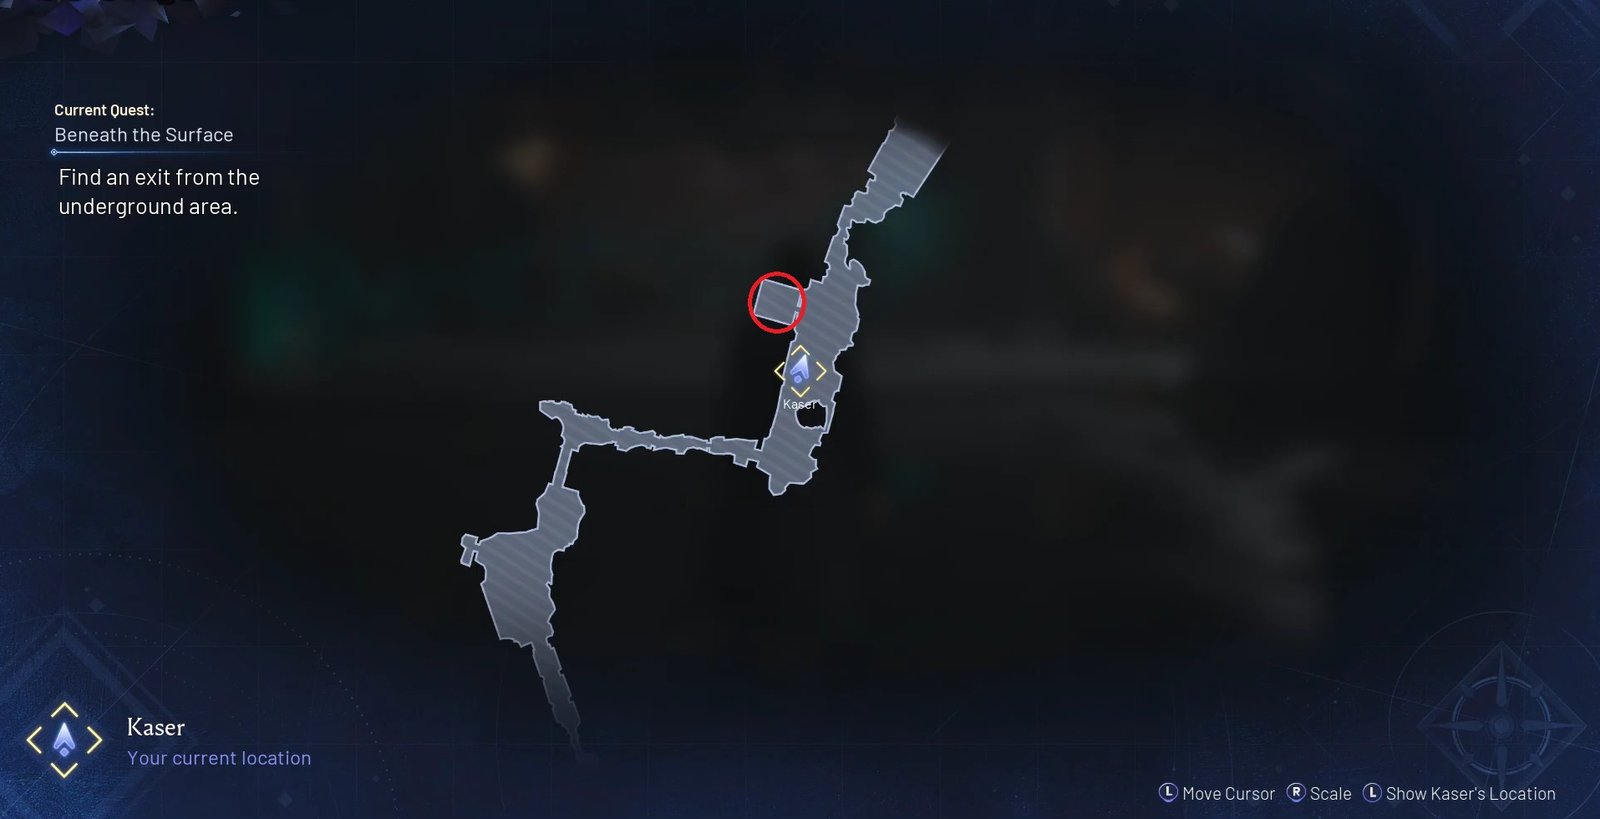
Take the ramp up, and immediately to your left is the second chest in the area
Collectible #3: Chest (3/9)
Jump down and continue straight ahead to come across another blue crystal blocking the entrance. Destroy that to get your hands on the third chest in the Underground Laboratory.
Collectible #4: Chest (4/9)
The next chest is located in the central open area of the Underground Laboratory. This one is easy to spot and you will come across this area as part of normal story progression.
Collectible #5: Document (1/4)
As you move ahead from the previous area, go up the stairs to come across your first document – A memorial dedicated to the first Holy Knight in the Empire.
Collectible #6: Chest (5/9)
You will next come across a giant blue crystal. Bang opposite it is a ramp that you can jump on to and get to the 5th chest in the area.
Collectible #7: Document (2/4)

In the same room, as you move towards your right, you will get to collect the Imperial Document. This falls on the way to your next area.
Collectibles #8 – 11: Document (3/4), Chests (6-8/9)
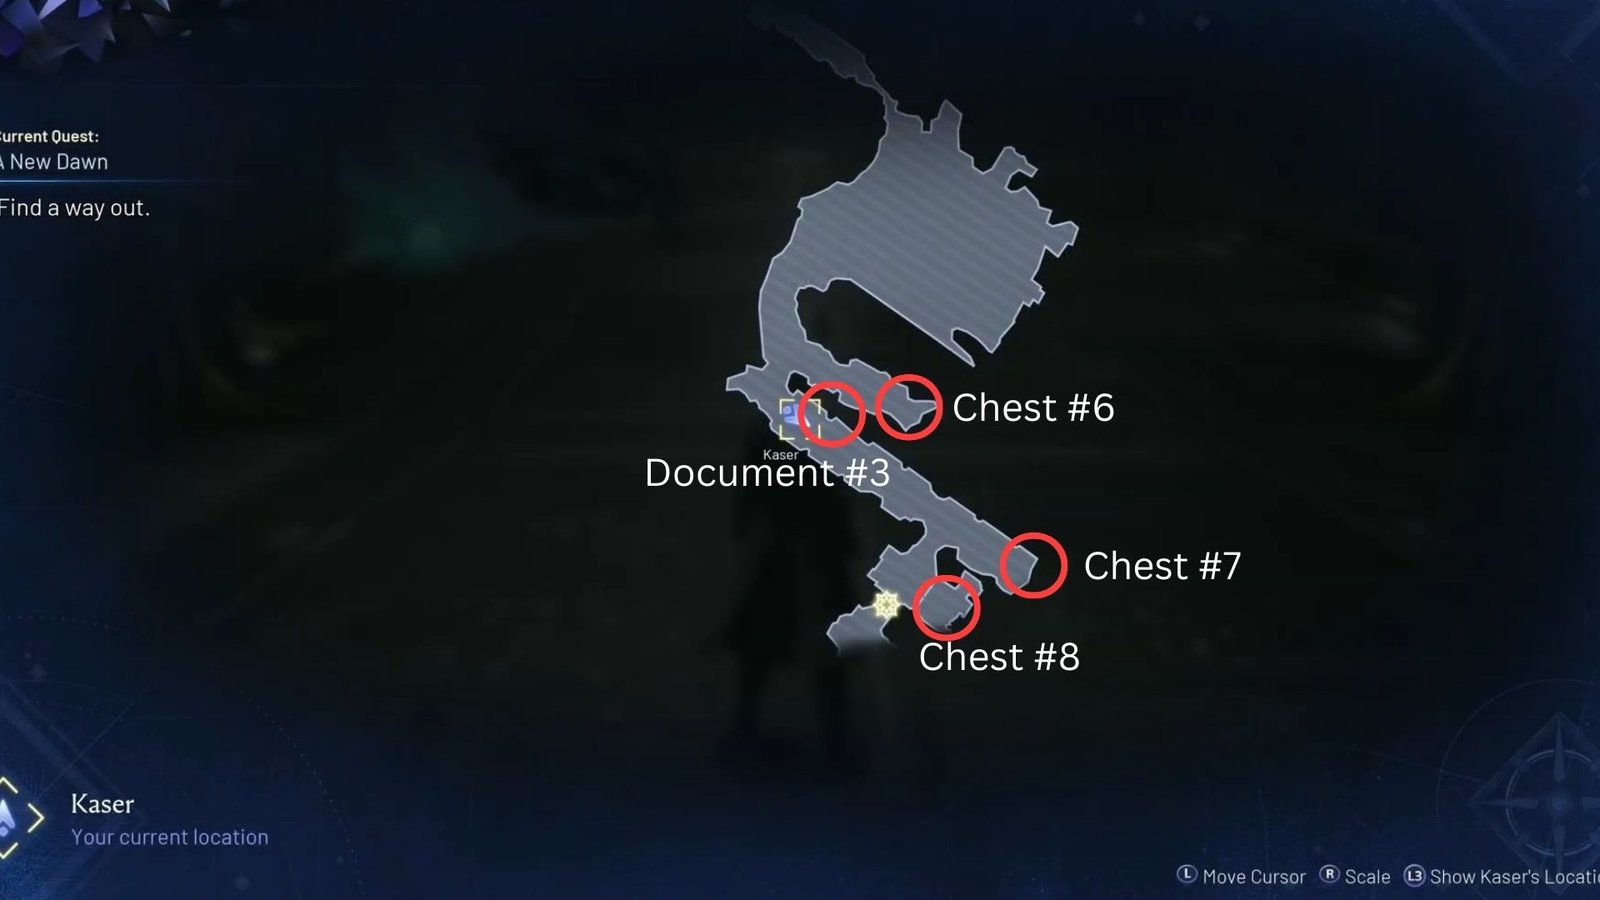
You will next come across a long, narrow corridor, and on the left, lying next to a corpse, you can pick up your 3rd document. This one will talk about the Empire’s Holy Gift Technology.
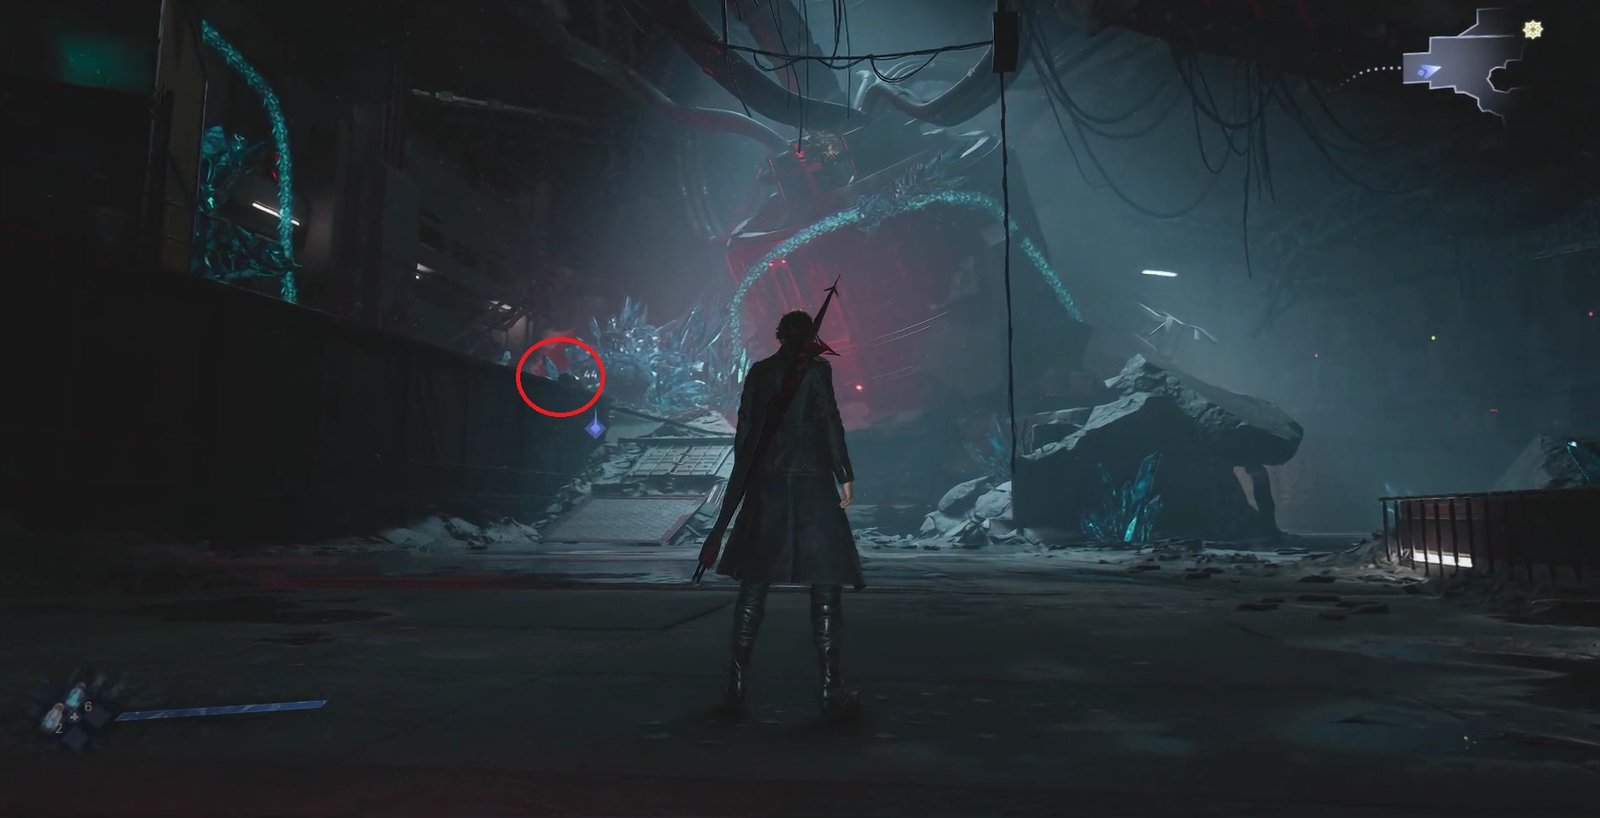
From the same place as the earlier collectible, you will see an adjacent corridor running parallel to your current location. Make your way there, pass the flickering currents, and you will spot your next chest for the area.
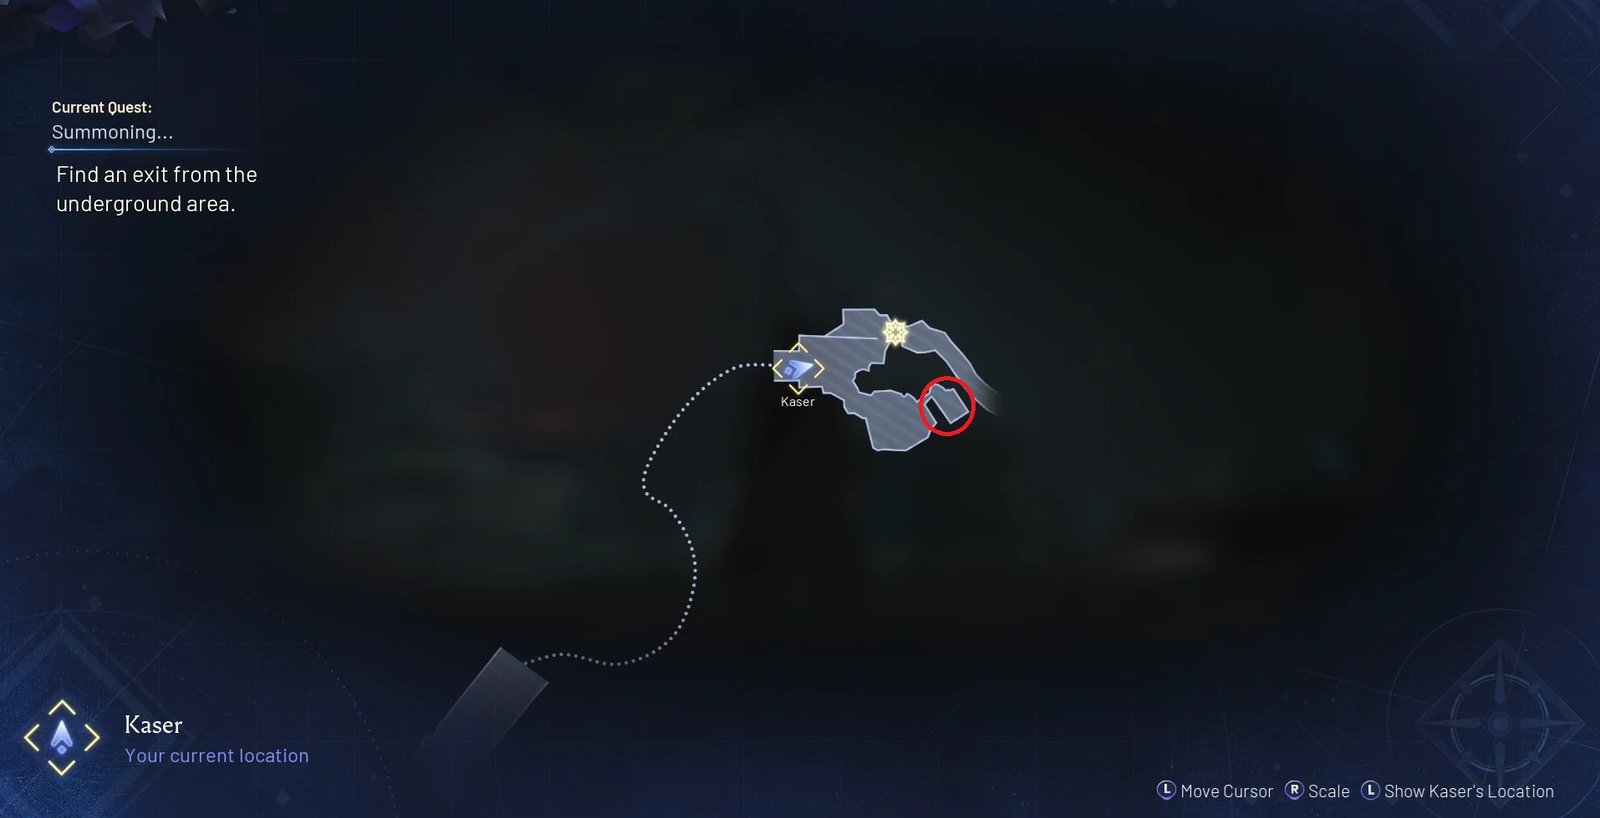
Return back to the main corridor, and move ahead. You will see the 7th chest for the Underground Laboratory area lying right there at the very end.
Take the path to the right of the corridor, and you will spot a small room in between, as seen on the map above, that contains a chest for you to open and loot.
Collectibles #12-13: Chest (9/9) & Document (4/4)
The last chest for the area is at the very end, on the left part of the next room that you find yourself in as you progress through the Underground Laboratory.
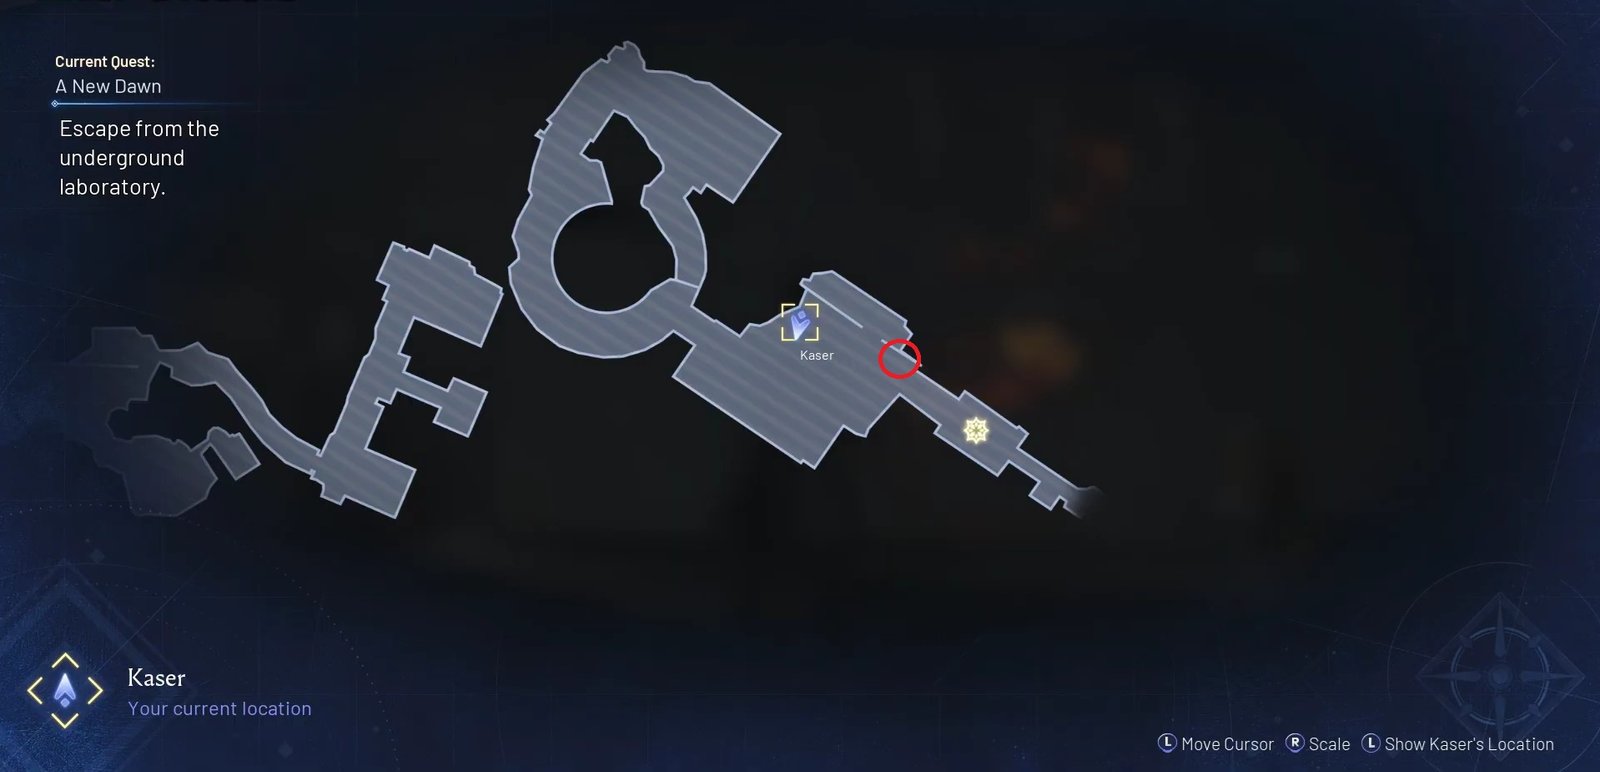
This again is almost unmissable, before you take the elevator, the corridor just before it will have a table on the right that has the fourth document, and the last collectible for the area.