

")
Stalker 2: Heart of Chornobyl’s storyline is quite complex, and has a lot of main story quests that can lead you to 4 different endings. Not only that, these quests also help you get powerful weapons and gear on your journey. During the An Act of Mercy quest, you can pick up the Whip Sniper Rifle towards the end of the mission. But you are bound to miss it if you don’t pay attention. But then that’s what we are here for, and we have all the details in this guide on how to get the Whip and complete An Act of Mercy quest in Stalker 2.
How To Start An Act Of Mercy Quest In Stalker 2
This quest is part of the main storyline, and it unlocks right after completing the Dark Times quest. During the Dark Times quest, you will receive the coordinates to a location after you kill Wolfhound. This will lead you to a house where the Doctor resides. Speak to the Doctor to start the An Act of Mercy quest.
An Act Of Mercy Quest Walkthrough

After talking to the Doctor, you will be tasked with retrieving the Monolithian Device from within the Dusty Cable Tunnel in Yaniv. You can find the Dusty Cable Tunnel on the eastern side of Yaniv. If you manage to do this without killing Monolithians, there are extra Coupons waiting for you at the end of the quest, so keep that in mind as you proceed.
Complete The Doctor’s Request Without Killing Monolithians
Once you get inside the Cable Tunnel, head all the way down and open the door in the basement. Your task here is to navigate towards the Monolith Infirmary, where the Device is located. But you need to practice stealth so you don’t end up killing anyone during the mission. After going through the door, go straight ahead to cross over to the other side of the room. There is a Monolithian here, sneak past him. If you do get spotted, you can just make a run for it and hopefully, he won’t follow you.

Go down the passage at the end of the room, turn left, and enter the first room on your right. Another Monolithian will appear, wait for him to go past before you make progress. Go all the way down the passage on the left, beware of another Monolithian at the end. Quickly enter the vent on the right and follow the path.
Locate the Monolith Infirmary


After you exit the vent, you can find the Monolith Infirmary entrance. Take a right after you exit and enter the left doorway at the end of the passage. Depending on your difficulty, you will spot several soldiers roaming the area and inside the Infirmary. If you stick with the plan of not killing them, then you can collect a nice reward towards the end of the mission.
Retrieve The Monolithian Device
The Monolithian Device is found inside the room on the right side. Once inside the infirmary, exit the door ahead and enter the first door on the right. Go through the passage and enter the doorway to find the device. Pick it up, then book it out of there by going down the same path that you came in.
Take the Monolithian Device To The Doctor

Head back to the Doctor located at Red Forest. Once you are at his place, head down to the basement to find him. There is a cutscene where you will witness a scuffle between the Doctor and a possessed Strider. Once the situation has calmed down, talk to the Doctor to complete the mission. If you haven’t killed any Monolithians inside the Dusty Cable Tunnel, then the Doctor will wire you some Coupons after you leave. The amount varies depending on your game’s difficulty.
Whip Sniper Rifle Location
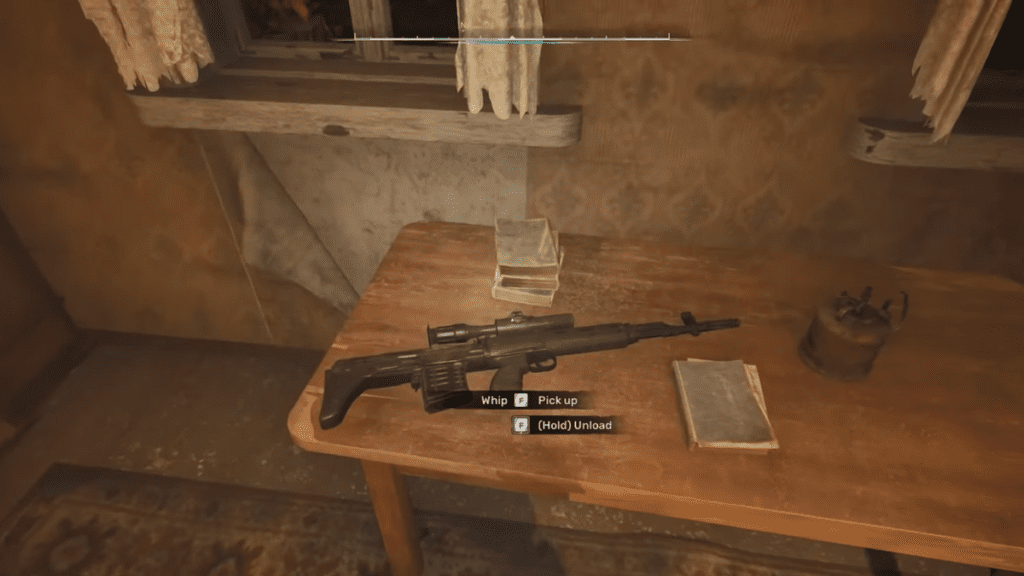
Before you leave the Doctor’s house and right after exiting the basement, check the room to find the Whip. It is located on top of the table near the basement staircase.
Note: While the Whip is a Unique Weapon, it is not durable when you pick it up here.
Whip Stats:
- Damage: 4.8
- Penetration: 3
- Rate of Fire: 4.9
- Range: 3.4
- Accuracy: 4.97
- Mode: Single
- Magazine: 10
- Caliber: 7.62×54