


Right in the beginning of Indiana Jones and the Great Circle, Indy faces a mysterious burglary in the college building. While you’d want to explore the lush green forests and hidden ancient ruins in the game, this prologue is necessary to familiarize yourself with the controls and get a gist of where the story of The Great Circle begins.
The burglar breaks down everything in their path and makes everything a huge mess. While searching for him throughout the college, Indy will have to collect some items that can help in later parts of the game. They are scattered across classrooms, hallways, janitor’s closet and Indy’s office. Here’s a guide on finding all of the 10 collectibles in Marshall College before moving on to the next part of the game.
How To Get All 10 Marshall College Collectibles In Indiana Jones & The Great Circle
The Marshall College building has 10 collectibles that you can get.
Journal Note 1. Faculty Card
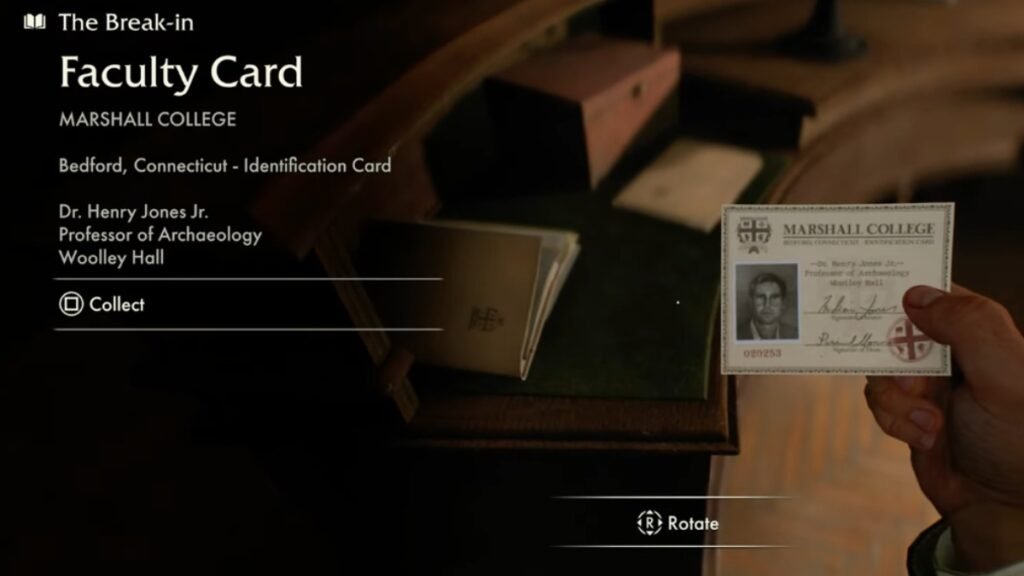
For the first note, head over to the reception area. Climb the stairs and go on the right to reach the hallway. Go right as the game shows you and then go left to reach the reception. Here, you’ll find a faculty card of Dr. Henry Jones Junior.
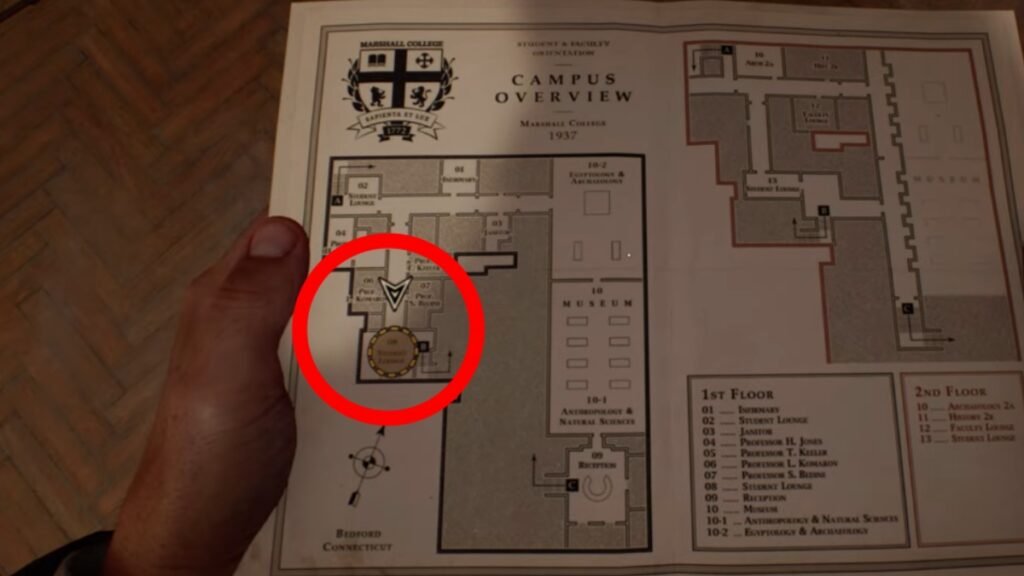
Campus Map
In the same room, just head over to the door and you’ll see a map of the Campus. Use this to locate various other rooms in the Marshall College building.
Journal Note 2. Blackshirts Article
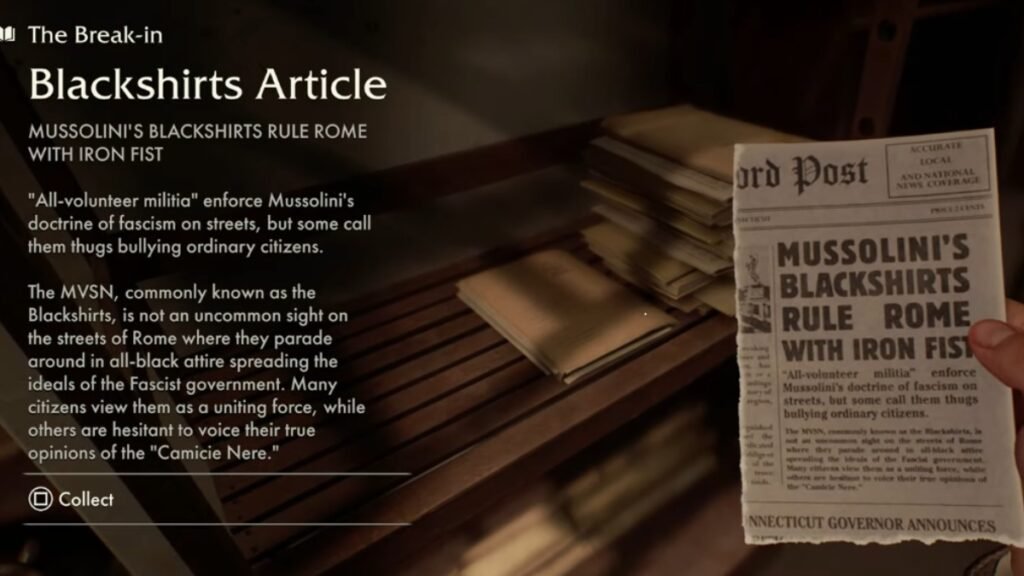
From the museum, head over to the hallway on the right. Go into the first room on the left and you’ll find a small piece of newspaper. Pick it up, as it’ll be the Blackshirts Article that you can collect.
Journal Note 3. Cat Mummy Notes
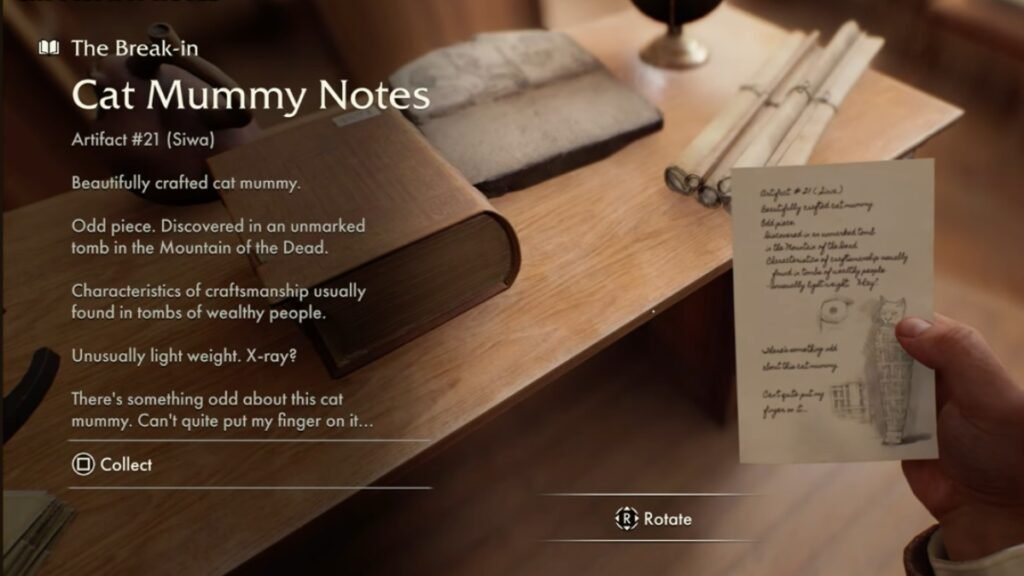
From the hallway of the previous location, keep going forward until you reach the end and see stairs going upwards. Climb up and go into the first room on the left. In this classroom, go up to the table in the middle and there’ll be a note about a cat mummy lying on it. There will also be an apple nearby that you can take with you.
Journal Note 4. Bjorkman’s Letter
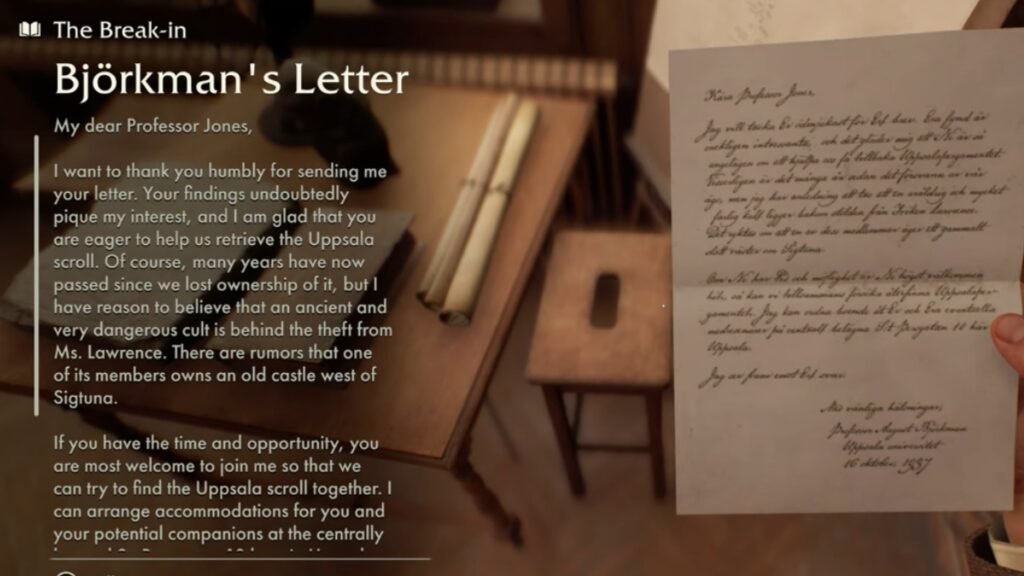
This letter is in the same classroom as the Cat mummy notes. Just go towards the table on the right side of the classroom near the teacher’s table. There you’ll find a letter sent to you from Bjorkman, asking you to come join him in finding the Uppsala scroll together.
Journal Note 5. Shirley’s Letter
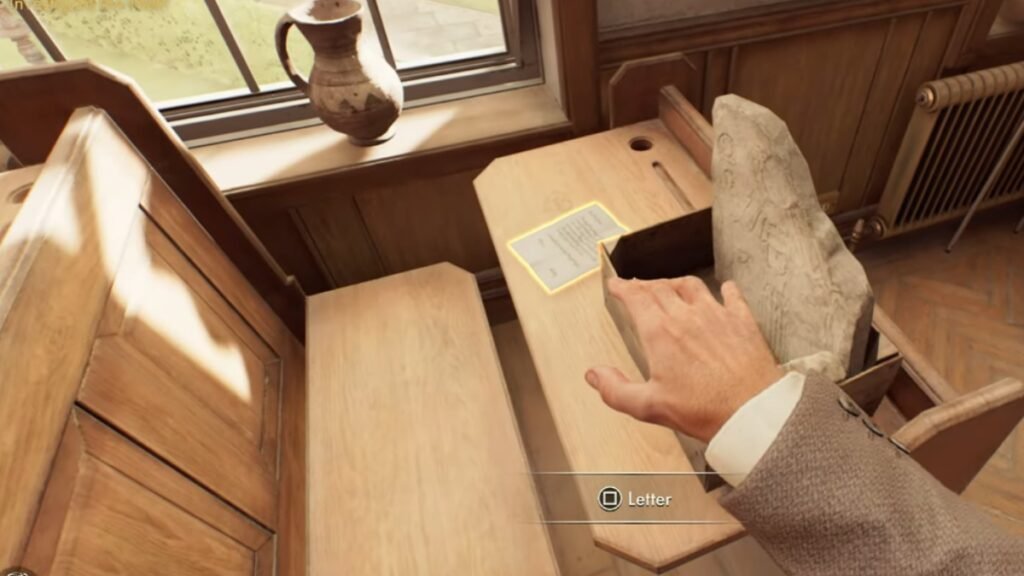
Another item that lies in the same classroom is Shirley’s letter, which is sitting on the first table on the right. You can find it next to the stone slab. In this letter, Shirley requests private tuition since she wasn’t able to show up for Mr.Jones’ thesis deadline.
Journal Note 6. Strange Aeons #1
Come out of the classroom and keep going forward in the hallway. Once you reach the end, go to the corridor and follow the red carpet till you see a room on the right. Go inside and you’ll see a book sitting on the table on the right. This book talks about the adventures of Joe the Archaeologist.
Journal Note 7. Baseball Card
After picking up Joe’s book, keep going forward and enter the hallway on the right. The card will be on the steel trolley on the right, next to the books. This is just a collector’s card to keep with you.
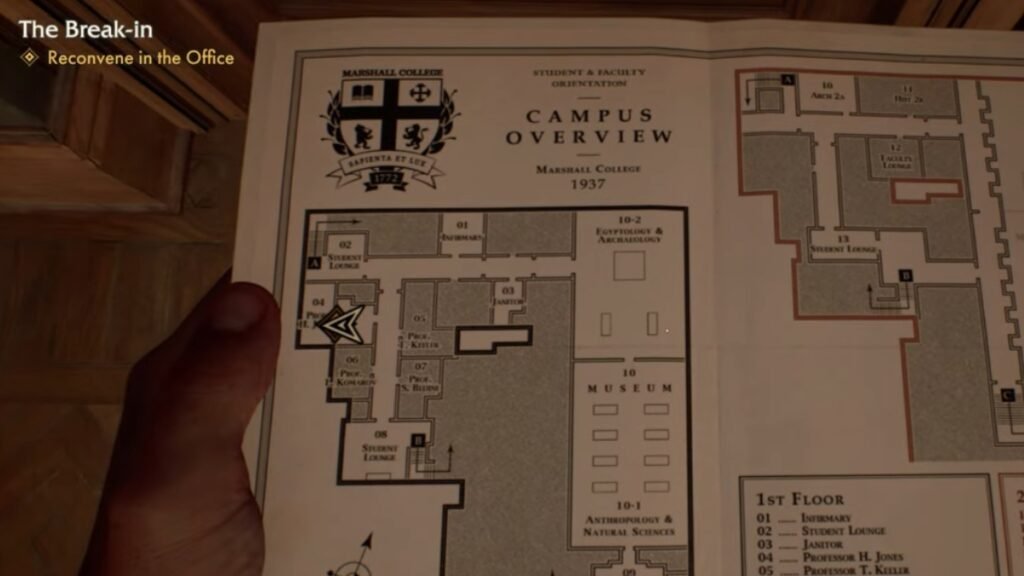
Giant’s Pendant
For this head over to the location shown in the map. This is the Students Lounge where you’ll have to go and pick up the huge cupboard in the middle. Climb on the cupboard and you’ll see that the window is completely broken. On its bars will be the Giant’s Pendant, left behind by the intruder.
Journal Note 8. Temple Map
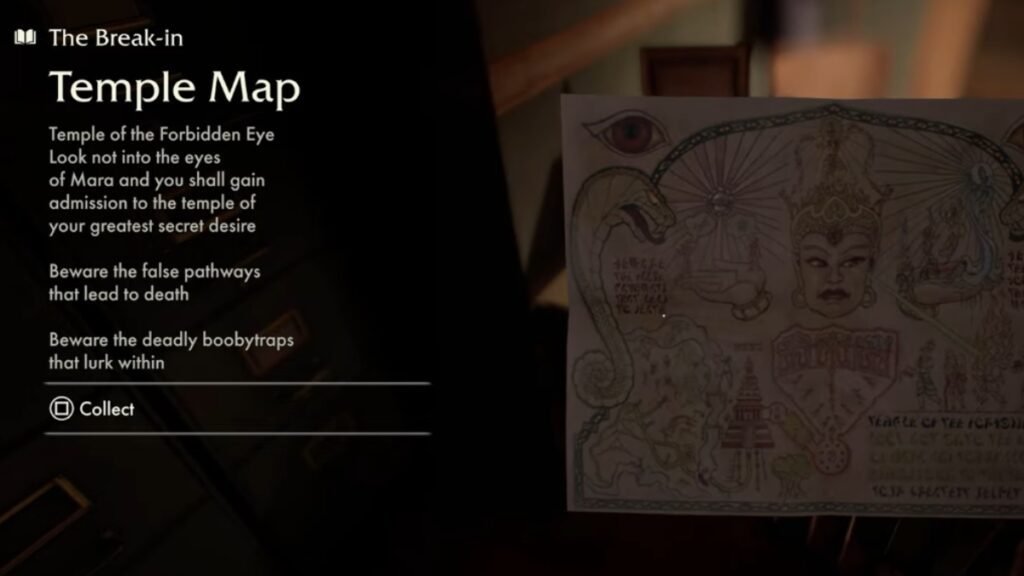
Come out of the Students Lounge and enter the room on the left. Brody will already be standing next to it. Go up to the table and on its left corner you’ll find a Temple Map.
Journal
For the journal, you’d have to go up to the location shown in the map above, which is Prof. Jones’s office. Go inside and a scene will show Indy taking his journal. All of the previous collectibles will be added to this journal, making it easy for you to have a look at what you’ve collected so far.
Gramophone Record
The gramophone record lies in the same room as the journal. Just go towards the left corner of the room near the Gramophone. Indy will pick up the Rhythm and Blues record and put it in his suitcase.
Journal Note 9: Cat Mummy Photograph

This mysterious Cat Mummy photograph is present in the same room as the previous two collectibles. Go to the right side of the room, where you’ll see a huge board with all kinds of photographs posted on it. While all of the pictures are interesting, you’ll have to take the Cat Mummy Photograph, which will be on the bottom side of the board.
Journal Note 10. Giant’s Pendant

This pendant is found near the corner of the desk in Jones’ office. It will be right next to the edge of the table beside Indy’s suitcase. This pendant is the only clue that can lead Indy to the Giant who broke into Marshall College.
Bullwhip
The final collectible/item that you’ll need from the college is the iconic bullwhip. It can be found lying on the ground near the right side of the room. Taking this item and placing it in the suitcase will mark the end of the Marshall College prologue.
With this out of the way, be ready for quests and areas later on as well that have collectibles, like photo inscriptions in the Stolen Cat Mummy quest, or the 5 lost artifacts of Africa.