


Throne and Liberty’s Wilds of Talandre update brings a whole new island where you can pick up new quests, meet new enemies, and explore new dungeons. The Hall of Illusion is yet another dungeon that you can explore to meet some unexpected bosses. The Molgras is the first boss encounter here, and this guide will detail how to beat Molgras in Throne and Liberty.
Throne & Liberty Molgras Boss Guide
Molgras can be a bit intimidating from the get go, but you can easily solo him by following a few tips and tricks.
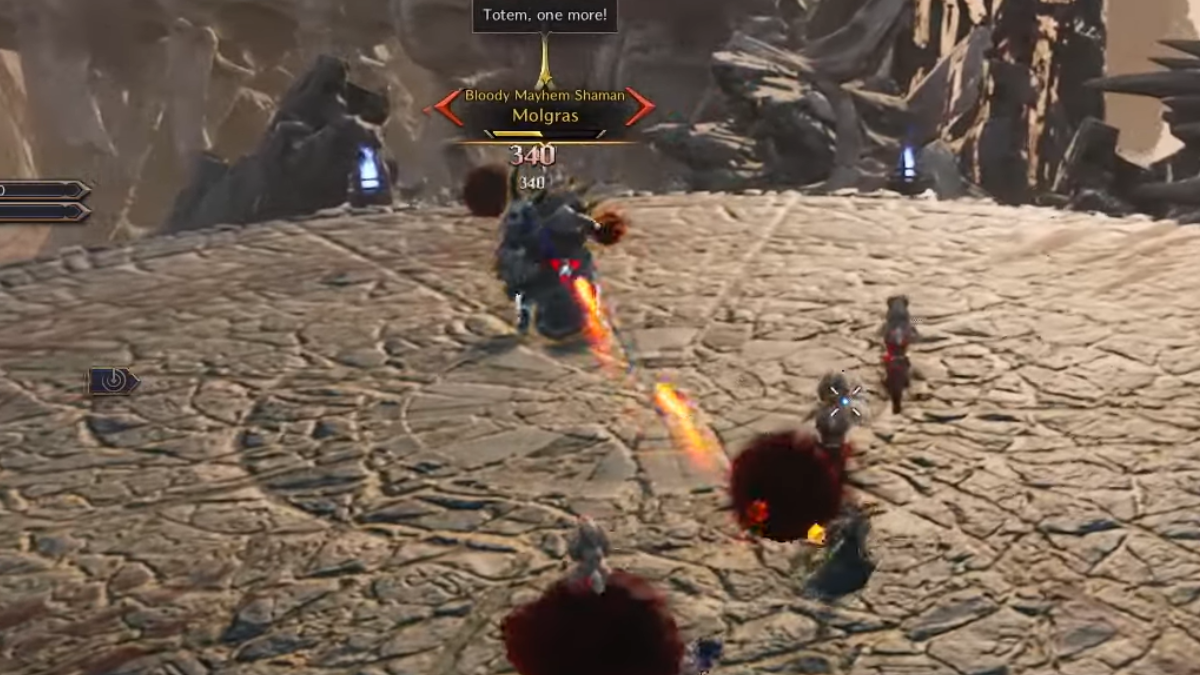
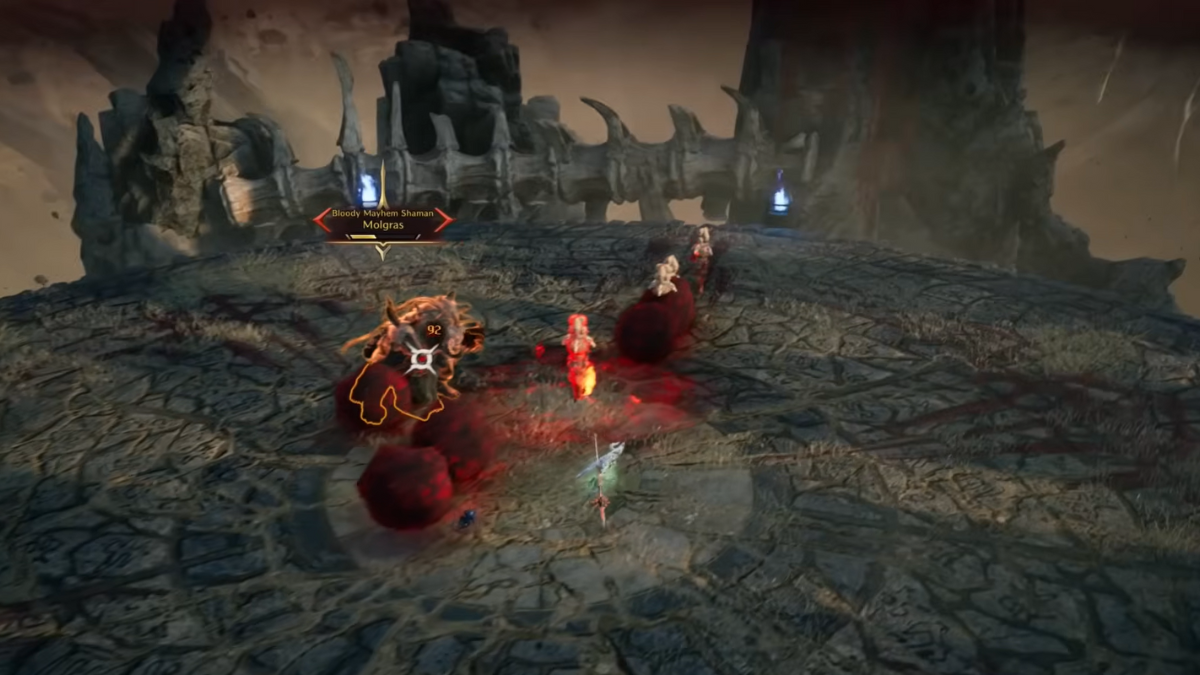
- Molgras’s main attack pattern is to spawn totems around the arena. These totems will continue to spew red orbs that will deal damage.
- You need to dodge the orbs as well as Molgras’s attacks while attacking the boss to win the round.
- To know where a totem will spawn, pay attention to the spawn location of the first two totems.
- After that, you can influence where totems will spawn next, as most of them will appear at your standing location.
- Usually, the second totem will spawn diagonally after the first totem.
- When you spot both the totems, try to position yourself behind the second totem almost in line with the first one.
- The third totem will appear at your location, repeat this step one more time to line up all four totems.
- While working on aligning all totems, don’t forget to deal ranged damage.
- Melee players can work on battling the boss up close while standing in front of the totems to align them rather than do it from behind the totems.
- Each time the boss says “Come Out, Totem”, a new totem will appear, so you can use it as a hint to align yourself.
- Periodically, you will also notice a red circular wave wash over the area, but you can avoid the damage here by jumping.

- Keep an eye out for the phrase “I’ll Follow You Anywhere”, that indicates that the boss will teleport to your location.
- If you have placed yourself in front of or behind the totems, run towards the opposite end of the totem line after the boss has teleported to your prior location.
- Pay attention to its gaze and stay in line with the totems till it releases a powerful red beam, destroying everything in its path.
- If done correctly, all the totems would be destroyed and Molgras will be stunned, giving you enough time to deal damage.
- Always remember that the more totems available within the area, the tougher the fight will get and the chances of you dying are higher.
- You can keep repeating the steps above while dishing out damage so that you can keep destroying the totems.
- At 50% health, Molgras will spawn a unique fourth totem that will have a red aura. When you spot the phrase “Totem, One More”, this is your cue to move as far away from the original totem line.
- You need to let Molgras place the unique red totem away from the main totem line, as destroying this totem will stun you. Try not to destroy this particular totem by keeping it away from the rest.
- You can then go back in line with the previous totems and let the boss destroy them.
With enough persistence, you can easily beat Molgras and continue on with the rest of the dungeon. If you are looking for more guides on Throne and Liberty, you can check out our guides on Soundless Mage Tailesia and everything on Skill Conversion Books.