


Each level in Doom: The Dark Ages offers tons of collectible items hidden away in secret areas. Some are easy to miss, so you need to keep a keen eye out just in case. In Chapter 5 alone, while exploring the Holy City of Aratum, you can pick up some unique collectibles. If you are having a hard time trying to pick out where each collectible is located, then this guide will detail where to find them all in Doom: The Dark Ages.
All Chapter 5 Collectible Locations in Doom The Dark Ages
The collectible list when it comes to Chapter 5 is vast, hence why you need to comb through the level before you move on. Some of the items listed below can be missable, so follow along as we list out where you collect all collectibles within the Holy City of Aratum.
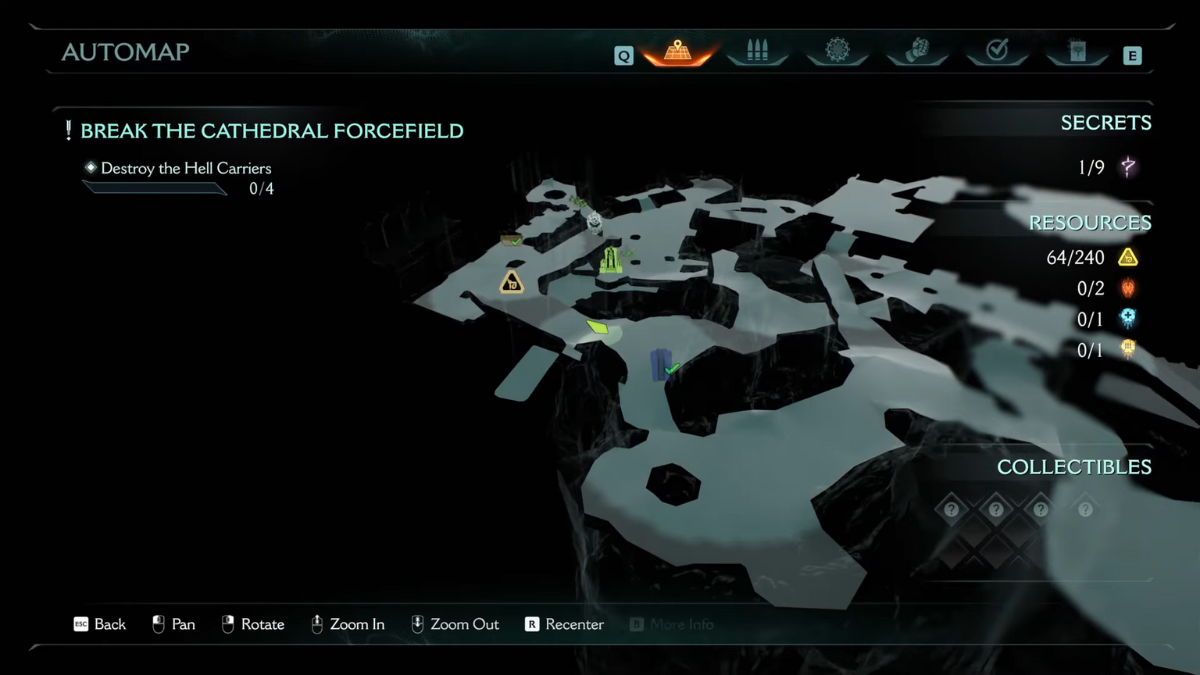
Hell Carrier #1 and #2

There are two Hell Carriers at the start of the level, after exiting the dragon’s den and at the entrance to the city. There is a larger Hell Carrier in plain sight, as well as a secondary smaller Hell Carrier zipping around. You can notice the smaller carrier from the green streaks that shoot out of the jet. Destroy them both, after which you can explore the bigger carrier to find some gold.
Cultist Circle #1

From the first sentinel shrine, turn to the right to find some gold coins. This will lead you down a hole where you can find the Cultist Circle for the Countercult challenge. After dispelling it, turn around to find a nook filled with gold.
Gold Chest

To get out of the underground hole, jump into the water and swim upwards towards the opening. You will find another barrier to break on your right and a gold chest in front of it. Loot the chest to get gold, then jump down to the courtyard.
Blue Keycard Location
Follow the path on the right, climb up, then get into the cave on the left. Defeat the enemies, get out of the cave through the exit on the side, defeat the enemies here, then climb up the wall. You will come across a corpse holding the Blue Keycard when you take the path on the left.
Life Sigil #1

To use the blue keycard, jump down from where you were and interact with the locked door on the left. You can collect some gold here and a Life Sigil.
There is a resource to collect at the very end of the level. Keep following through the chapter’s quests till you reach the end and have to fight the boss. After defeating the boss, break open the wall to get it.
Demonic Essence – Ammo

There is a second Hell Carrier available at the same spot at the city entrance after completing the final boss fight. There is a Hell Knight you need to fight inside this carrier to get the Demonic Essence – Ammo resource. There is some gold to find around the ship as well.
Landing Zone #1 and Cultist Circle #2


Make your way to the center of the city and dive down to the lower levels to find two turrets. Destroy the turrets to kill the Titan boss here and you can spot a Landing Zone. Land on it, then make your way off the ledge to the lower level to find a Cultist Circle. Right beside the cultist circle is a line of gold coins that you can pick up.
Weapon Skin
Follow the trail of gold to be led inside a cave, and break the barrier ahead using your weapon. On the other side you can pick up the weapon skin.
Red Keycard Location

Go further ahead down the path to find a climbable wall on your right. Make your way straight to the platform where an enemy can be spotted, defeat it, then stand on the glowing plate on the floor. This will unlock the underground door in the main area, so jump down the hole and swim down to find a valve.
Turn the valve to drain the water, then turn around to find a raised gazebo. Break the wall within the gazebo, then go around it to find a way to hop into the structure. Inside is a corpse having the Red Keycard, pick it up and exit the hole using the blue catapult device in the room.
Ruby #1
This will lead you to an area where you can break two barriers on either side and also collect some gold. Up ahead is a locked red door that requires the Red Keycard to unlock. Go through it, collect all the gold, and pick up the Ruby on the statue.
Landing Zone #2 and Max Health Increase

Head back to the starting area at the entrance of the city and head left to find a turret. Destroy it and defeat the Titan to get the second secret Landing Zone. This will start a challenge where you need to clear the area of enemies. Defeat the boss at the end to get a Max Health Increase resource.
Gold Chest

Go back to the landing area but don’t mount the dragon. Rather, head downwards to find a cave opening where you can find a Gold Chest. You can now get on your dragon and make your way to the left side of the main city entrance.
Hell Carrier #3 and #4

You will come across a pulsating alien enemy to shoot down. Shoot its mouth to gain entry into a passage within, and you will spot a third smaller Hell Carrier zipping around. Tail it and shoot it down, after which you will spot the fourth larger Hell Carrier. Shoot that down as well, then land on the landing zone beside the carrier and not on it.
Super Shotgun Location

Jump down to the lower floor and defeat the enemies that spawn here, then unlock the safe on the floor to get the Super Shotgun.

Explore the passage beyond the safe and make your way towards the staircase on your right. You don’t need to climb up the staircase, rather look above and shoot down the chain with the breakable symbol on it.
Ruby #2 and Cultist Circle #3


Turn around and pick up the Ruby off the statue, then head back towards the entrance where you came from. Keep an eye out on the left to find a passage leading out, follow it and break the barrier to draw down a bridge. Push the block out of the way, climb up it, then follow the path on the left to find another Cultist Circle.
Codex #1

On the lower level of the room is a codex to pick up as well. Once you do that, explore the area to find a blocked barrier and some gold on a platform beside it. Head over to the gold first, after which you will be locked within the platform. Fight the waves of enemies and defeat the boss to be set free, after which the barrier will unlock and you can head back to the starting area of the cave.
Life Sigil #2

Make your way back to the staircase where you had destroyed the chain overhead, then head up the stairs and drop down. Pick up the Life Sigil, then exit the cave by stepping on the glowing platform.
Toy Location


Once you are out, don’t cross the bridge. Rather, jump off the ledge to your right and pick up the gold. Follow the linear path till some enemies appear, defeat them, then head all the way up by climbing the walls and going up the stairs. You will find the Serrat toy in front of a breakable gate.
Gold Chest

Break the gate ahead and follow the quest marker to the west side of the map. Once you head west, jump down to find a dead end and a gold chest at the end of it.
Hell Carrier #5
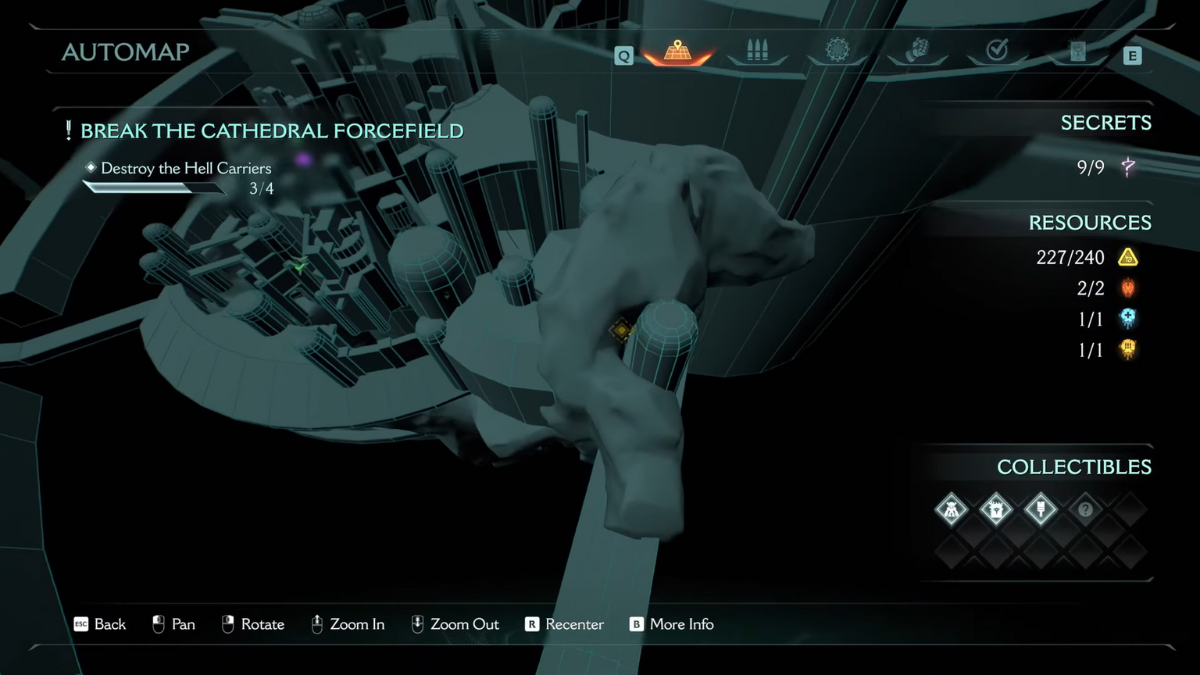
Head over to the northeastern section of the city. There is another pulsating alien to shoot down and gain access to the inside of its mouth. The fifth Hell Carrier can be found within to shoot down.
Cycler Location and Codex #2


Continue with the quest objectives till you reach an area with a pile of gold on the floor. Beside it is a safe that you can unlock and get the Cycler weapon. Once you reach the bottom of the level, collect the gold before breaking the barrier, and at the end of the gold train is a codex.