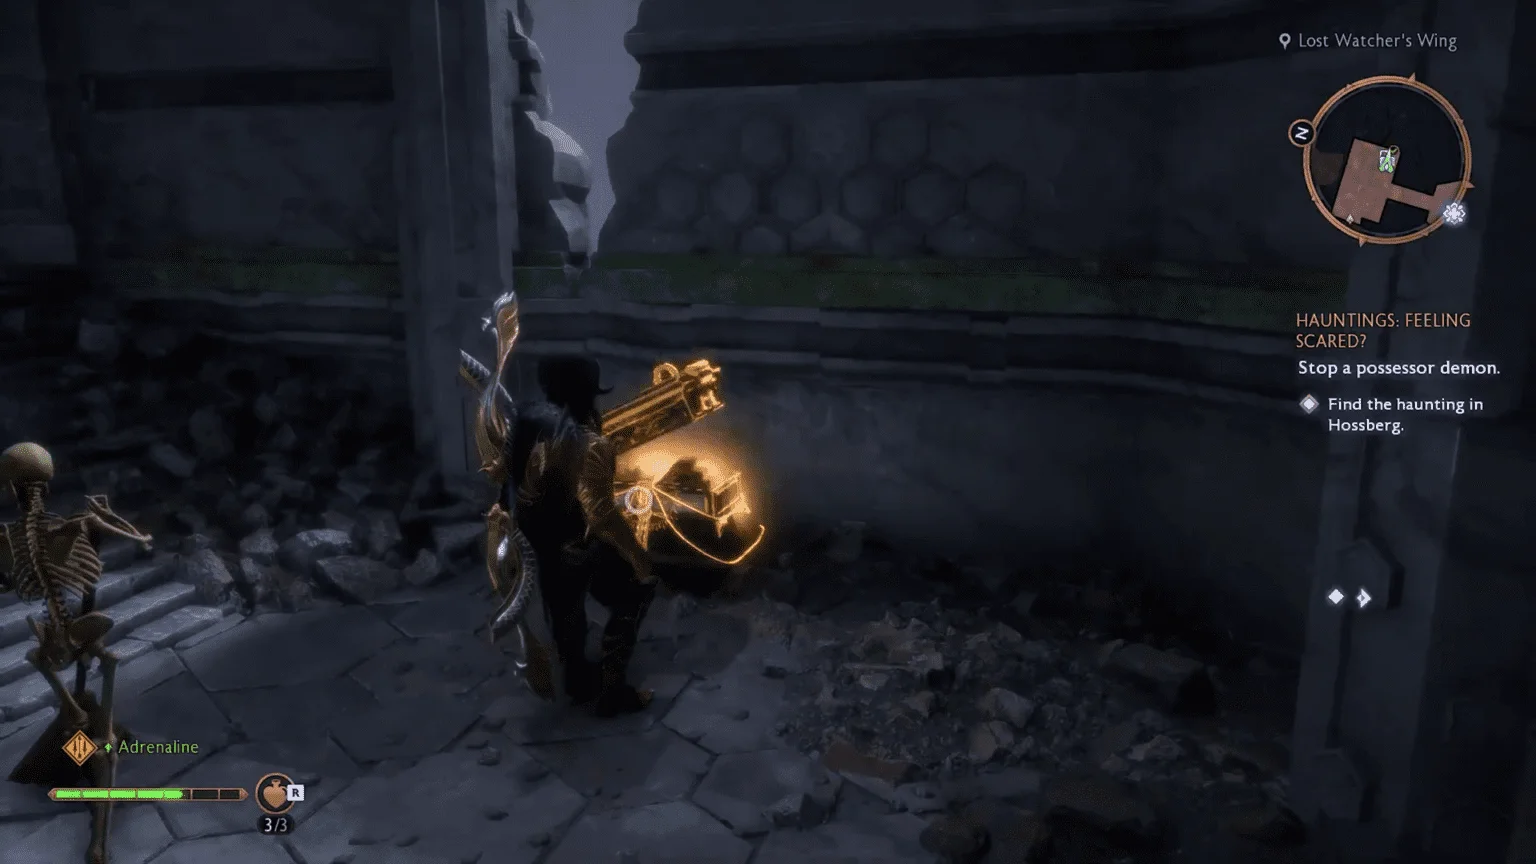
Necropolis Halls in Dragon Age: The Veilguard has plenty of chests hidden behind puzzles. Finding them takes some effort, but there is nothing satisfying than 100 %ing an area, and getting all it’s secrets and rewards. To help you do that for this area, we have put up the definitive guide to solve all Necropolis Halls Chests Puzzles in Dragon Age: The Veilguard. .
All Necropolis Halls Chests Puzzles & How To Solve Them
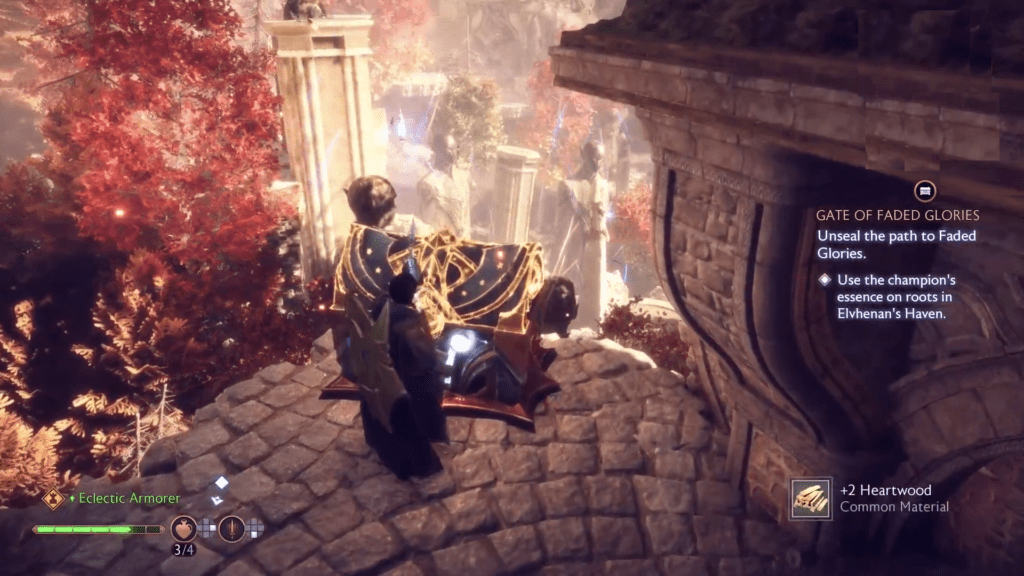
Some chests in the Necropolis Halls will have a puzzle and others might require the completion of side quests or platforming sections to open them. Here is the list of puzzles you will encounter in Necropolis Halls and the number of treasure chests to unlock for each of the puzzles.
- Restless Spirit Puzzle (2)
- Secret Skeleton Puzzle (2)
- Candle Light Puzzle (2)
- Memorial Gardens Bells Puzzle (2)
- Cascades Wisp Puzzle (1)
- The Spectral Court Bonfire Puzzle (1)
- Platforming Cascades Puzzle (1)
- The Path of Sighs Chest (1)
- Pinnacle of Its Kind Quest (4)
- The Lost Watcher’s Ring Chest (1)
Each one of them will have its own objective and completion goals, we also have listed out the treasure chests in numbers, there are 17 of them in the Necropolis Halls.
How To Solve Restless Spirit Puzzle In Necropolis Halls
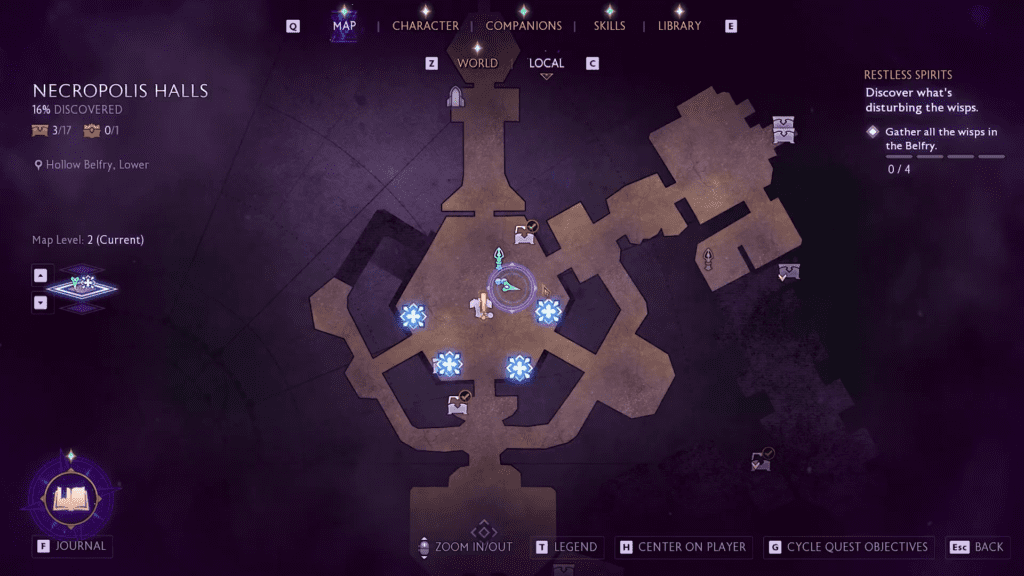
Location: Necropolis Halls, Hollow Belfry, Lower
After adding Emmrich to the squad, you will be able to pick the side quest Restless Spirit in Necropolis Halls.
Objective: Find and place four Wisps near the locked door to open it. There are four gates with a purple flame, behind each gate we will find the Wisp we need to get our reward. Each of these rooms behind the purple flame gate contains a small puzzle for us to solve to proceed.
Location of the First Wisp
The Objective: The objective here is to light six stone torches. But you have to follow an order to light them all up. Head to the closed door on the east, open the door, and get inside. Interact with the candles to make the first light appear, we have to use light in a perfect order to light up all the glyphs in the room.
- Interact with the glyph next to the candles(1st).
- Interact with the glyph across the candle on the left wall(2nd).
- Right-side of 2nd glyph, you will find another glyph blocked by the wooden boxes (again on the left wall). Beak the boxes and interact with the glyph (3rd).
- Then interact with the glyph on the ground right next to the first glyph (4th).
- The last glyph we interact with is the glyph left of the 2nd glyph. It is the one near the entrance of the room.
Once you have done all the steps, head to the candles and interact with the skeleton to collect our first Wisp. Take the wisp and head to the locked door to clear out our first wisp.
Location of the Second Wisp
The Objective: Light up to braziers to obtain the Wisp.
Take the purple door to the left of the locked door. Head inside the grab the codex on the table. The puzzle is simple: on the right wall, you will spot two empty braziers and have to light them up. Once you lit both of them, you will see fire rising in the middle between both braziers, here use Placate Mischief to free the trapped wisp.
Take the second wisp to the locked door to clear the second wisp off the list.
Location of the Third Wisp
The Objective: Break the Red Barrier and get the third wisp
With two doors remaining, take the door on the right the one with a glowing red orb inside. Open the door. break the crates to focus the laser beam on another room. Then pull the lever in the room to unlock another door next to our current room. We will have to turn off the giant red wall in this room to get to our Wisp.
Get out of the laser room, and then head inside the room we unlocked on our left. Here go near the broken fence on the left, use your bow to shoot the red shield in the other room behind the fence hanging on the right wall.
Treasure Chest #1: Now go back to the laser room, break the crystal to turn off the red barrier open the chest inside. You will find the item ‘The Iron Cast.’
and take the 3rd wisp next to the chest to the locked door.
Location of the Fourth Wisp
Now go to the last remaining purple door of the room where complete the laser puzzle. Head inside, and break all the crates on the right to reveal the lever on the ground. Interact with the lever to unlock a new room next to our current room.
Get out of the room and go inside the room on the right we unlocked by interacting with the lever. Here break the wooden barrier on the right and grab the memento on the ground.
Now Head outside you will see a purple orb in the air on the left near the laser room. Use Spiteful Aura to create a giant purple hand on the ground.
Climb on the purple hand to get our fourth and final wisp for the puzzle. After taking the fourth final wisp to the door will unlock the gate to get our rewards.
Treasure Chest #2 Head Inside, and defeat the Orbiting Envy Demon, and you will find the treasure box on the right. Open it you will get the reward “The Dying Wish.”
How To Solve Secret Skeleton Puzzle In Necropolis Halls
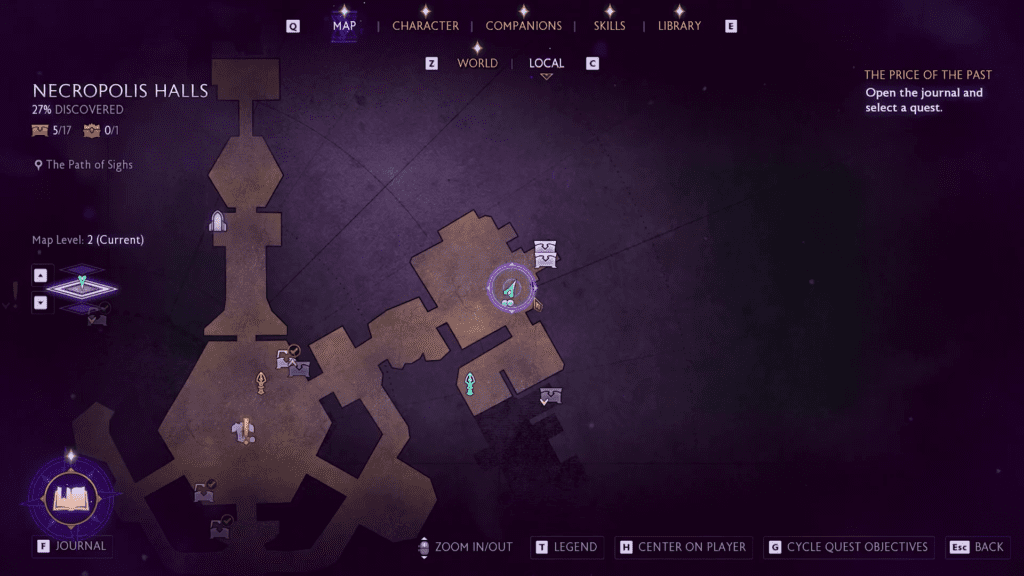
Locations: Necropolis Halls, The Path of Sighs
The Objective: We must gather five Skeleton parts to make a complete skeleton in under 1:45 minutes.
Head to the east of the Necropolis Halls to find the coffin on the ground. Interacting it will release an orb in the air and our job is to interact with any item the orb touches. Another indicator is the purple torches, which interact with the items near the purple torches.
Note: The location of the torches is far apart but you can use them as an indicator to locate the next skeleton part.
- First, the orb will touch the Skull (1st) next to the candles across the coffin.
- Then get inside the doorway across the location of the Skull, here turn left, and go through a small room where we find a piece of the Skeleton (2nd). Get out and take the staircase on the left.
- Here you will spot another purple torch on the left, head up to the location, to find another part of the skeleton on a ledge a bit high on the ground (3rd).
- Drop down, and take the stairs on the right to follow another purple torch at a distance. Go near it, and interact with it to grab the part (4th).
- Now go back to the main staircase, here jump on the platform right of the main staircase to obtain the last skeleton remains. (5th)
Now drop down and head back to the coffin where everyone started to finish the puzzle in time.
With the puzzle completed, head back to the room with the staircase, here on the right you will be able to interact with the activator to unlock the locked door with two chests inside.
Treasure Chest #3: The first Treasure chest will contain the item “Researcher’s Robes.”
Treasure Chest #4: The second Treasure Chest will have a“Jade Cleaver .”
How To Solve Candle Light Puzzle In Necropolis Halls
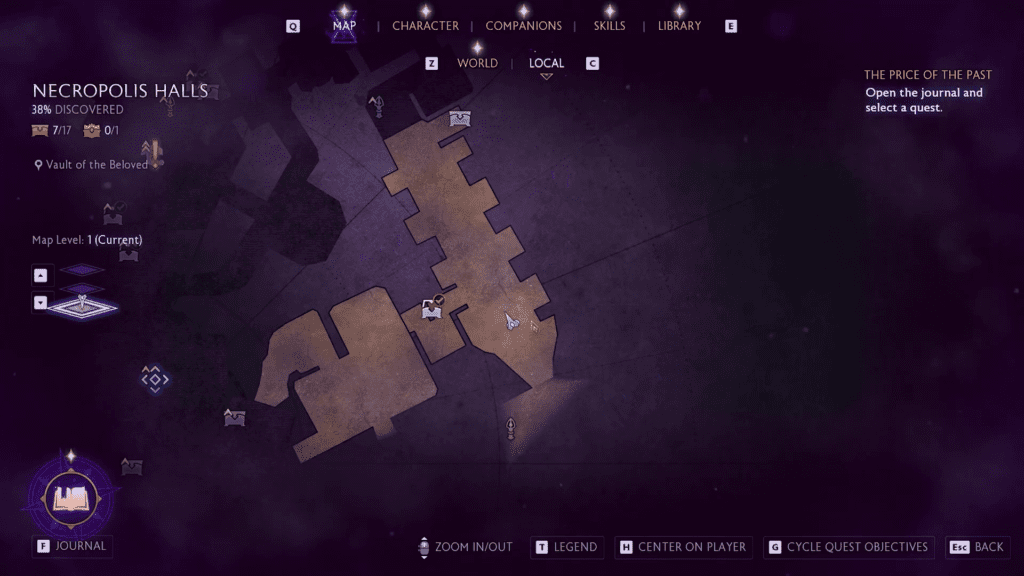
Location: Necropolis Halls, Vault of the Beloved
The Objective: Here we must light 6 candles in the right order to open the treasure chest.
Get to the chest located east of the map. Use the lever to lift the steel barricade. While the chest is on the sight, it is locked. you will get a codex page directing us to the puzzle in the large hallway.
- Now go back to the start of the hallway, light the candle on the right then on the left. Move to another pair of candles in the middle of the hallway.
- Here again, light the candle on the right and then on the left.
- Now make it to the end of the hallway, right next to the treasure box location, here again, light the candle on the right and on the left.
That’s it, now go back to the Treasure Chest room and open it.
Treasure Chest #5: Open the chest to get” Funeral Finery Armor.“
Treasure Chest #6: Now go back to the start of the hallway again, here you will find the grey stone doorway with octagon-shaped glyphs above on the right. Get inside the room to unlock a treasure chest. Open it to get “The Boundless Scholar“.
How To Solve Memorial Gardens Bells Puzzle In Necropolis Halls
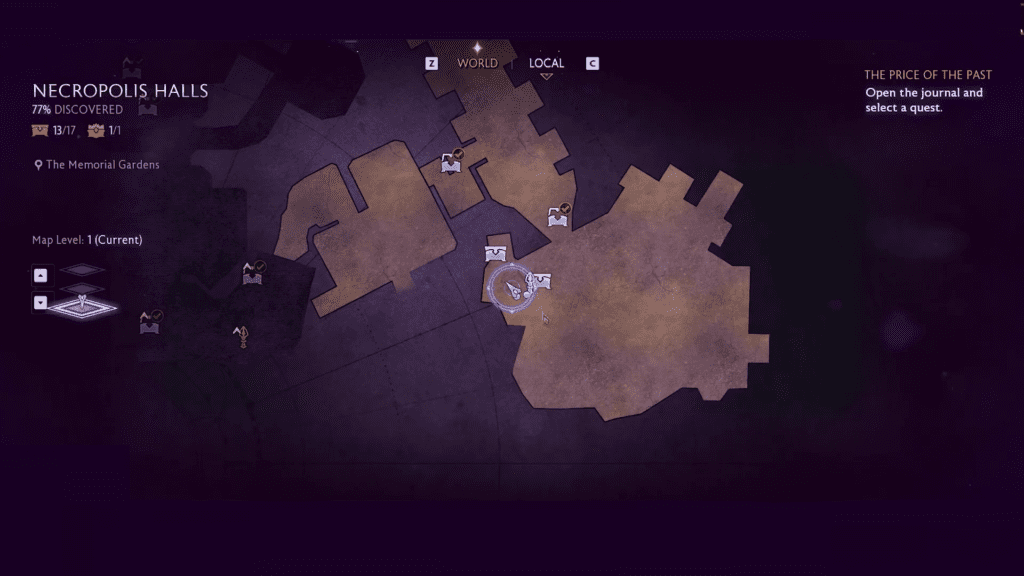
Requirement: Talk to Emmrich to obtain the Walking the Graves quest.
Location: Necropolis Halls, The Memorial Gardens
The Objective: Ring Five bells by using Placate Mischief to open the door with the chest.
- First Bell: Head to the main hall, and use Placate Mischief to put down the fire under the bell to release the light orb. The door next to the first bell is the room that contains our treasure chest.
- Second Bell: Near the 3 graves west of the hall, just turn around from the first bell, pass the tomb on the left, and take the stairs, you will find the second bell behind 3 graves. Again use the Placate Mischief to put down the fire.
- Third Bell: Go down the same stairs but this time turn right, you will find the third bell on the right in between gravestones, surrounded by a small bush of trees. Put out the fire to release the third light orb.
- Fourth Bell: Take the route left of the third bell location, you will find another bell on the left near an open area next to a green fire lamp.
- Fifth Bell: Now move to your right, pass the tree with candles, take the stairs, and you will find the fifth bell on the left next to a green flame lamp. Use the Placate Mischief to open it.
Now head back to the first bell location, the door next to the bell is now open. Head inside to find our treasure chest.
Treasure Chest #7: You will find “Anointed Ash” inside the chest.
Treasure Chest #8: Just a bit south of the first bell location on the map, you will come across an open tomb with a tree on the left. Head inside to find our next treasure box. Here you will obtain “Plumed Platemail.“
How To Solve Cascades Wisp Puzzle In Necropolis Halls
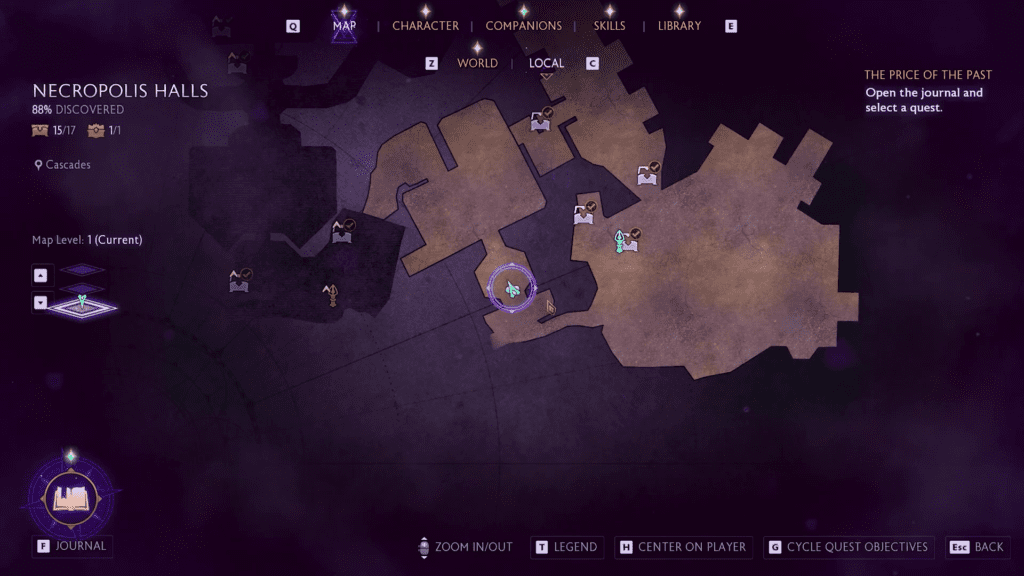
Location: Necropolis Halls, Cascades
The Objective: Guide the light orb to the activator.
Compared to what we saw in other puzzles, this one is simpler.
- Take the route west of the Memorial Garden, it will take you to a new location called Cascades. Here interact with the locked door in the middle of the room by using Placate Mischief.
- The lock will break and a light orb will appear. Turn around, go down the stairs, and then jump off the ledge on the right. Here keep walking straight, and the light orb will automatically placed on the activator next to the door.
This will lift off the door with a treasure chest inside.
Treasure Chest #9: Open the chest to get “Golden Locus.“
How To Solve The Spectral Court Bonfire Puzzle In Necropolis Halls
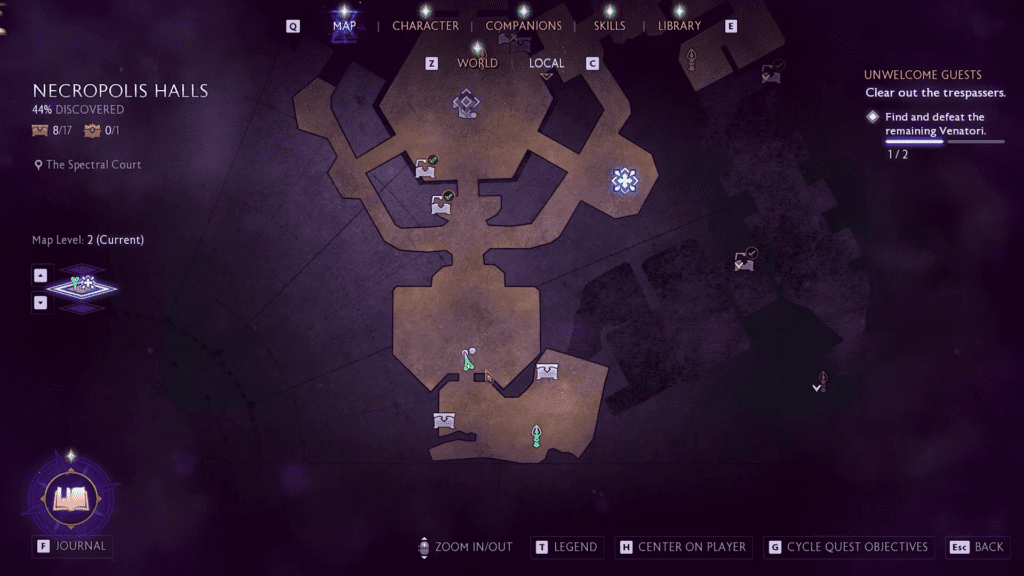
Location: Necropolis Halls, The Spectral Court
The Objective: Here we will have to light up two bonfires on the staircase to open the door for the chest.
Like many other puzzles in this area, a sequence is involved when working with the bonfires here. First, we light up the bonfires on the left to light the last bonfire on the left of the stairs and do the same for the right side.
From the left:
- Use Ignite to light the bonfire in the middle.
- Then use Placate Mischielf on the fire left. The light will spawn out and will move to the corner of the room to point at another bonfire. Where we must use Ignite again to light the bonfire.
- Head up the stairs, and light the bonfire on the left.
Now we focus on doing the same for the right side.
From the Right:
- Then go back to the fire bonfire in the middle, and again use Ignite to light it.
- This time move to the pillar at the right, you will find another bonfire behind the pillar. Use Ignite to light the fire.
- Head up the stairs, and then light the bonfire on the right.
Once both bonfires on the stairs are lit, the light orb will move back to the casket located left of the room (Where we used Placate Mischief earlier). Walk up to the casket, and the lid of the casket will move automatically, revealing the SIlver Spoon memento.
Treasure Chest #10: Now leave the room by taking the exit south of our location, then turn right to activate the alter to open the door with the chest. Open the chest to find “Enchanted Longblade“.
How To Solve Platforming Cascades Puzzle In Necropolis Halls
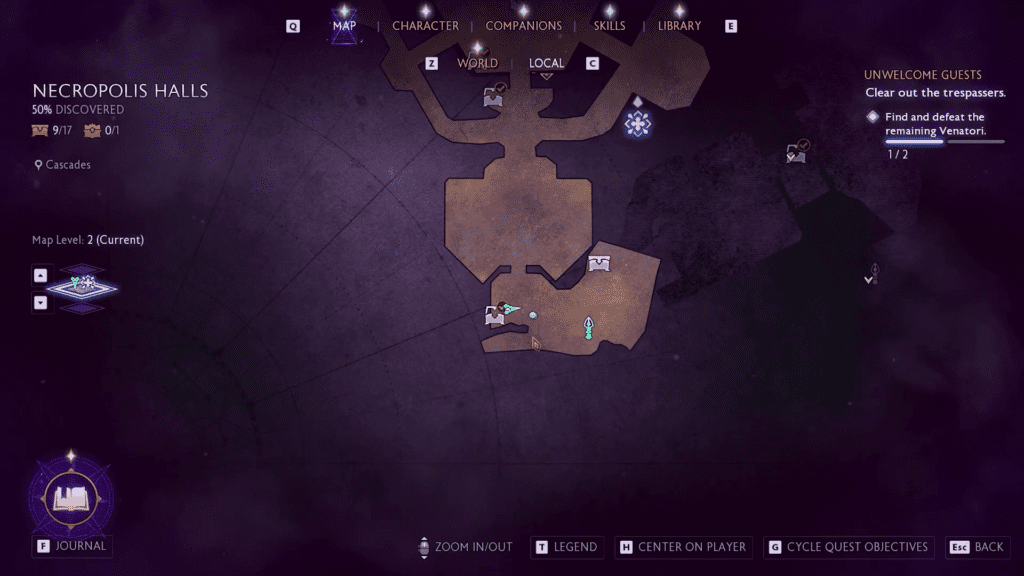
Location: Necropolis Halls, Cascade
The Objective: We just have to make our way to the Treasure location located east of the map.
- Start from the Treasure Chest on the left of the map, go down the stairs, and then immediately turn right. Here use Eternal Hymn on the Resonant Slab on the wall. Jump on the protruded walls, and keep heading straight. at the end, climb on the ledge to your right.
- Keep walking in the same direction, break the wooden barricade you will arrive at the platform with a casket on the left. Activate the ladder upfront in case you fall.
- You will also find a purple orb (Veil Instability) floating in the air, use Spite’s Reach to activate it, it will spawn purple skulls in the air.
- Jump on the platforms, and make your way to the beam protruding on the rocks. Jump on another beam on its right and then slide down to the platform.
Treasure Chest #11: Here we will find the Treasure Chest left of the platform, open it to obtain “Preserved Gurn Hide“
How To Get The Path Of Sighs Chest In Necropolis Halls

Location: Necropolis Halls, The Path of Sighs
The Objective: All we have to do here is to walk to the end of the line.
Reach the Path of Sighs, here take the route on the left, directly the path facing the skull in the middle. Now all you have to do is just keep walking straight, take the stairs and you will eventually make it to Hollow Belfry, Upper region, again keep heading straight.
The Path is very linear, after a long walk, you will eventually reach the end of the route, here you will find the chest on the right near the dead end.
Treasure chest #12: Open the chest right of the cleaning skeleton, and you will obtain “The Dying Wish“
How To Complete Pinnacle Of Its Kind Quest
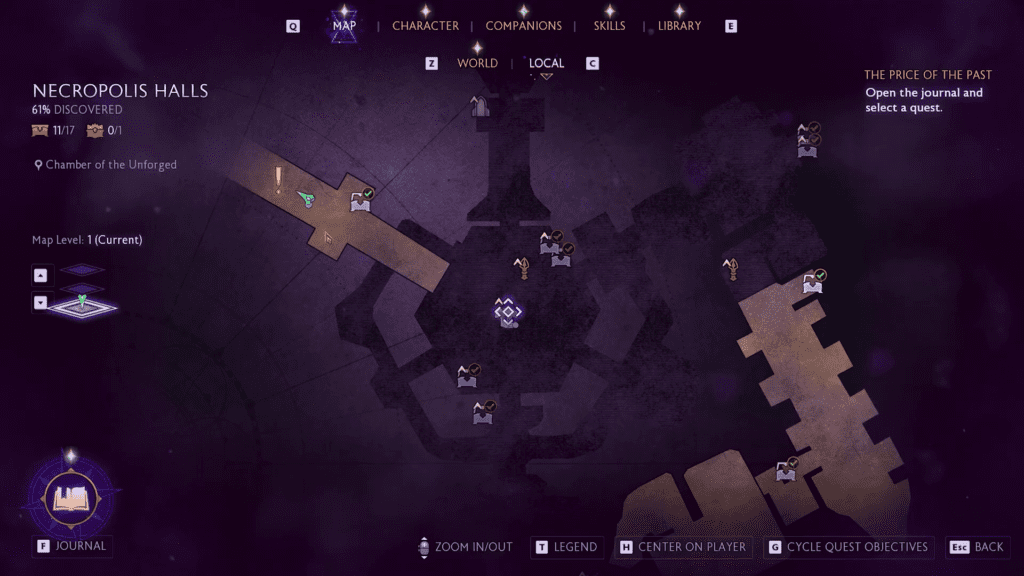
Location: Necropolis Halls, Chamber of the Unforged
Requirement: You will have to have Emmrich on your squad to activate the quest “Pinnacle of its Kind “questline and unlock the Necropolis Area.
Head to the door at the end of the Chamber of Unforged in Necropolis Halls, but the door will have a dark power surrounding it. To unlock the door we must slay three bosses in the game.
The Objective: Hunt down The Formless Ones, three monsters in different locations to finish the quest.
- First Formless One Location: You will find the monster in the south of Hossberg Wetlands, in the region titled Solitude’s Edge.
- Second Formless One Location: Head south of Dock Town, now go to the region titled The Spillway. here you will encounter the second monster on the list.
- Third Formless One Location: Head northwest of Arlathan Forest, you will find him at the end of the Tattered Bridge location.
Once you slayed all the Formless ones, head back to the door in Chamber of Unforged in Necropolis halls, here you will have to fight the Undead Dragon and defeat him to gain many rewards and access to two chests, completing the Pinnacle of its kind quest.
Treasure Chest #13: Open it to get “My Regards Short bow“.
Treasure Chest #14: Open the chest to obtain “Enchanted Longblade.”
Treasure Chest #15: Go down the stairs from Chest #13 and #14, turn left, and you will find another Treasure chest in the room. Open it to obtain “Striking Misfortune“.
Treasure Chest #16: Head to the room directly across the Treasure Chest #15, where we will find our 16 chests in Necropolis Halls, open it to find “Pillar of the Departed”. Unlike other items, it’s a unique item, we have a guide to help you hunt down other unique items in the game.
How To Get The Lost Watcher’s Ring Chest
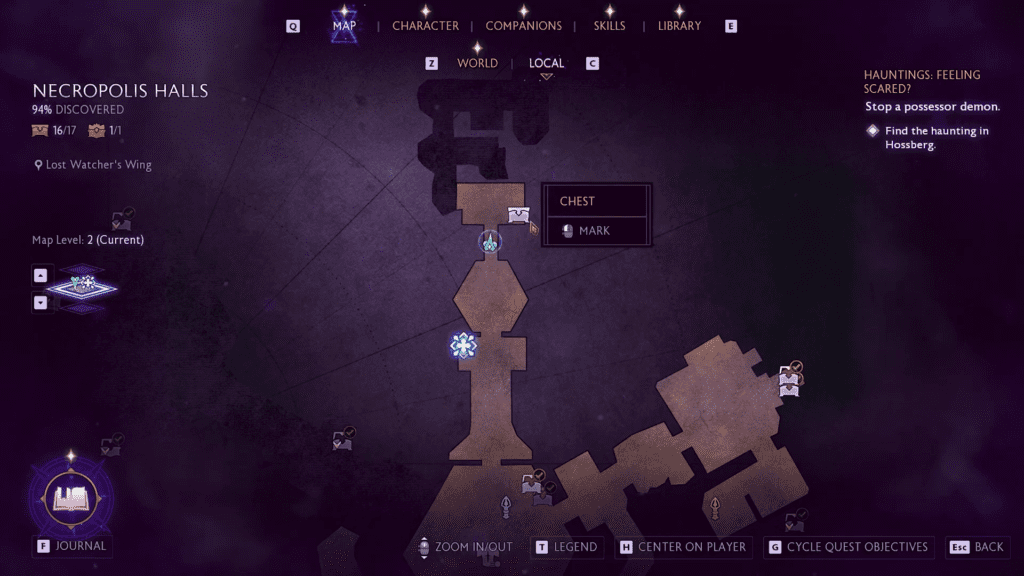
Location: Necropolis Halls, Lost Watcher’s Ring
The Objective: You must complete the Hauntings: Restless Dream, Hauntings: From Beyond, and Hauntings: Shadow of Fortune quests. Then you can access The Lost Watcher’s Ring area, here you will find the chest on the right.
Talk to Myrna and Vorgoth in Necropolis Hall to start our Haunting questline. Each of these questlines has us defeating monsters all around the map.
- Hauntings: Restless Dream: Head to Ruins Reach in Arlathan Forest, and defeat the spirit Nocturnix.
- Hauntings: From Beyond: head to the massive pillar in the center of Lost Watcher’s Ring, and defeat the monster The Lost Explorer.
- Hauntings: Shadow of Fortune: Now we have to go to Elvhenan’s Haven in Crossroads and take out The Skeleton Crew.
Treasure Chest #17: Open the last chest in the Necropolis Halls to obtain “Strong Arm “medium armor.
And with that, you are all done discovering and solving Necropolis Halls Chests puzzles in Dragon Age: The Veilguard!


