


Like most high end businesses, you must hire employees to help take the load off your back and complete errands. As you rise up the ranks in Schedule I, things will start getting tougher as you try to keep up with the demands. Luckily, there are a handful of employees for hire, and each of them offer unique services that you can utilize to run your establishment successfully. This guide will cover everything there is to know about hiring and managing employees in Schedule I.
How To Get Employees In Schedule I

The location that you need to go to get employees in Schedule I is just opposite Taco Ticklers and beside the Piss Hut. There is a flight of stairs heading down, just follow it to find a doorway. This door unlocks anytime past 6 PM, so come by in the evening to gain access. Once inside, you will spot several vendors who are ready to deal weapons, equipment, and workers. You should look around to find an NPC called Manny, who resides on the top floor. Take the stairs near the entrance to find his room and talk to him.
While talking to him, pick the option to hire employees, which will bring up all the employee options available. Currently, there are 4 workers for hire, and you can select the ones according to your needs. Next, you need to assign the location where they will work, and you can pick between Barn, Bungalow, Docks Warehouse, and Sweatshop, depending on what you have unlocked. There is a limit to how many employees can work in a selected location, so keep an eye on that.
Once everything has been decided, Manny will give you the rundown of the signing fee and the employee’s daily wages. Agree to the terms to hire your new employee.
Note: The vendors here only deal in cash, so even if you have reached your credit limit, you can still purchase items without being tracked.
Employee Types and Job Description Explained
Before you make a choice about the type of employee you require for a location, you need to know what skills they bring to the table. Below is the detailed explanation of all employees available and what they do in Schedule I.
Cleaner
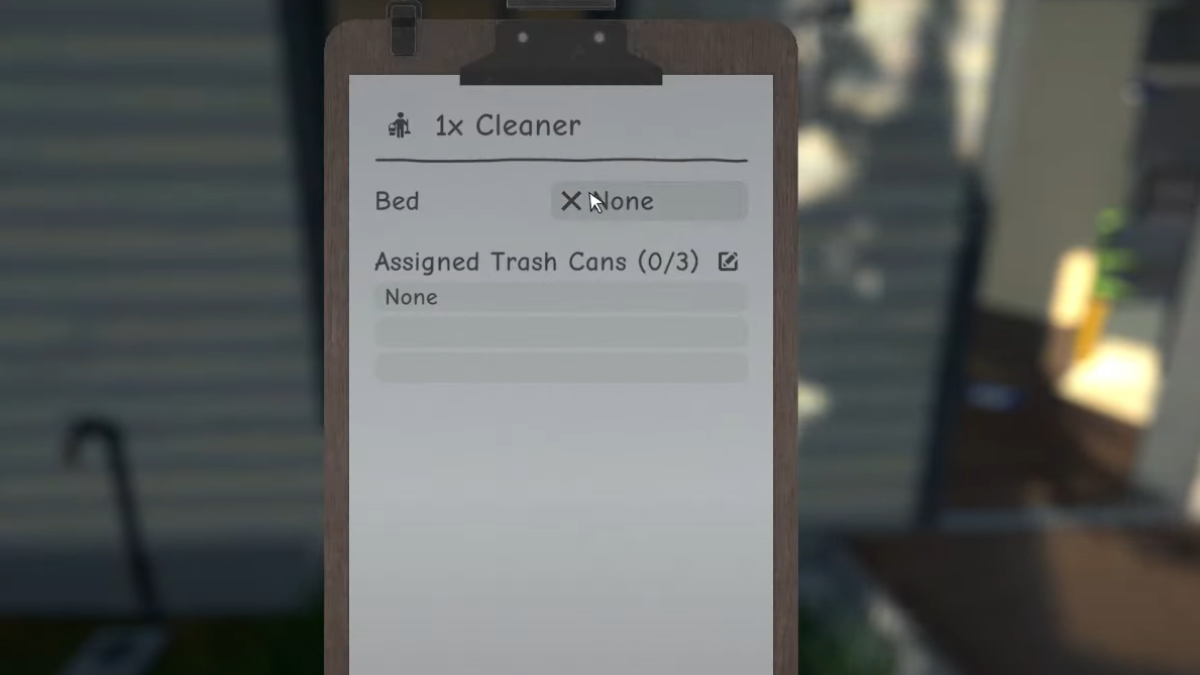
You can assign a cleaner to take out the trash and clean up after your shift. They empty trash cans if you have trash bins assigned to them via the Clipboard. Each cleaner can be assigned 3 trash cans, as long as you have these bins situated around your workstation. To assign a trash bin to a cleaner, click on the pencil in the box icon in the Clipboard, then hover your cursor over the bin and select it. Your cleaner will now empty out the trash can that was assigned to them, and you can change it anytime through this method.
- Signing Fee: $1000
- Daily Wage: $100
Chemist
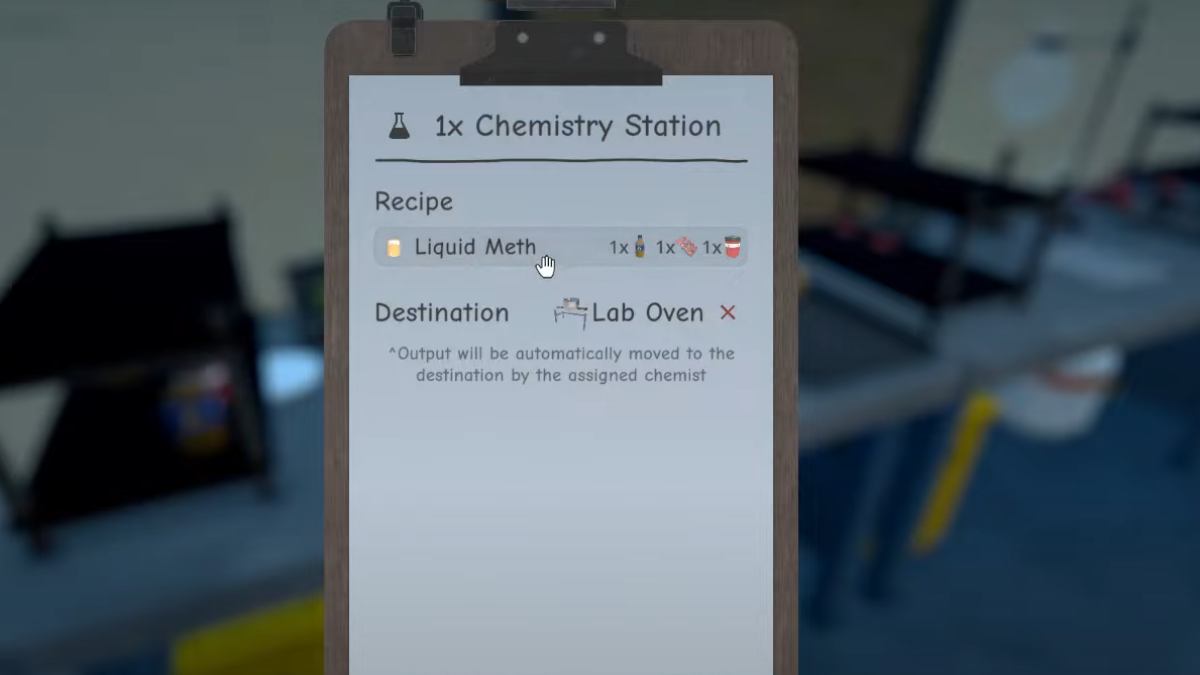
Hiring a Chemist will take care of all your production needs. You can assign three workstations to one Chemist if you want them to manage it all. This can be assigned through the Clipboard by clicking on the pencil icon, then selecting the workstation that requires assistance. Also, while assigning a workbench like the Chemistry Station, you need to select the recipe that the Chemist needs to work on. You can also set the destination on where the Chemist needs to place their final product, or omit this option entirely if you want to take care of it yourself.
- Signing Fee: $2000
- Daily Wage: $300
Botanist

You need to assign a shelf filled with soil and seeds for the Botanist to work with. This shelf can be assigned under the Supplies section of the Clipboard. Next, you have to give the Botanist 8 Pots or Drying Racks to work with, then head over to any of your planting pots or racks and select the ones that require extra help to assign them through the Clipboard. While working with pots, you can assign seeds and additives by selecting a pot and going through the options. The destination can also be set here, so the Botanist will place the finished product at the required location.
- Signing Fee: $1500
- Daily Wage: $200
Handler

A Handler will take care of the packaging of your supplies. Assign a Handler to three of your packaging stations, then set a destination where they will place the finished product. It can be from the packaging station to the distribution rack, or from the supplies rack to the packaging station, and then follow that with the distribution rack. Technically, you need to guide the Handler to pick up the product and package it, then set it aside in a location where you can pick it up for distribution.
- Signing Fee: $1500
- Daily Wage: $200
Each employee in Schedule I will require a bed at the location assigned to them, so place a bed and assign it through the Clipboard. At the base of each bed is a suitcase where you can place their fee amount, depending on how many days you want them to work. So, for a 10-day job for the Cleaner, you need to pay a total of $1,000 and place it inside the suitcase.
To fire employees, you can select an employee and press E, or select the Services are No Longer Required option from the chat box. If you find your employees not working, you might have to check their clipboard to see whether their assigned tasks are still applicable, or change them to a different station.
Before you get employees, of course, you may also want to first own a business in Schedule I. Check our guide here on how to go about doing exactly that- for free.