


Before leaving the Ice Belt region in Metroid Prime 4: Beyond, it’s worth taking the time to explore every section of the map thoroughly. I often found myself backtracking for Energy Tanks, Missiles, and Shot Expansions simply because I was too focused on progressing the main story.
Deeper exploration into each corner of the region made me realize just how many collectibles I had missed. I had to rethink my route and find smarter ways to reach the trickier spots in the game with the abilities I owned.
Using the experience I gathered along the way, I have compiled the following guide to help you track down all 17 collectibles in the Ice Belt region too.
All Missile Expansions, Shot Expansions, & Energy Tank Locations in Ice Belt – Metroid Prime 4
Before you begin, you should take the time to follow the main story and unlock suit abilities like the Psychic Lasso and Psychic Boost Ball within the Ice Belt region.
This will make it easier to reach sections of the map that you would have otherwise missed. Let’s get down to locating each of the 17 collectibles within the region below.
Missile Expansion #1 Location

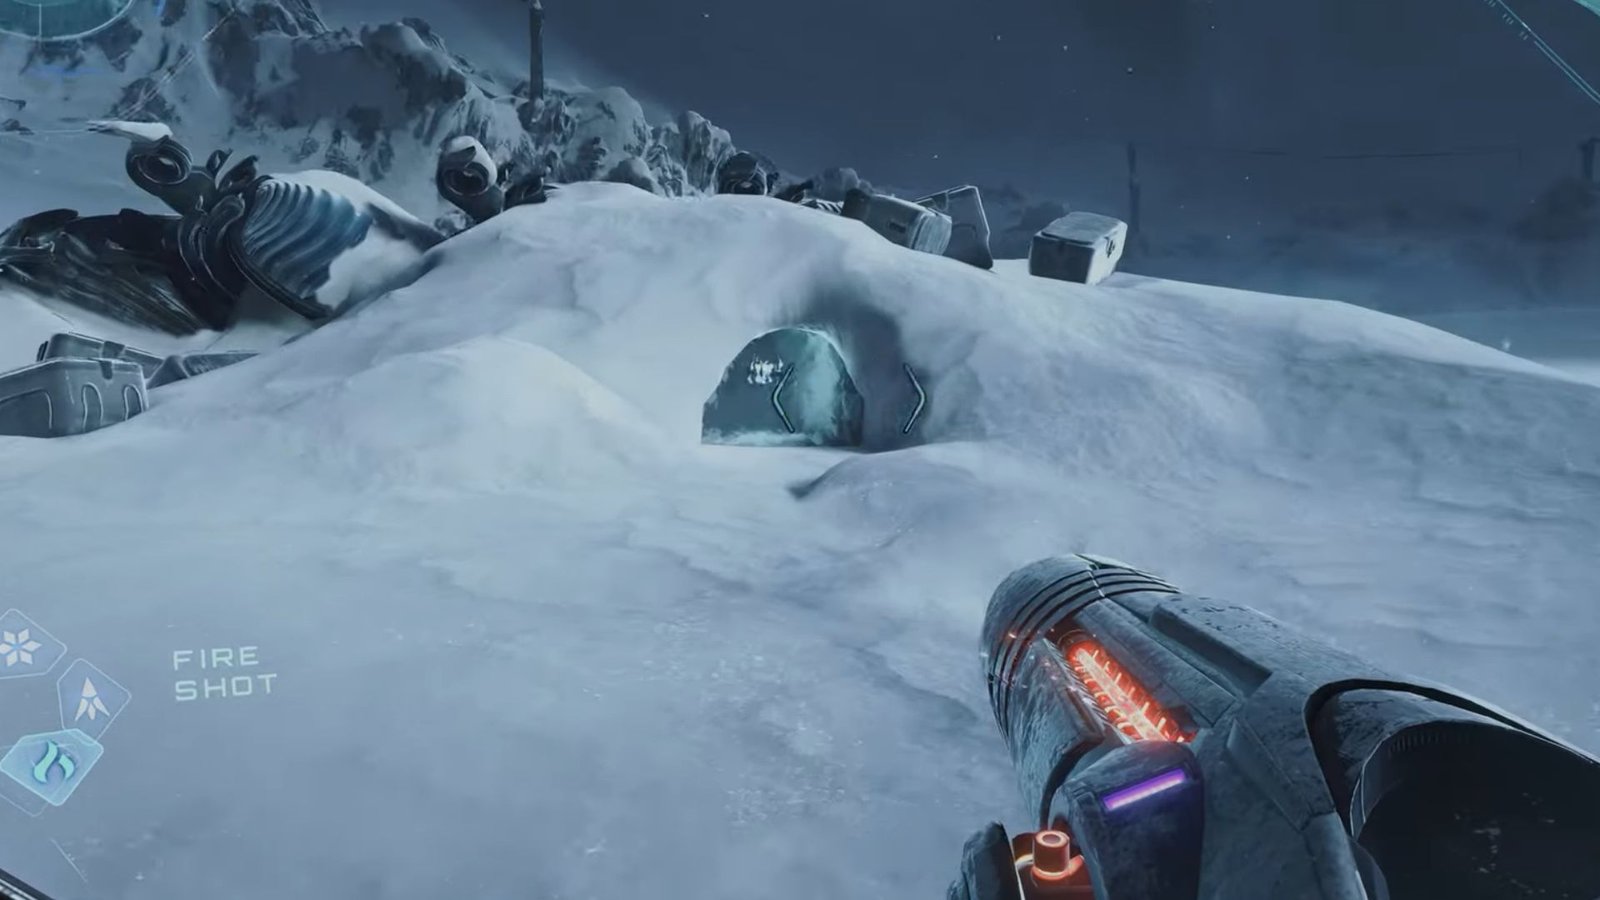
Once you exit Sky Shuttle, you will land in the Loading Crane area of the Ice Belt. On your left will be a Save Room, and if you go right, you will spot some breakable boxes. Right behind it is a bomb slot. Utilize the bomb slot to unlock the gate beside the crates and get the first Missile Expansion of the area.
Shot Expansion #1 Location
Leave the Loading Crane area for Snowfield Accessway. In the Snow Wolves area, find a Scout Bot and delivery truck wreckage. The Shot Expansion is under the wreckage, covered in ice. Use Fire Shot to melt the ice, then turn into a ball to collect it.
Shot Expansion #2 Location
After getting the Lasso Power Suit Upgrade, unlock two morph ball tracks in Equipment Storage by yanking them down. Follow the tracks to reach the second Shot Expansion.
Missile Expansion #2 Location
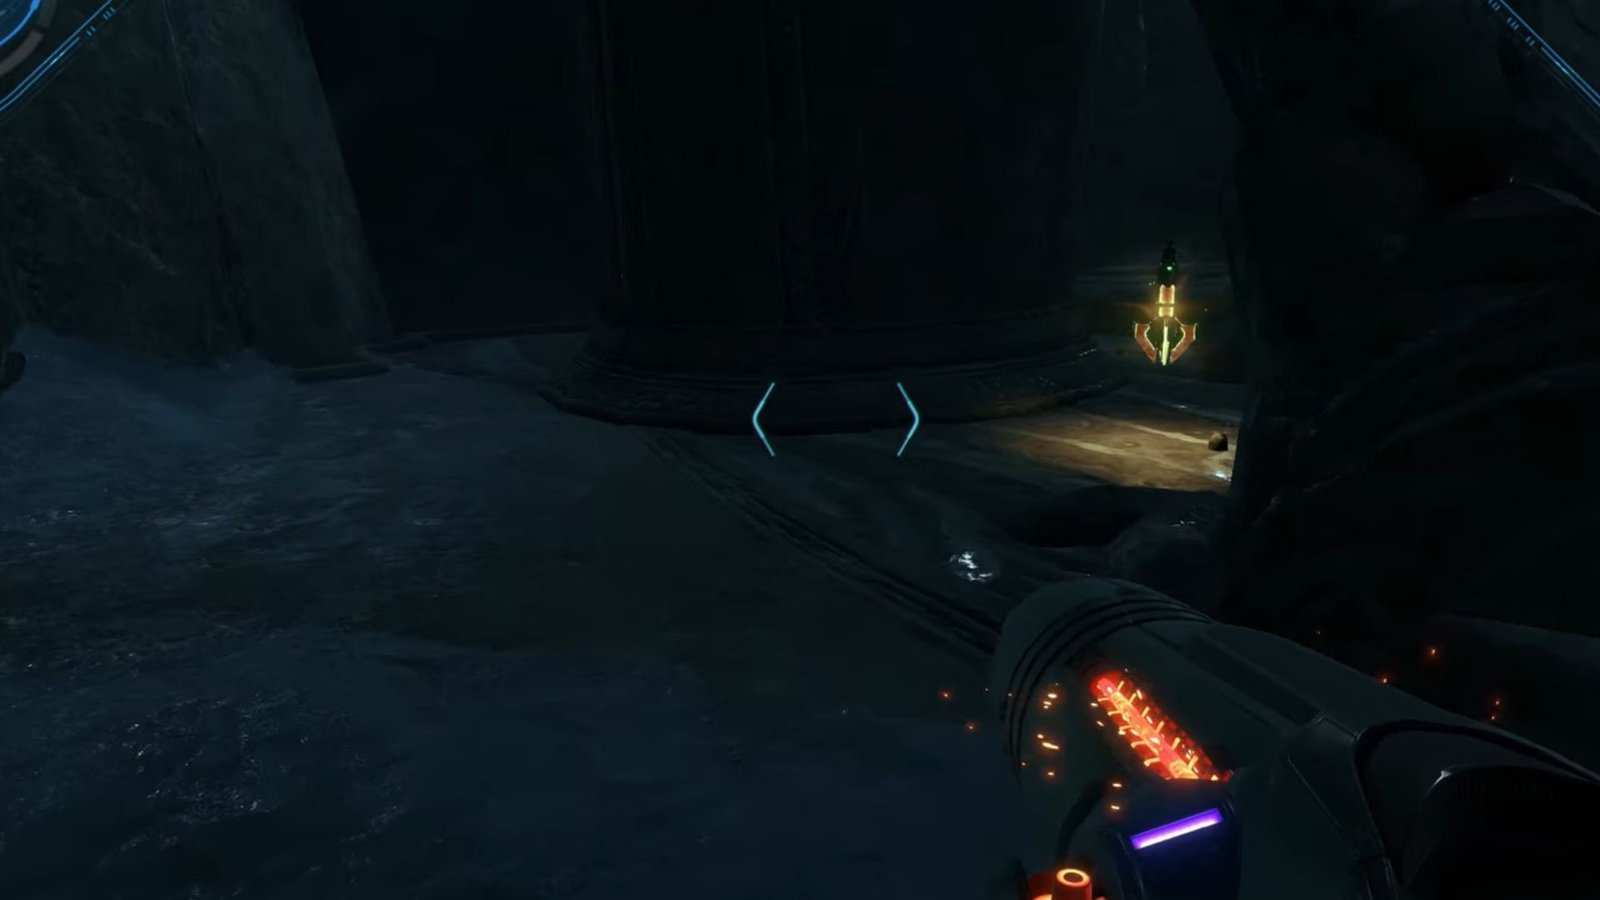
Once you reach the Ancient Temple after crossing the Cliffside, you will find the second Missile Expansion in front of the statue, between two boulders.
Missile Expansion #3 Location

Take the elevator in the Lobby and head down to the elevator Landing in Quarantine. Use Thunder Shot on the slot to your right and defeat the Snow Roaches coming your way. Inside the room is the third Missile Expansion for the area.
Shot Expansion #3 Location
Once you hit the Security Gates past the Elevator Landing, keep an eye on the ice covering an entrance on your right.
You will find it just past the crushed vehicle. Use the Missile Launcher or Fire Shot to break the ice, get into ball morph, then go through the entrance to collect the third Shot Expansion.
Missile Expansion #4 Location

After reaching the Bio-Labs, head towards the Lobby Conduit. Use the ball morph and go through the tunnel on the left.
You will soon reach a puzzle area. Use the psychic grapple ability to propel yourself upwards and plant a bomb in front of the two red balls on either side. This will reveal the fourth Missile Expansion.
Shot Expansion #4 Location

In Tracking Operations within Bio-Lab, look up to find tunnel fixtures near the roof. Use the scan feature at the POIs, then use the lasso tool to pull them down. The tunnel entrance is right behind you, use it to get up to the Shot Expansion.
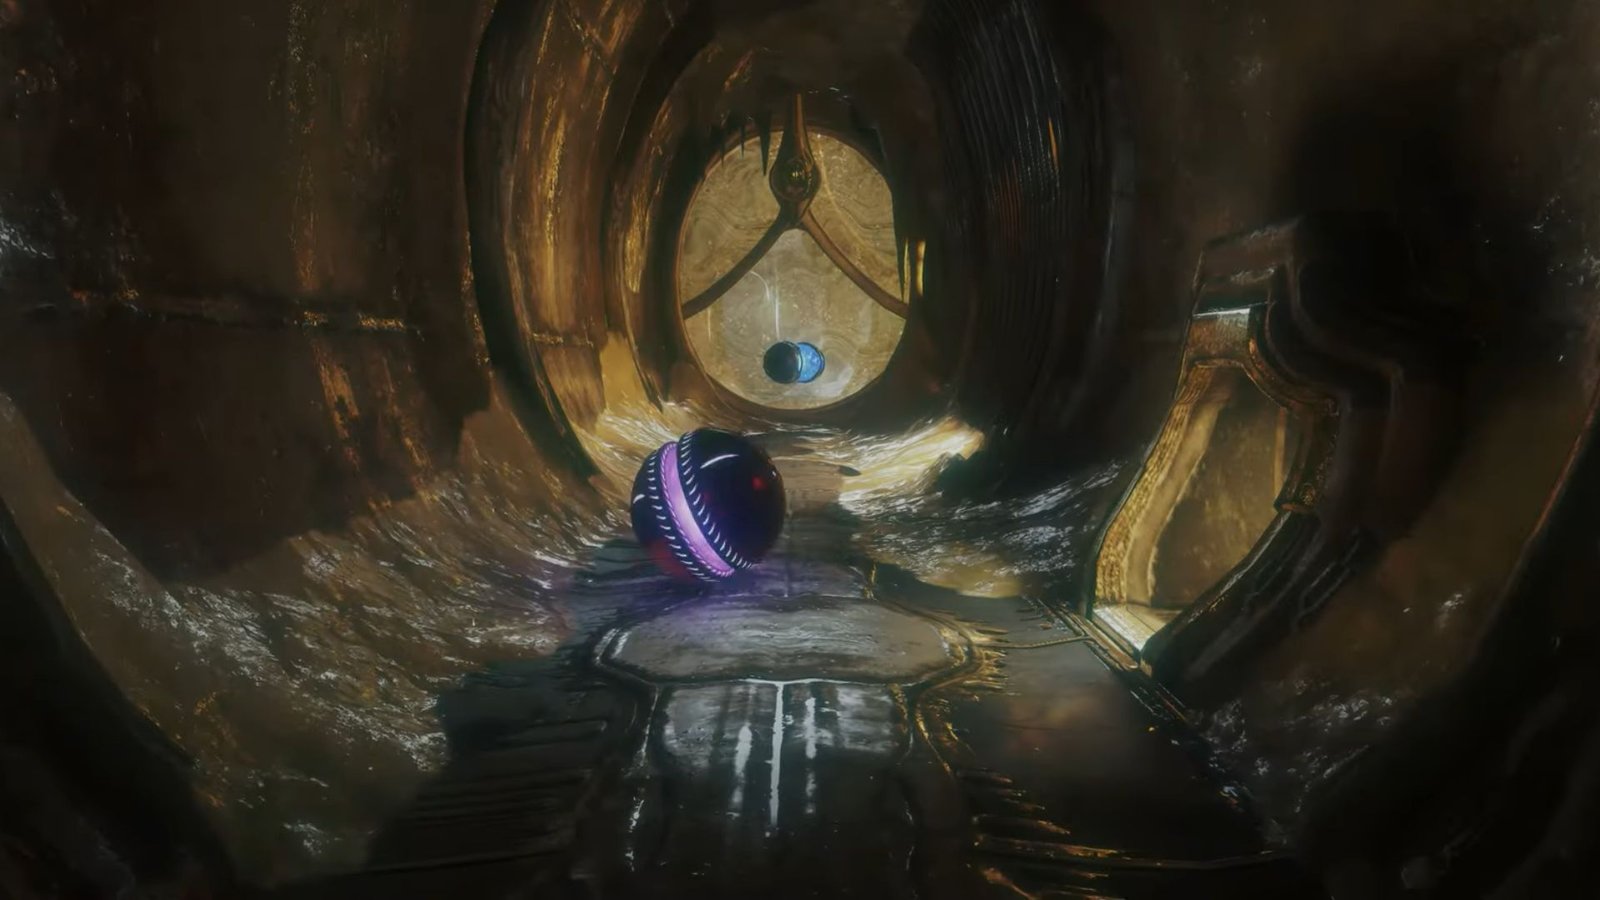
Missile Expansion #5 Location

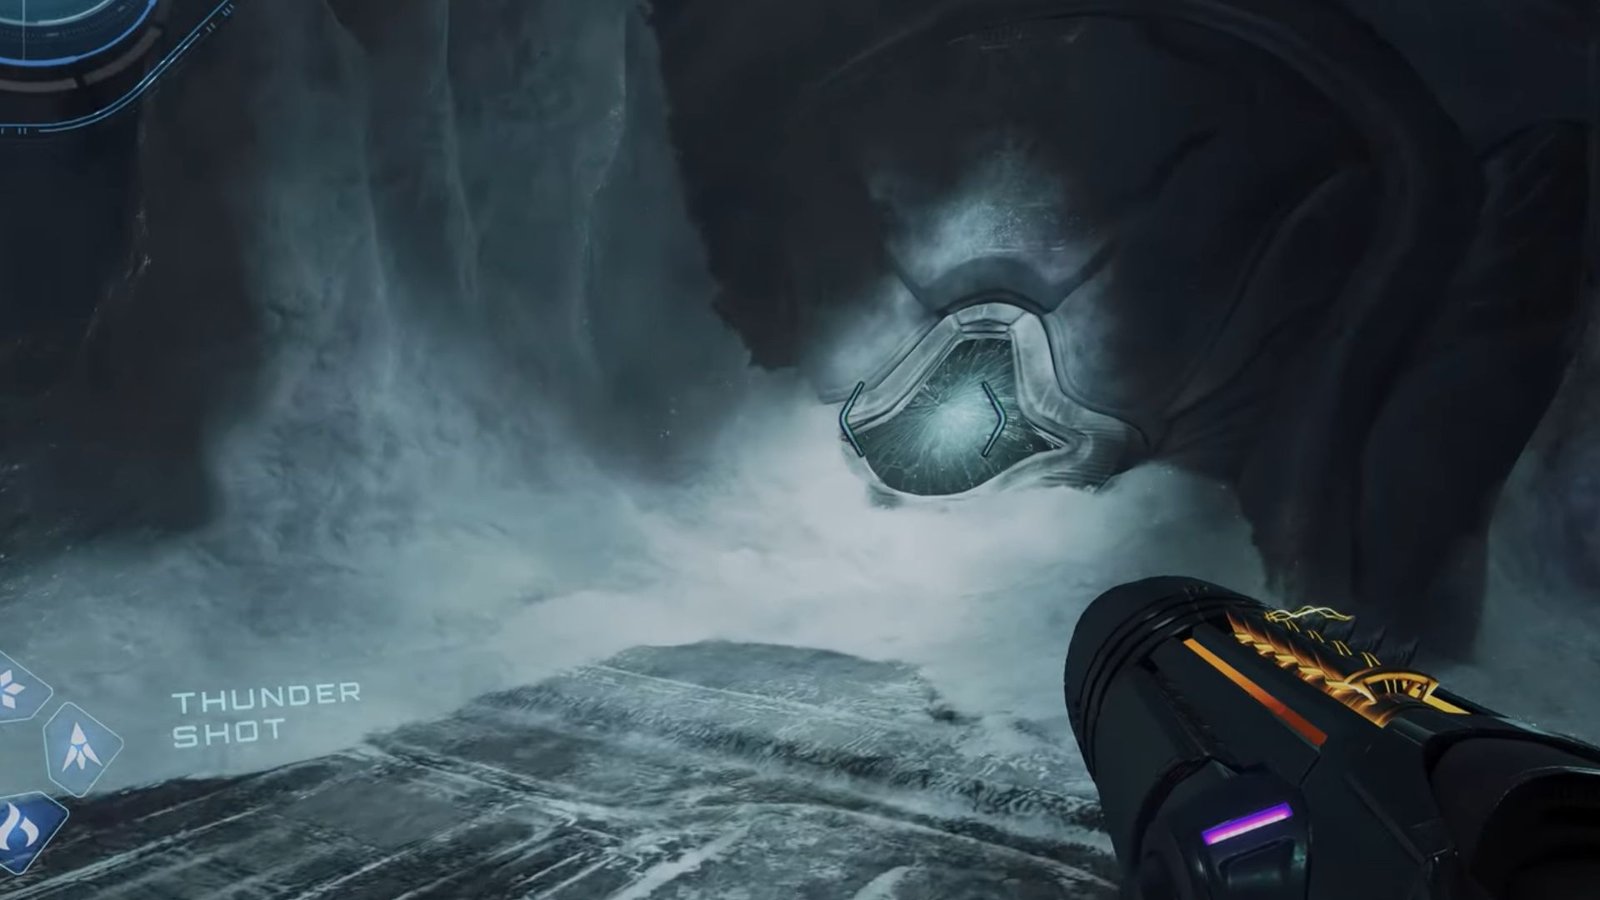
Head into the Bio Labs Access area, morph into a ball, then enter the narrow cave entrance. Melt the ice to get the fifth Missile Expansion.
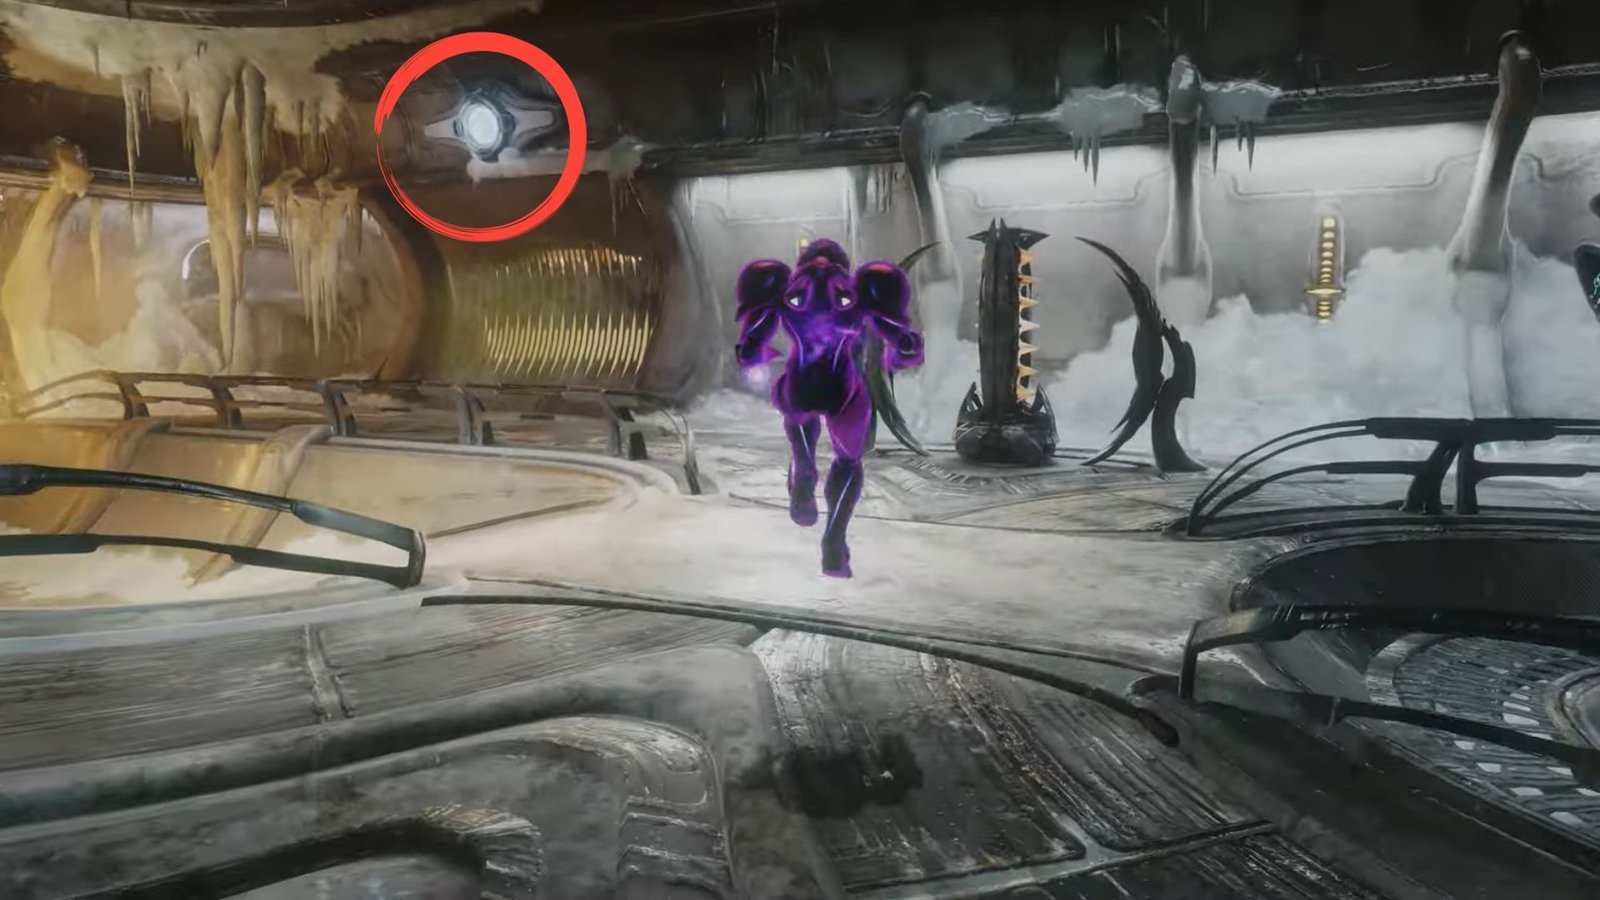
Energy Tank #1 Location

Make your way down to the Ice Canyon in Medical Bays. Scan the purple blips floating nearby to reveal psychic grapple points. Use the grapple tool to propel yourself towards the small island. Pick up the first Energy Tank of the region here.
Missile Expansion #6 Location

Within the Medical Bays Staging Corridor, after defeating the Griever, enter the open doorway nearby. You will find a morph ball tunnel, so turn into one and break open the gate using a bomb to gain access.
You have to use another bomb towards the end of the tunnel to break open the second gate and get the sixth Missile Expansion.
Missile Expansion #7 Location
Keep going down the Medical Bays to find the Storage Bay. Jump across the railings to get below the Storage Bay area.
You will find a morph ball tunnel, go through it, then use the rail tracks around the pillar to get to the Missile Expansion. Use bombs to propel yourself up and grab the expansion.
Shot Expansion #5 Location
Don’t leave the Storage Bay just yet. You will spot a tunnel right after entering the bay. Use the ball morph to get into it, then navigate the platforms to get to the other side.
Once you use the rail tracks leading up, use the boost ball skill to bypass the electric charge. Use the bomb to break the casing over the Shot Expansion to get it.
Missile Expansion #8 Location

Go past the Storage Bay into the Surgery Corridor. Use Fire Shot on the opening nearby to melt the ice and head inside.
Unlock the tunnel door inside the room using the lasso, go through it, then use the bomb to break the gate blocking your way towards the eighth Missile Expansion.
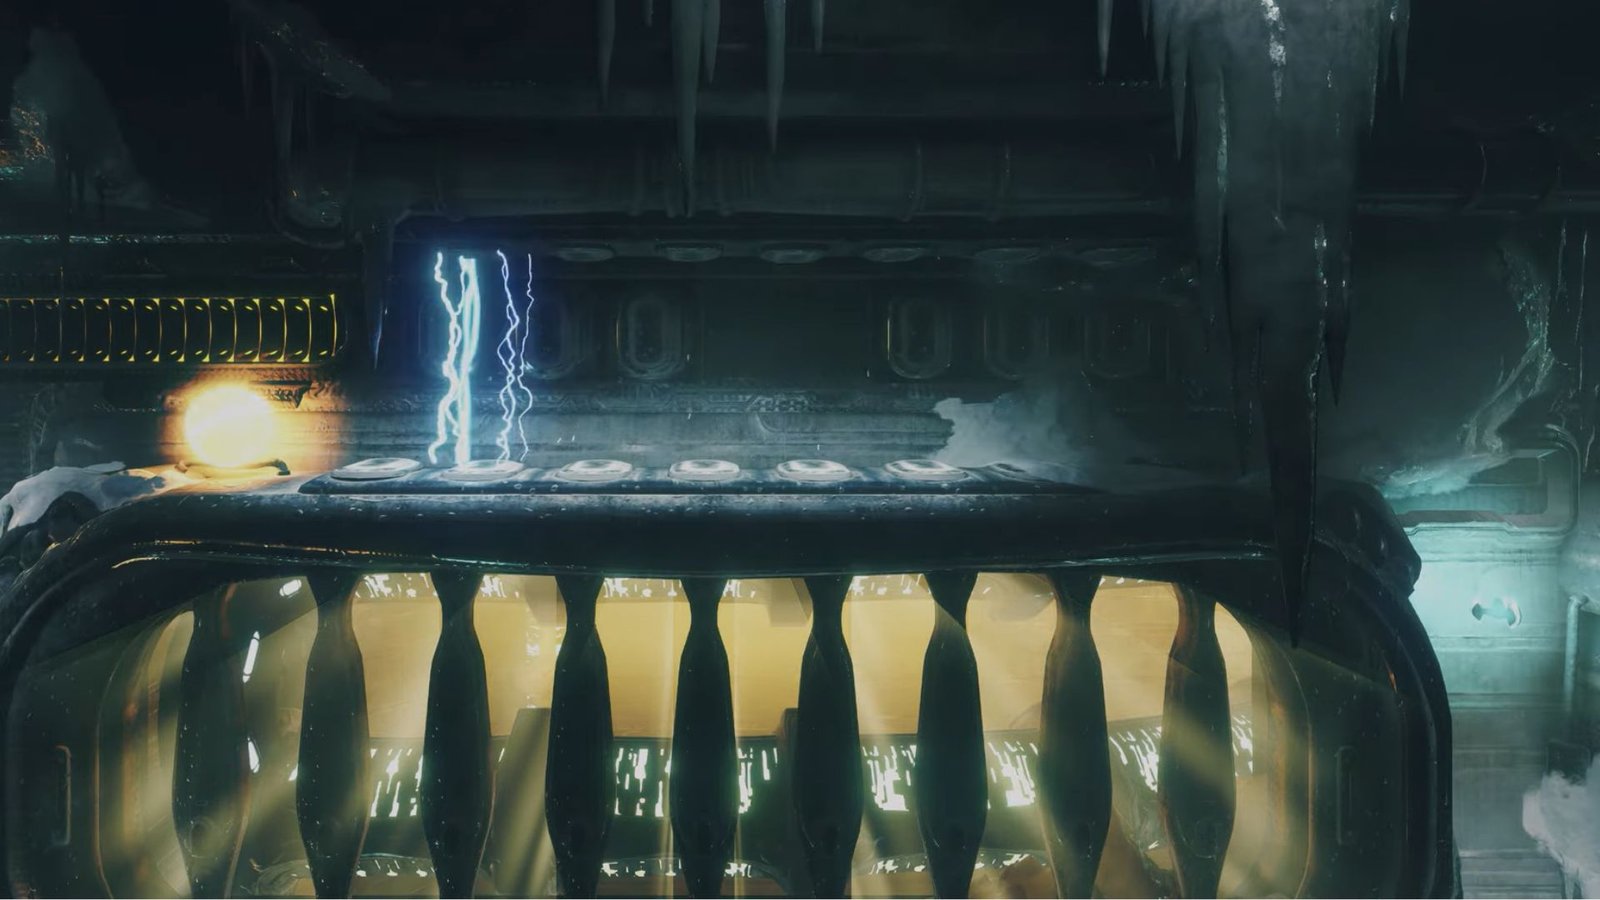
Shot Expansion #6 Location
For this one, you need to head to the Lower Airlock in the Power Station. To your right, you will spot a large gate. On top of the gate is a bomb slot, so toss a bomb into it using your psychic ability. Enter it and unlock the cryo-pod to your immediate left to get the Shot Expansion.
Energy Tank #2 Location
You now need to enter the Power Generator of the Power Station, then jump to the extreme lower levels of the station, below the spinning blade. You will find a morph ball tunnel; go through it to get the second Energy Tank.
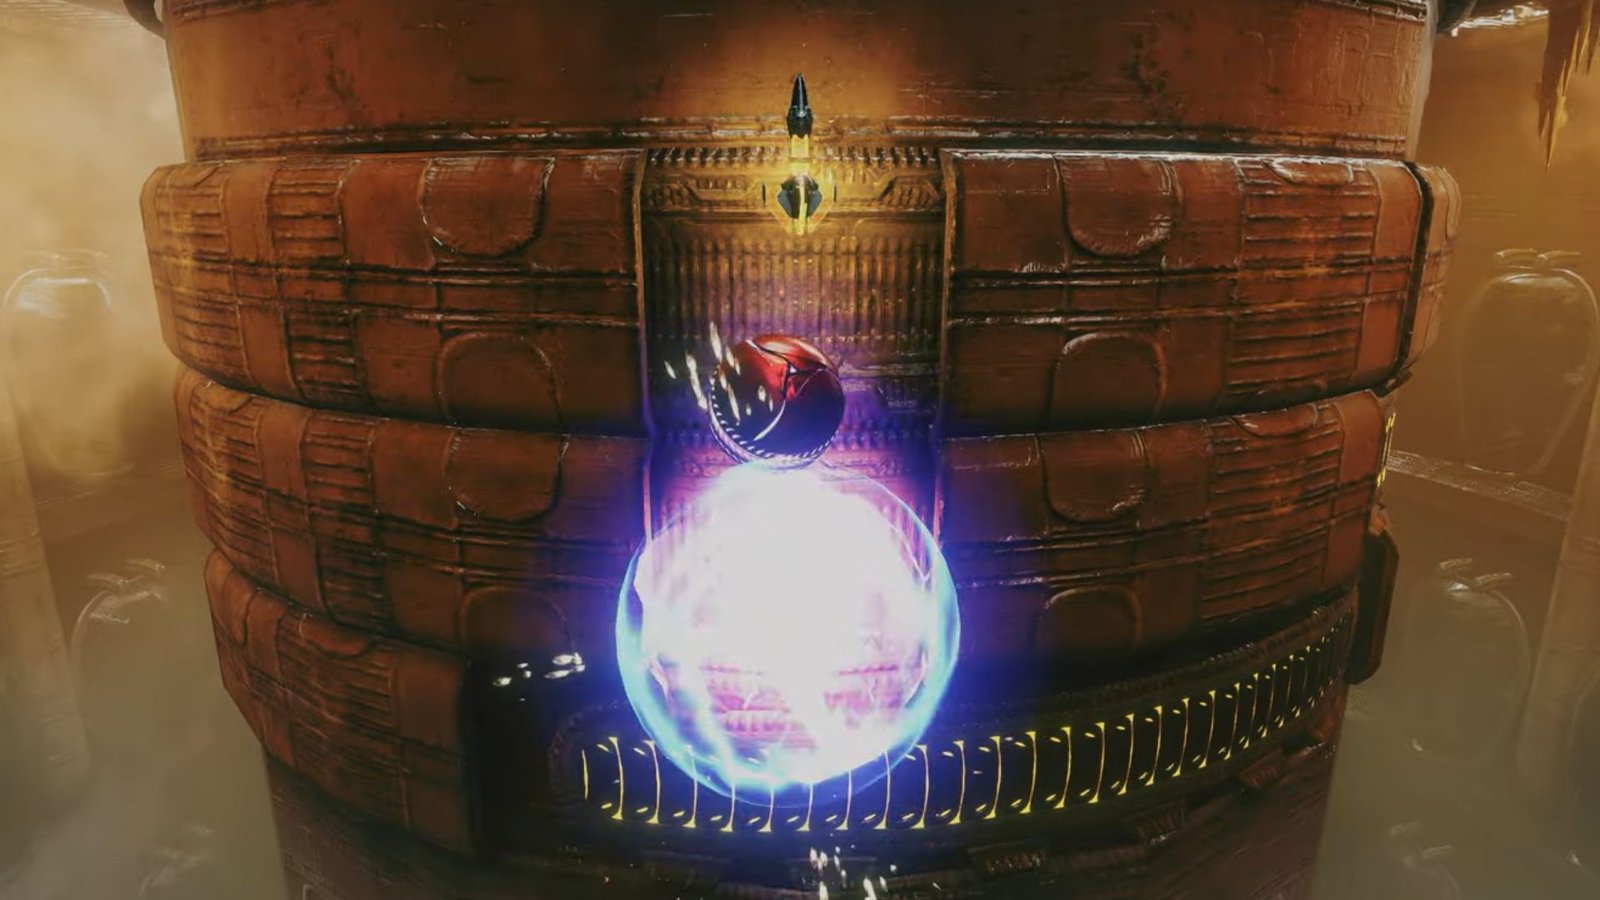
Large Shot Expansion #1 Location
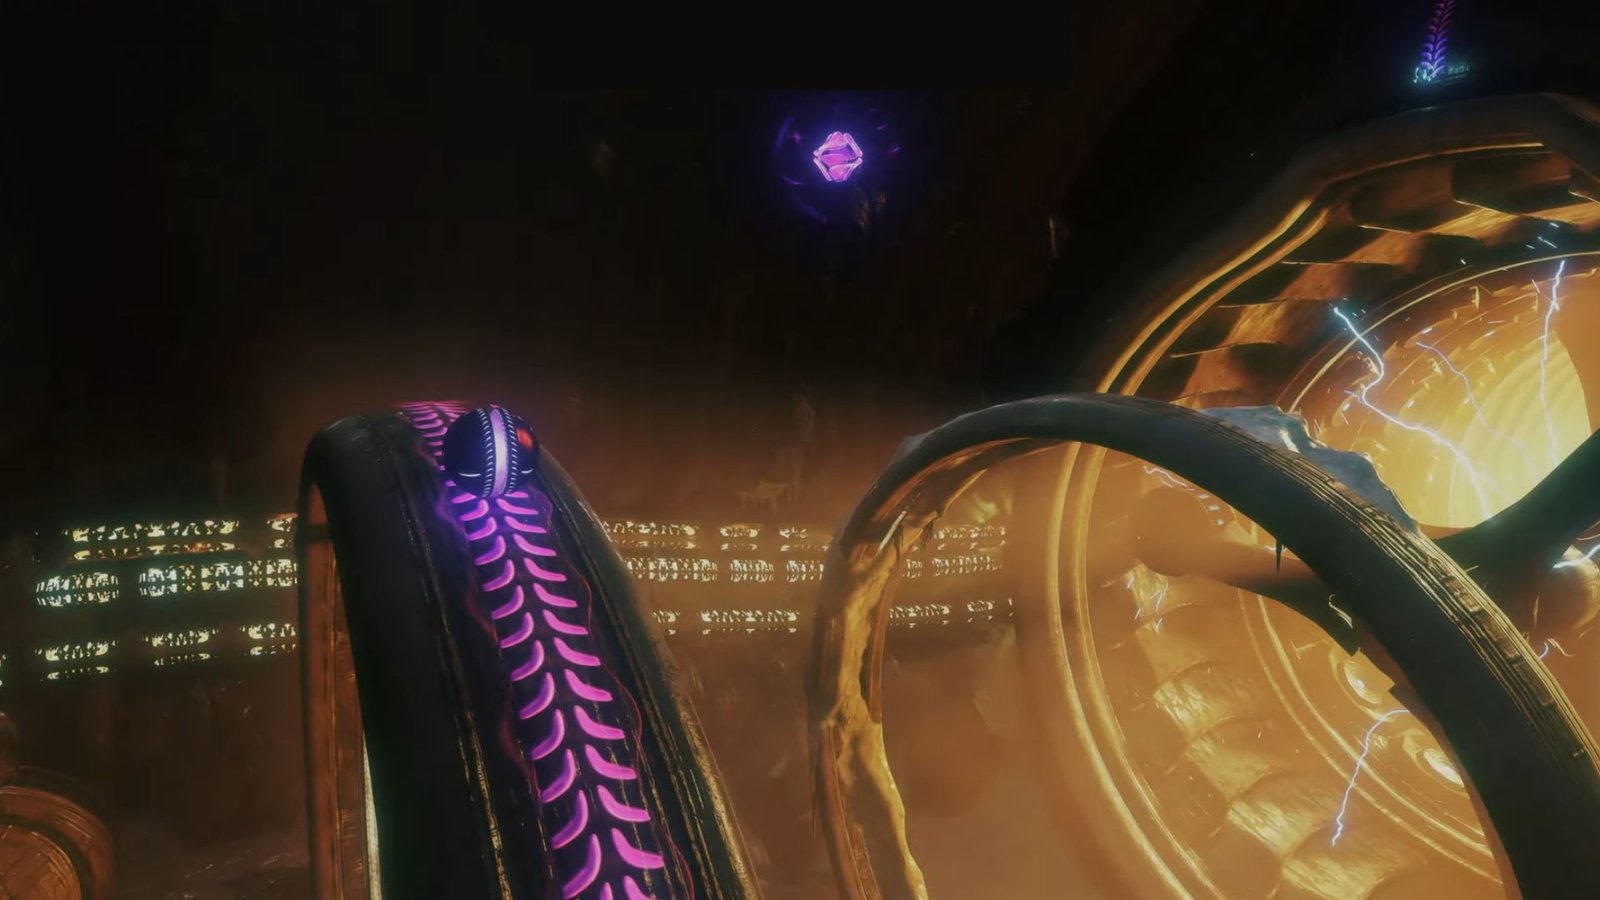
Head back to the Power Generator and look around for rail tracks that will take you to the top of the room. It’s right opposite the spinning blade. Head up the rail, then use the boost jump skill to jump up towards the purple orb.
Latch on using the grapple tool, then continue to jump up until you reach the rail tracks above. At the end of the track, you get to pick up the Large Shot Expansion.
After obtaining all of the above collectibles, you are well on your way in expanding the ammo capacity for your Missile Launcher and Elemental Shots in Metroid Prime 4: Beyond.
Add in a few Energy Tanks to increase Samus Aran’s max HP, and you get to continue your adventure and uncover more collectibles within the later sections of the game.